Some of the links on this site are affiliate links. I make a small commission from sales when you click through the link. There is no additional cost to you.
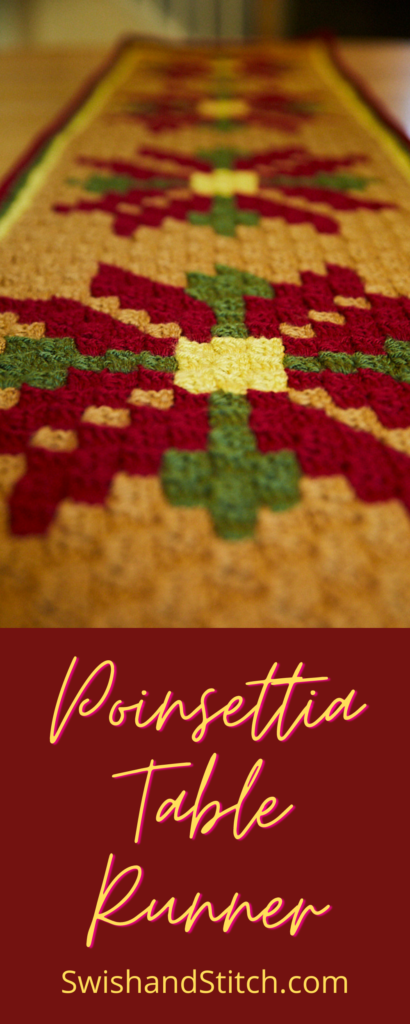
Crochet Poinsettias Table Runner For Christmas Decorating
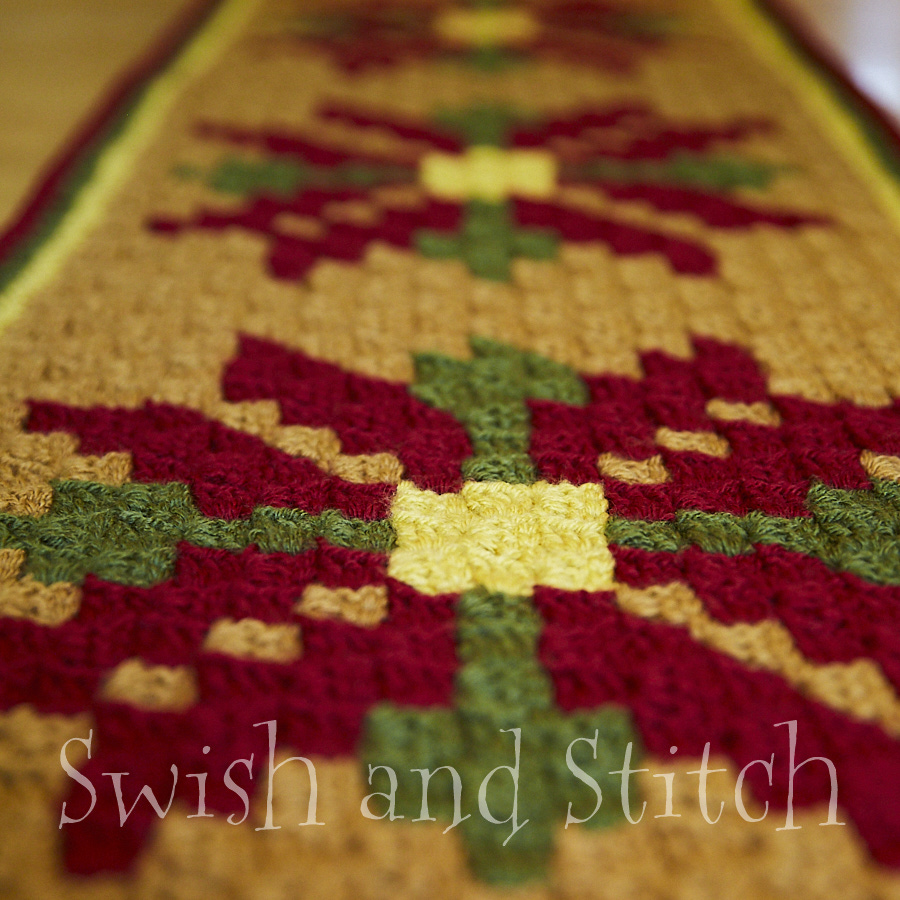
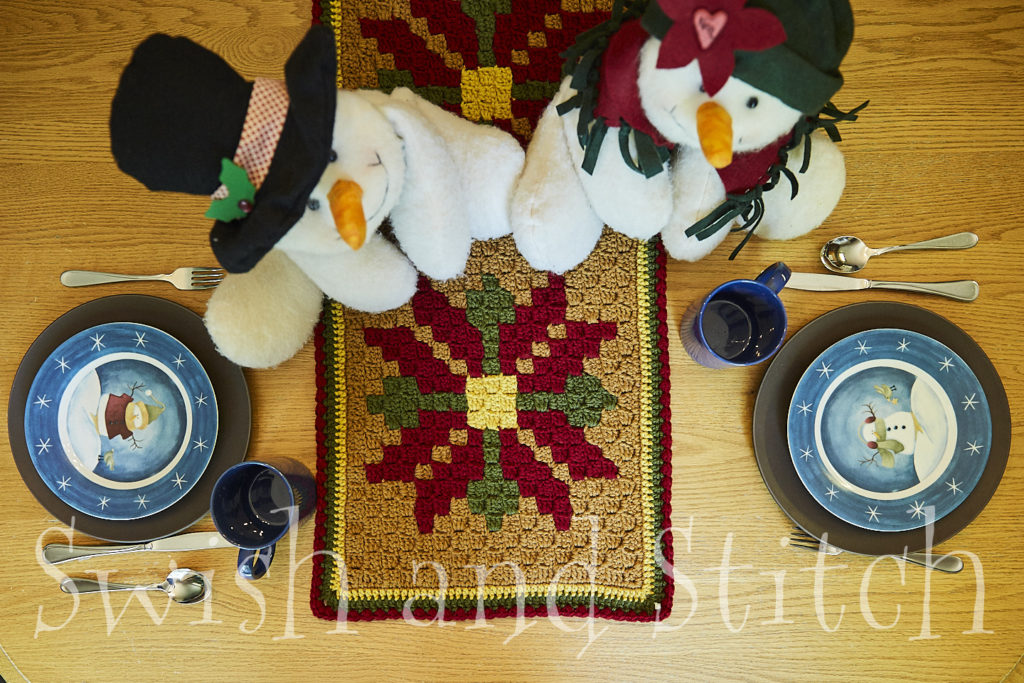
The Christmas Poinsettias C2C Crochet Table Runner is made from the Poinsettias Panel from the Christmas Cabin C2C Crochet Afghan. It features four beautiful poinsettias. I crocheted it up and added three border rows and I love the way it turned out! It is the perfect size and looks great with other Christmas accessories.
Dimensions: 15 inches x 57 inches
Visit Swish and Stitch Crafts on Etsy for the full ad-free Christmas Cabin C2C Crochet Afghan Pattern!

The printable PDF includes:
- Christmas Cabin C2C Crochet Afghan Instructions
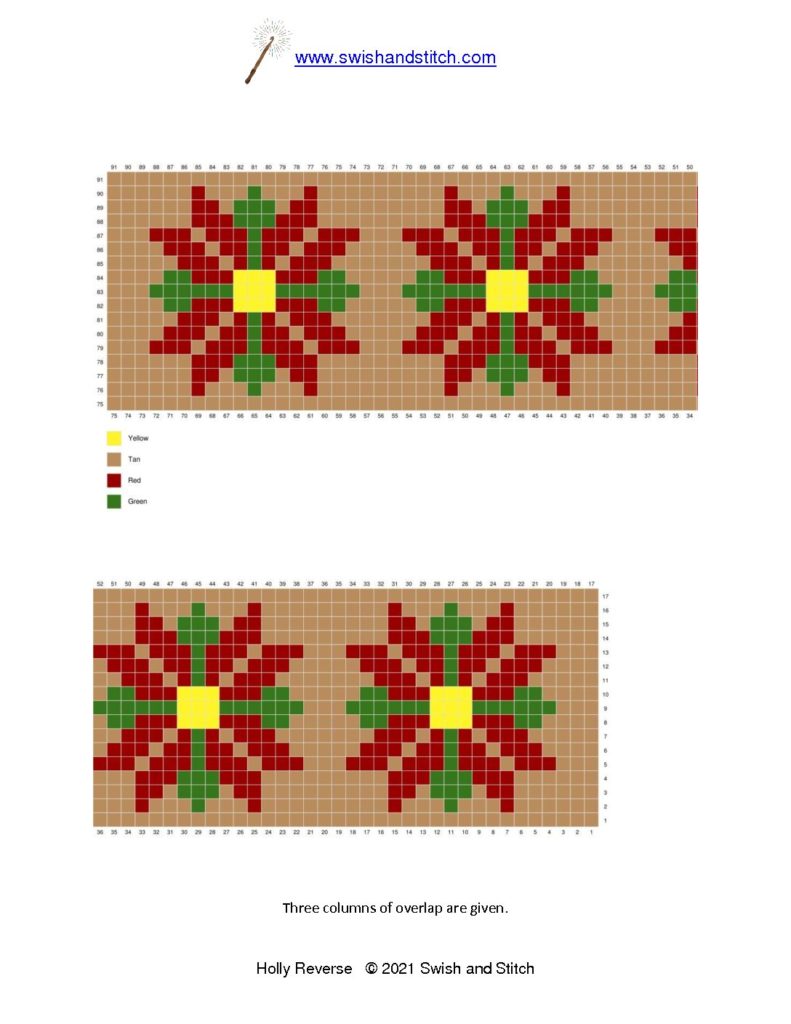
- Poinsettias C2C Crochet Panel Pixel Chart and line-by-line instructions
- Holly C2C Crochet Panel Pixel Chart and line-by-line instructions
- Holly Reverse C2C Crochet Panel Pixel Chart and line-by-line instructions
- Christmas Cabin C2C Crochet Panel Pixel Chart and line-by-line instructions
- Poinsettias C2C Crochet Table Runner Instructions
- Bean Stitch Edging Tutorial
Christmas Poinsettias C2C Crochet Table Runner Instructions
Let’s get started!
Materials
~ Christmas Poinsettias C2C Crochet 17 x 75 pixel graph
~ Lion Brand Vanna’s Choice Yarn 3.5 oz skeins in the following colors (weights are approximations):
- Honey — 8.5 ounces
- Cranberry — 6.0 ounces
- Olive — 3.0 ounces
- Mustard — 1.5 ounces
~ Size H Crochet Hook or hook needed to achieve gauge (see Gauge for C2C Afghans)
~ Tapestry Needle
Crochet the panel starting from the bottom right corner of the chart. Row-by-row written instructions are below.
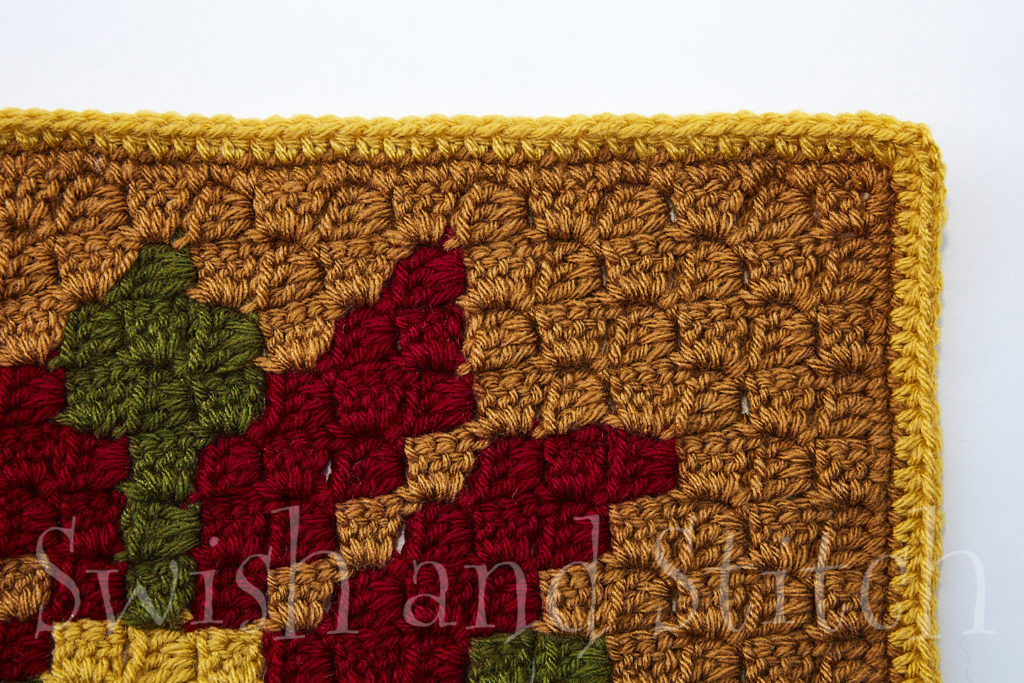
After you finish crocheting the panel, crochet one row of single crochet in HONEY around the entire panel. See Adding a Single Crochet Edge around a Finished C2C Block for how I crochet around the edge.
Christmas Poinsettias Crochet Table Runner Border Instructions
Border Row 1
With right side of the Poinsettia Panel facing, attach MUSTARD in any stitch with a standing Half Double Crochet (HDC). Stitch HDC1 in each stitch to the end of the side. In the corner stitch, crochet HDC2, Chain (CH)2, HDC2. Continue around the panel working HDC1 in each stitch and HDC2, CH2, HDC2 in each corner stitch. Slip Stitch (SL ST) in the first HDC. Fasten off.
Border Row 2
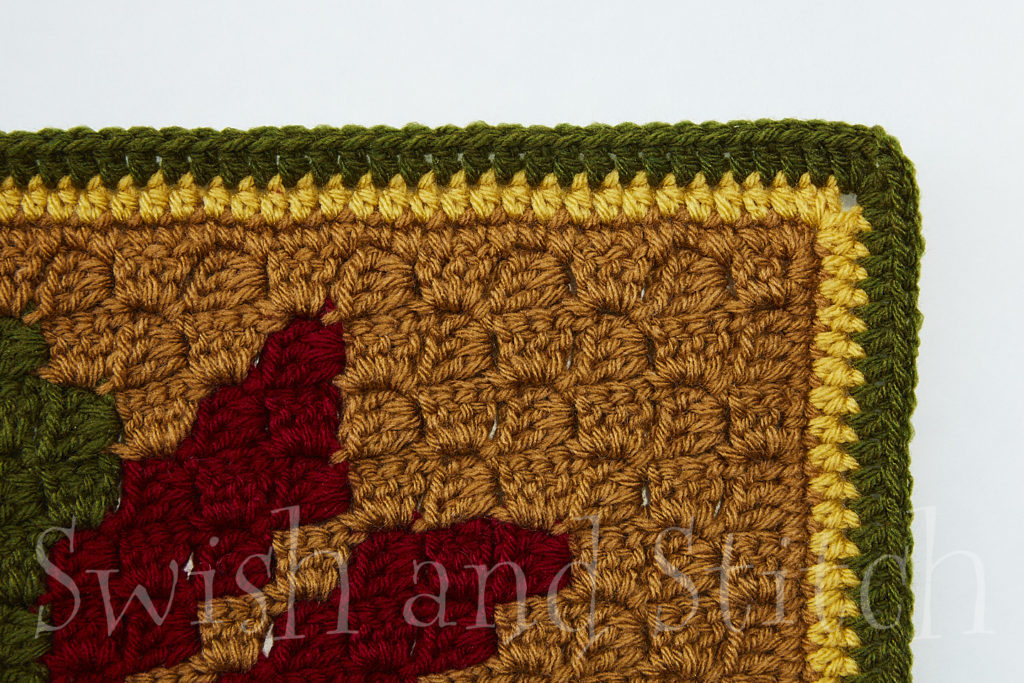
With right side facing, attach OLIVE in any stitch with a standing Double Crochet (DC). DC1 in each stitch to the end of the side. In the corner space, work DC2, CH2, DC2. Continue around the panel in like manner. SL ST in the first DC. Fasten off.
Bean Stitch
To be able to crochet the last border row, you need to know the Bean Stitch (BS). The bean stitch is simple but be sure to keep the loops on your hook loose to be able to pull your hook through all of them at the end. Be sure to lock the stitch each time with the final CH1.
Bean Stitch: Insert your hook in the stitch indicated. Pull up a loop. (2 loops on hook) YO. Insert your hook in the same stitch and pull up another loop. (4 loops on hook) YO. Insert your hook in the same stitch once more and pull up another loop. (6 loops on hook). YO. Pull hook through all loops. CH1.
A full-color step-by-step Bean Stitch Tutorial PDF is included in the Christmas Cabin C2C Crochet Afghan Pattern!
NOTE: When working Border Row 3, the stitch count may or may not work out perfectly. If you end up with an extra stitch before the corner, either skip one additional stitch, or squeeze in one additional BS. This is entirely a matter of personal preference. I have done both. I base my decision on what will make the corner lie flat and end up a 90-degree angle.
Border Row 3
Working on the right side of the Poinsettia Panel, attach CRANBERRY in any corner space with a Slip Stitch (SL ST). CH1. Work BS3 in the same space. *Skip next stitch. Work BS1 in next stitch.* Work from * to * to the end of the row. In the next corner space, work BS3. Continue around the panel in like manner. SL ST in top of first BS. Fasten off.

What do you think! How did yours turn out! I can’t get over the inviting feel I get from these comfy colors. I could not be happier with this table runner and I hope you feel the same!
As always, send me a pic! I love to see what other crafters are accomplishing!
Enjoy!
~Lucinda
Row-by-Row Instructions for the Poinsettia Panel
[RS] = Right Side
[WS] = Wrong Side
Y: Yellow (Mustard) [36 pixels]
T: Tan (Honey) [695]
R: Red (Cranberry) [384]
G: Green (Olive) [160]
Crochet from bottom right corner.
→ Row 1 [WS]: T1 (1 square)
← Row 2 [RS]: T2 (2 squares)
→ Row 3 [WS]: T3 (3 squares)
← Row 4 [RS]: T4 (4 squares)
→ Row 5 [WS]: T5 (5 squares)
← Row 6 [RS]: T6 (6 squares)
→ Row 7 [WS]: T7 (7 squares)
← Row 8 [RS]: T3, R1, T2, R1, T1 (8 squares)
→ Row 9 [WS]: T2, R1, T1, R1, T4 (9 squares)
← Row 10 [RS]: T4, R4, T2 (10 squares)
→ Row 11 [WS]: T3, R1, T1, R1, T5 (11 squares)
← Row 12 [RS]: T3, G2, R4, G2, T1 (12 squares)
→ Row 13 [WS]: T2, G2, R1, T1, R1, G2, T4 (13 squares)
← Row 14 [RS]: T4, G2, R4, G2, T2 (14 squares)
→ Row 15 [WS]: T3, G2, R1, T1, R1, G2, T5 (15 squares)
← Row 16 [RS]: T3, R4, G1, R2, G1, R4, T1 (16 squares)
→ Row 17 [WS]: T2, R4, G1, Y1, G1, R4, T4 (17 squares)
Corner
← Row 18 [RS]: T4, R4, Y2, R4, T3 (17 squares)
→ Row 19 [WS]: T7, Y3, T7 (17 squares)
← Row 20 [RS]: T3, R4, Y2, R4, T4 (17 squares)
→ Row 21 [WS]: T4, R4, G1, Y1, G1, R4, T2 (17 squares)
← Row 22 [RS]: T1, R4, G1, R2, G1, R4, T4 (17 squares)
→ Row 23 [WS]: T7, G2, R1, T1, R1, G2, T3 (17 squares)
← Row 24 [RS]: T2, G2, R4, G2, T7 (17 squares)
→ Row 25 [WS]: T8, G2, R1, T1, R1, G2, T2 (17 squares)
← Row 26 [RS]: T1, G2, R4, G2, T3, R1, T2, R1, T1 (17 squares)
→ Row 27 [WS]: T2, R1, T1, R1, T6, R1, T1, R1, T3 (17 squares)
← Row 28 [RS]: T2, R4, T5, R4, T2 (17 squares)
→ Row 29 [WS]: T3, R1, T1, R1, T6, R1, T1, R1, T2 (17 squares)
← Row 30 [RS]: T1, R1, T2, R1, T3, G2, R4, G2, T1 (17 squares)
→ Row 31 [WS]: T2, G2, R1, T1, R1, G2, T8 (17 squares)
← Row 32 [RS]: T7, G2, R4, G2, T2 (17 squares)
→ Row 33 [WS]: T3, G2, R1, T1, R1, G2, T7 (17 squares)
← Row 34 [RS]: T4, R4, G1, R2, G1, R4, T1 (17 squares)
→ Row 35 [WS]: T2, R4, G1, Y1, G1, R4, T4 (17 squares)
← Row 36 [RS]: T4, R4, Y2, R4, T3 (17 squares)
→ Row 37 [WS]: T7, Y3, T7 (17 squares)
← Row 38 [RS]: T3, R4, Y2, R4, T4 (17 squares)
→ Row 39 [WS]: T4, R4, G1, Y1, G1, R4, T2 (17 squares)
← Row 40 [RS]: T1, R4, G1, R2, G1, R4, T4 (17 squares)
→ Row 41 [WS]: T7, G2, R1, T1, R1, G2, T3 (17 squares)
← Row 42 [RS]: T2, G2, R4, G2, T7 (17 squares)
→ Row 43 [WS]: T8, G2, R1, T1, R1, G2, T2 (17 squares)
← Row 44 [RS]: T1, G2, R4, G2, T3, R1, T2, R1, T1 (17 squares)
→ Row 45 [WS]: T2, R1, T1, R1, T6, R1, T1, R1, T3 (17 squares)
← Row 46 [RS]: T2, R4, T5, R4, T2 (17 squares)
→ Row 47 [WS]: T3, R1, T1, R1, T6, R1, T1, R1, T2 (17 squares)
← Row 48 [RS]: T1, R1, T2, R1, T3, G2, R4, G2, T1 (17 squares)
→ Row 49 [WS]: T2, G2, R1, T1, R1, G2, T8 (17 squares)
← Row 50 [RS]: T7, G2, R4, G2, T2 (17 squares)
→ Row 51 [WS]: T3, G2, R1, T1, R1, G2, T7 (17 squares)
← Row 52 [RS]: T4, R4, G1, R2, G1, R4, T1 (17 squares)
→ Row 53 [WS]: T2, R4, G1, Y1, G1, R4, T4 (17 squares)
← Row 54 [RS]: T4, R4, Y2, R4, T3 (17 squares)
→ Row 55 [WS]: T7, Y3, T7 (17 squares)
← Row 56 [RS]: T3, R4, Y2, R4, T4 (17 squares)
→ Row 57 [WS]: T4, R4, G1, Y1, G1, R4, T2 (17 squares)
← Row 58 [RS]: T1, R4, G1, R2, G1, R4, T4 (17 squares)
→ Row 59 [WS]: T7, G2, R1, T1, R1, G2, T3 (17 squares)
← Row 60 [RS]: T2, G2, R4, G2, T7 (17 squares)
→ Row 61 [WS]: T8, G2, R1, T1, R1, G2, T2 (17 squares)
← Row 62 [RS]: T1, G2, R4, G2, T3, R1, T2, R1, T1 (17 squares)
→ Row 63 [WS]: T2, R1, T1, R1, T6, R1, T1, R1, T3 (17 squares)
← Row 64 [RS]: T2, R4, T5, R4, T2 (17 squares)
→ Row 65 [WS]: T3, R1, T1, R1, T6, R1, T1, R1, T2 (17 squares)
← Row 66 [RS]: T1, R1, T2, R1, T3, G2, R4, G2, T1 (17 squares)
→ Row 67 [WS]: T2, G2, R1, T1, R1, G2, T8 (17 squares)
← Row 68 [RS]: T7, G2, R4, G2, T2 (17 squares)
→ Row 69 [WS]: T3, G2, R1, T1, R1, G2, T7 (17 squares)
← Row 70 [RS]: T4, R4, G1, R2, G1, R4, T1 (17 squares)
→ Row 71 [WS]: T2, R4, G1, Y1, G1, R4, T4 (17 squares)
← Row 72 [RS]: T4, R4, Y2, R4, T3 (17 squares)
→ Row 73 [WS]: T7, Y3, T7 (17 squares)
← Row 74 [RS]: T3, R4, Y2, R4, T4 (17 squares)
→ Row 75 [WS]: T4, R4, G1, Y1, G1, R4, T2 (17 squares)
Corner
← Row 76 [RS]: T1, R4, G1, R2, G1, R4, T3 (16 squares)
→ Row 77 [WS]: T5, G2, R1, T1, R1, G2, T3 (15 squares)
← Row 78 [RS]: T2, G2, R4, G2, T4 (14 squares)
→ Row 79 [WS]: T4, G2, R1, T1, R1, G2, T2 (13 squares)
← Row 80 [RS]: T1, G2, R4, G2, T3 (12 squares)
→ Row 81 [WS]: T5, R1, T1, R1, T3 (11 squares)
← Row 82 [RS]: T2, R4, T4 (10 squares)
→ Row 83 [WS]: T4, R1, T1, R1, T2 (9 squares)
← Row 84 [RS]: T1, R1, T2, R1, T3 (8 squares)
→ Row 85 [WS]: T7 (7 squares)
← Row 86 [RS]: T6 (6 squares)
→ Row 87 [WS]: T5 (5 squares)
← Row 88 [RS]: T4 (4 squares)
→ Row 89 [WS]: T3 (3 squares)
← Row 90 [RS]: T2 (2 squares)
→ Row 91 [WS]: T1 (1 square)