Some of the links on this site are affiliate links. I make a small commission from sales when you click through the link. There is no additional cost to you.
To every completed corner-to-corner crochet block, I add a row of single crochet around the circumference of the block. This added row ensures two things: 1) that any additional rows you add will be evenly spaced, and 2) that you will have a nice even chain around the entire edge. The even chain around the edge makes it sooo much easier to join blocks together neatly.
Since I am mathematically minded, I like to have a system for how I place my single crochet stitches. This guarantees that when I put two blocks side by side I will be within one stitch without having to count.
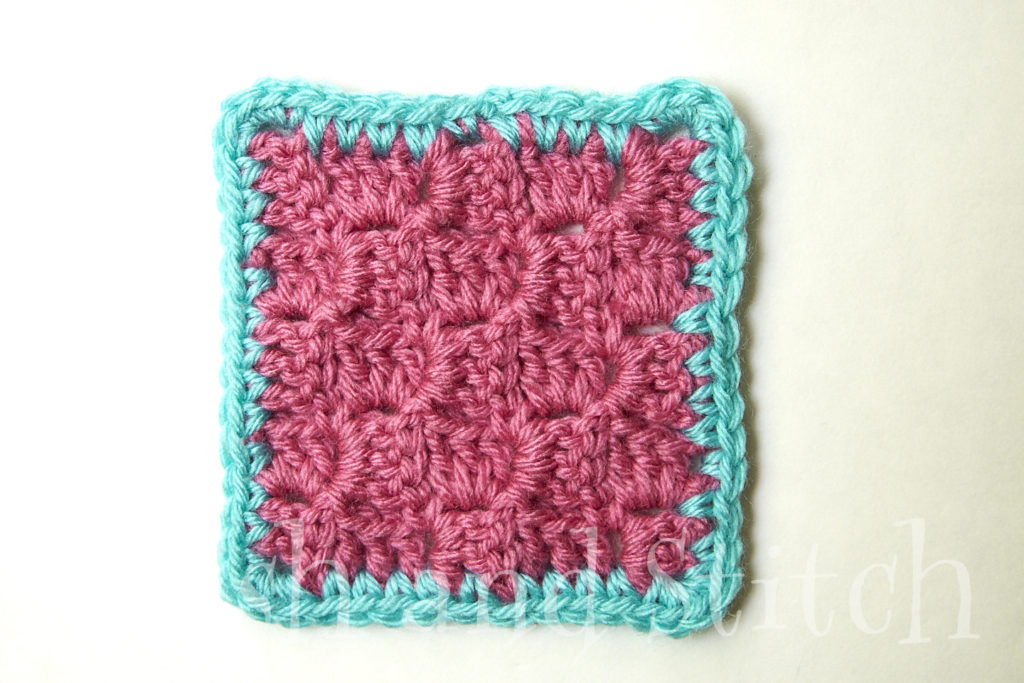
Since my blocks typically have an odd number or squares for the width and the length, I will use a 5 square X 5 square swatch to demonstrate my method.
I crochet 5 single crochet stitches for every two squares or pixels on the chart—one with the double crochet posts lying horizontally, and one with the double crochet posts standing vertically. If I try to do more than that, my border tends to end up wavy from too many stitches.
When crocheting around a finished block, I crochet the single crochet row in the same color as the background color of the block. As you’ll notice in my pictures below, adding the single crochet edging in a contrasting color does not look very neat. Using the same color as the background of the block allows the single crochet to blend in and gives a very neat edge to the block.
For this sample, I will use a contrasting color so it can be easily seen.
Single Crochet Method
To begin and with the right side of your block facing you, join with a Single Crochet (SC) in any space between squares.
If the next square has the double crochet posts lying horizontally, SC 1 around the top post and in the next space between squares.
If the next square has the double crochet posts standing vertically, SC 1 between the posts and in the next space between squares.
Continue working across the block as listed above until the final square of the side. For the final square, SC 1 around the top post or between the vertical posts, then SC 3 in the corner. Turn the block to continue in the next side.
Continue working around the block, leaving off the final SC 1 between squares. (This stitch was already made as the joining SC.) Slip Stitch (SL) to the first SC. Finish off.
So for this sample, you will work the stitches according to the diagram below.

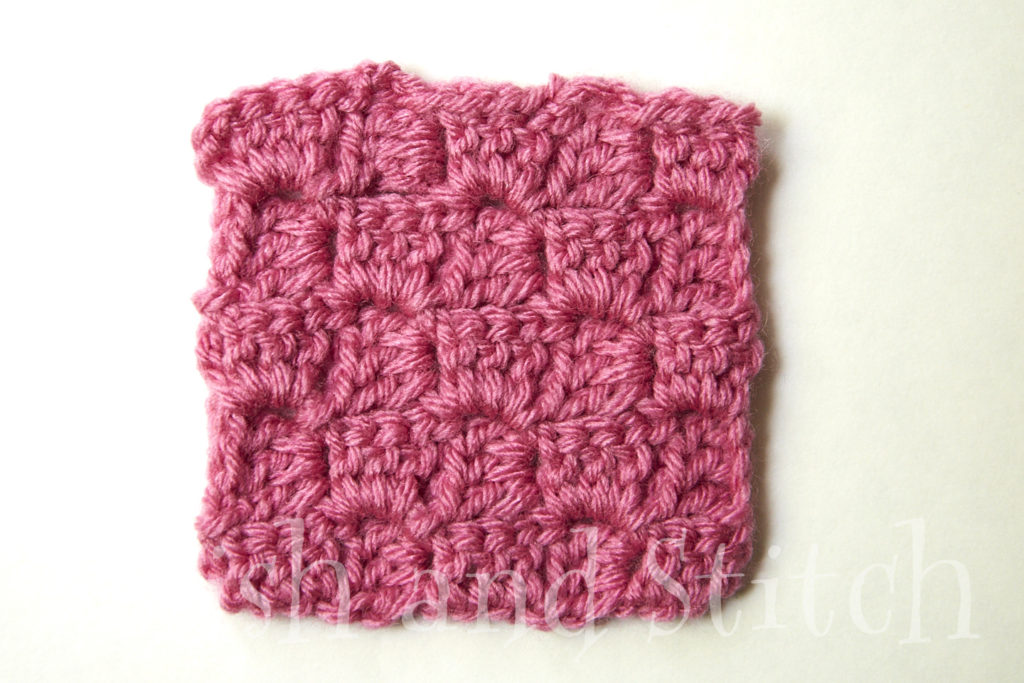
Here is the single crochet row in progress.
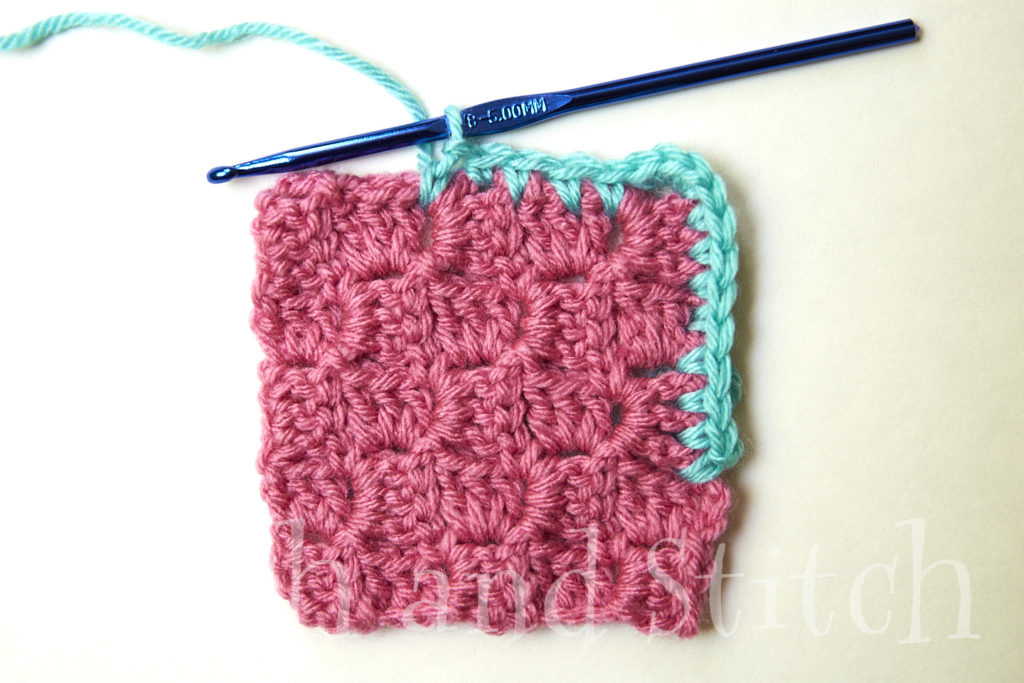
And here is the finished block.
Each side has 15 stitches worked in them, counting the corner stitch on both ends. In this case, the stitch count came out exactly even. If you do end up with an extra stitch on a side, it can easily be worked in or skipped when joining to another block.
And that’s all there is to it! Once you’ve tried it a few times, it becomes second nature and you don’t even have to think about it.