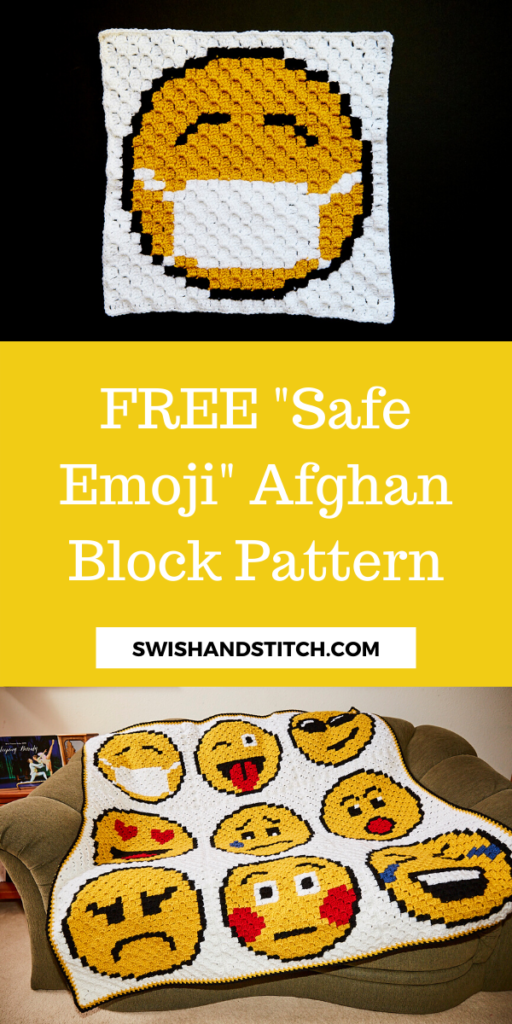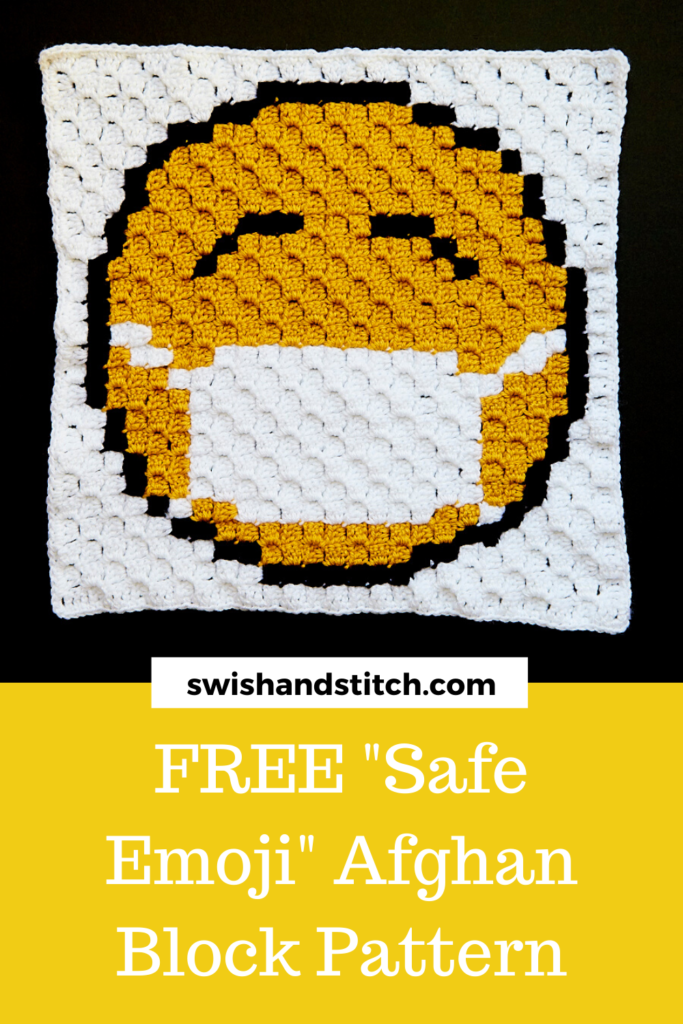
C2C Emoji Afghan Block 1—Safe Emoji
Some of the links on this site are affiliate links. I make a small commission from sales when you click through the link. There is no additional cost to you.
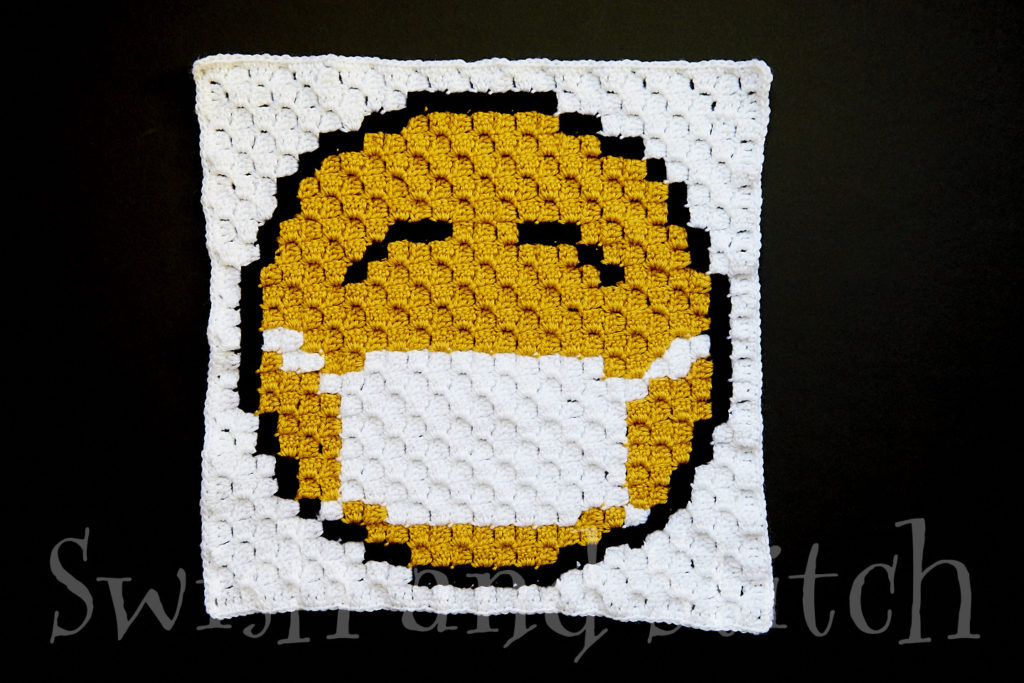
COVID-19 and social distancing are on everyone’s minds. It is, therefore, exceedingly appropriate to begin this series with the Safe Emoji, also known as the MASKED EMOJI.
Isn’t that PERFECT? I started out with a smaller mask, but my son GKatt pointed out that the mask needed to entirely cover our emoji’s nose and mouth so he redesigned it. Way to keep our emoji safe!
For basic instructions and the materials list for the complete 9-block blanket, visit C2C Emoji Afghan Crochet Along.
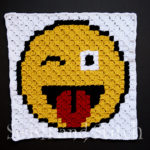
Want to personalize your blanket? Make it king-size? The Emoji Afghan Premium Pattern includes printable PDFs of all the free blocks plus 7 additional EXCLUSIVE emoji blocks! Mix and match or crochet them all!
Additional blocks include:
- Angelic Emoji
- Dead Emoji
- Eyes Emoji
- Frustrated Emoji
- Happy Emoji
- Kissing Emoji
- Skeptical Emoji

You can find the other blocks here:
Safe Emoji Instructions
Materials
~ Safe Emoji 25×25 Pixel Graph
~ Lion Brand Vanna’s Choice Yarn 3.5 oz skeins in the following colors:
- White [314 squares] — 3.4 ounces
- Mustard [237 squares] — 2.2 ounces
- Black [74 squares] — .6 ounces
~ Size H Crochet Hook or hook needed to achieve gauge (see Gauge for C2C Afghans)
~ Tapestry Needle
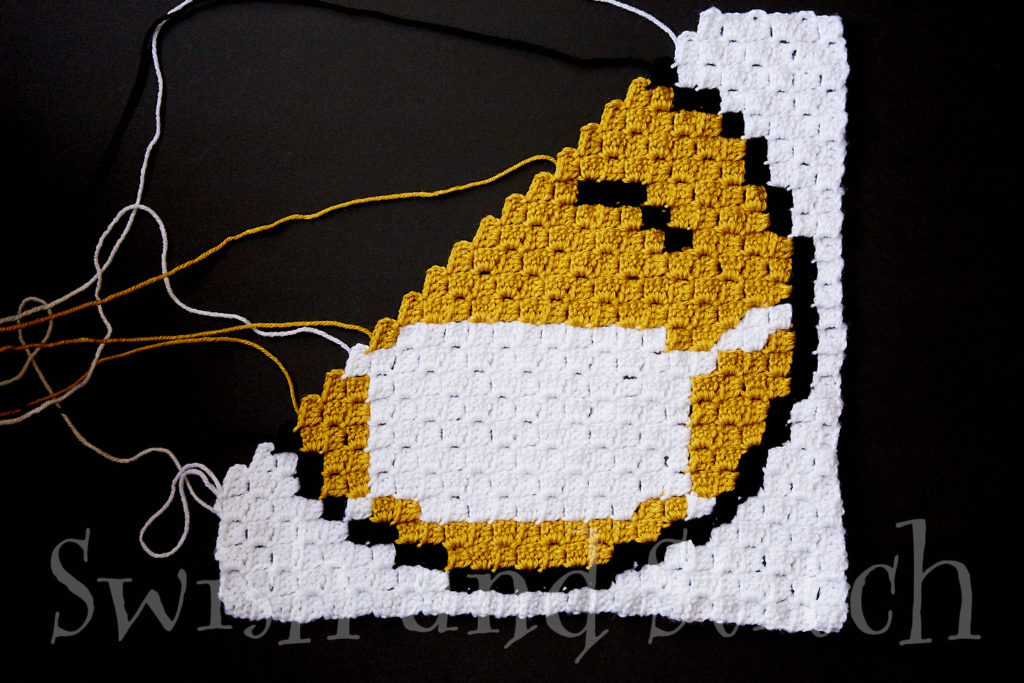
Crochet the square starting from the bottom right corner of the chart. Row-by-row written instructions are below.
After you finish crocheting the block, crochet one row of single crochet in WHITE around the entire block. I crochet 5 single crochet stitches for every two squares or pixels on the chart. If I try to do more than that, my border tends to end up wavy from too many stitches. For 25×25 pixel graphs I crochet 63 SC stitches on each side + an extra stitch in each corner. I do recommend counting the stitches and having the same number on each side—being consistent will make it much easier to sew the blocks together at the end.
Enjoy!
~Lucinda
Row-by-Row Instructions
[RS] = Right Side
[WS] = Wrong Side
Y: Yellow (Mustard)
W: White
B: Black
Crochet from bottom right corner.
→ Row 1 [WS]: W1
← Row 2 [RS]: W2
→ Row 3 [WS]: W3
← Row 4 [RS]: W4
→ Row 5 [WS]: W5
← Row 6 [RS]: W6
→ Row 7 [WS]: W7
← Row 8 [RS]: W8
→ Row 9 [WS]: W3, B3, W3
← Row 10 [RS]: W2, B2, Y1, W1, B2, W2
→ Row 11 [WS]: W1, B2, Y5, B2, W1
← Row 12 [RS]: W1, B1, Y4, W1, Y3, B1, W1
→ Row 13 [WS]: W1, B1, Y2, W3, Y4, B1, W1
← Row 14 [RS]: W1, B1, Y4, W4, Y2, B1, W1
→ Row 15 [WS]: W1, B1, Y2, W5, Y2, W2, B1, W1
← Row 16 [RS]: W1, B1, Y1, W9, Y2, B1, W1
→ Row 17 [WS]: W1, B1, Y2, W7, Y4, B1, W1
← Row 18 [RS]: W2, Y5, W7, Y2, W2
→ Row 19 [WS]: W2, B1, Y1, W8, Y4, B1, W2
← Row 20 [RS]: W2, B1, Y5, W8, Y1, B1, W2
→ Row 21 [WS]: W3, Y1, W8, Y6, W3
← Row 22 [RS]: W3, B1, Y2, B1, Y3, W7, Y1, B1, W3
→ Row 23 [WS]: W3, B1, Y1, W7, Y7, B1, W3
← Row 24 [RS]: W4, Y3, B1, Y4, W12
→ Row 25 [WS]: W4, B1, Y1, W6, Y8, B1, W4
Corner
← Row 26 [RS]: W4, Y3, B1, Y5, W5, Y2, W4
→ Row 27 [WS]: W3, B1, Y2, W4, Y5, B1, Y3, B1, W3
← Row 28 [RS]: W3, B1, Y3, B1, Y5, W3, Y2, B1, W3
→ Row 29 [WS]: W3, Y3, W2, Y10, W3
← Row 30 [RS]: W2, B1, Y11, W1, Y2, B1, W2
→ Row 31 [WS]: W2, B1, Y13, B1, W2
← Row 32 [RS]: W2, Y5, B1, Y5, W1, Y2, W2
→ Row 33 [WS]: W1, B1, Y1, W1, Y5, B1, Y5, B1, W1
← Row 34 [RS]: W1, B1, Y5, B3, Y2, W1, Y1, B1, W1
→ Row 35 [WS]: W1, B1, W1, Y10, B1, W1
← Row 36 [RS]: W1, B1, Y10, B1, W1
→ Row 37 [WS]: W1, B1, Y9, B1, W1
← Row 38 [RS]: W1, B1, Y8, B1, W1
→ Row 39 [WS]: W1, B2, Y5, B2, W1
← Row 40 [RS]: W2, B2, Y2, B2, W2
→ Row 41 [WS]: W3, B3, W3
← Row 42 [RS]: W8
→ Row 43 [WS]: W7
← Row 44 [RS]: W6
→ Row 45 [WS]: W5
← Row 46 [RS]: W4
→ Row 47 [WS]: W3
← Row 48 [RS]: W2
→ Row 49 [WS]: W1