Some of the links on this site are affiliate links. I make a small commission from sales when you click through the link. There is no additional cost to you.
This article was originally posted on www.happilyeveraperture.com. It has found its new home here. Please repin if needed to bookmark this page.
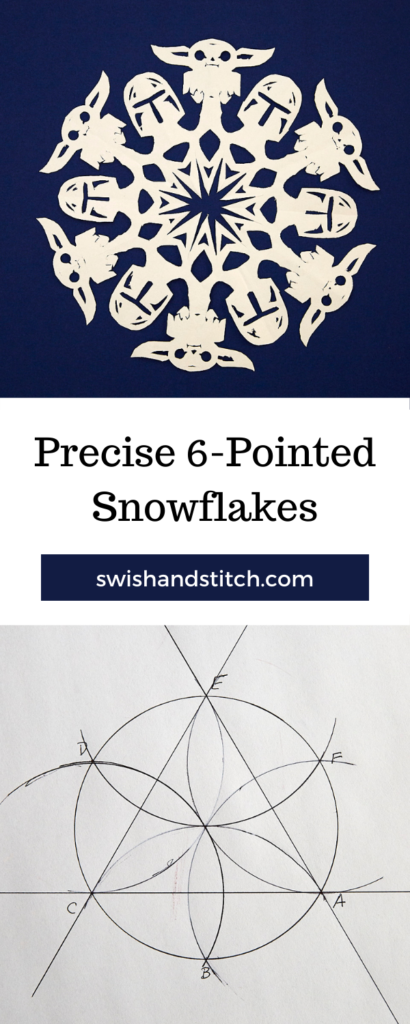
A New Angle on Paper Snowflakes
The other day HDawg and I had a text conversation that went like this:
Me: Check this out: Lego Snowflakes (web link to square Lego snowflakes)
HDawg: I’m on it! Except mine will be six pointed!
Me: I knew they would be!
HDawg: How come so many people do squares?? I don’t understand.
HDawg is our snowflake master. Her snowflakes are so good that I save her snowflakes in page protectors in a binder so we can rehang them year after year. And, as you may have guessed, it is an egregious sin to make something other than a 6-pointed (or multiple thereof) snowflake.
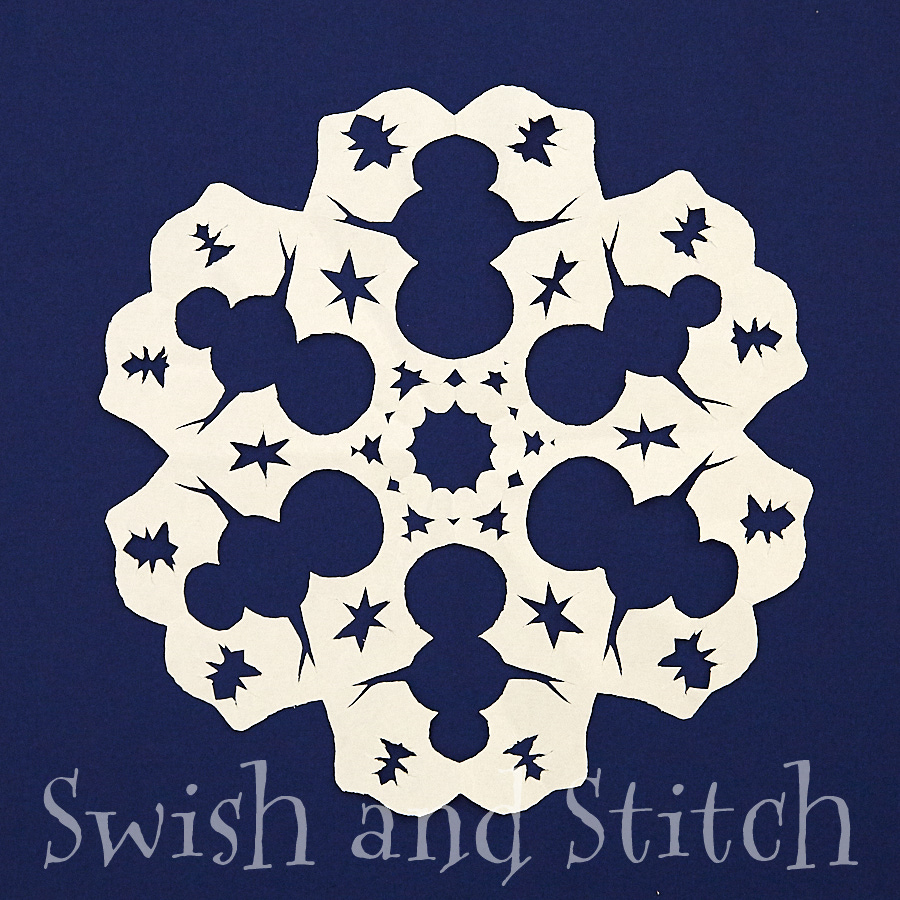
Here is her Lego snowflake.
Lego Minifigures
Pretty good, huh? And notice the six minifigure heads. She’s kind of amazing.
Geometry in the Real World
Okay, I know most people who took Geometry in high school wondered when they would ever use it. I, for one, loved geometric proofs and, even better, geometric constructions. They were just fun to me.
One of the hardest parts of precise 6-pointed snowflake construction is making sure that your folds are accurate so your snowflakes don’t turn out wonky and lopsided. Does that bother anyone else? But, what if you could have accurate folds every time? All you need is a simple guide and you can have perfectly folded snowflakes.
This is where geometry kicks in. This is math in the real world! And it’s so simple!
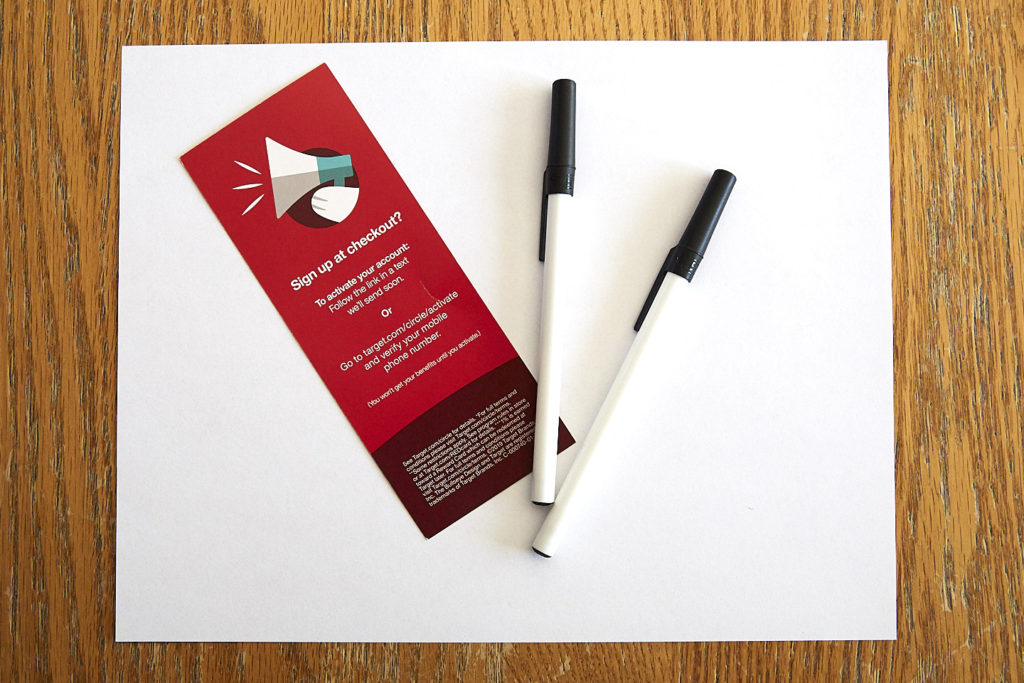
You don’t even need a compass or any other special tools to create your guide. All you need is a sheet of paper, thin cardstock—any stiff flier you get in the mail will do—and two pens. Don’t use pencils as the graphite may rub off onto your pristine snowflakes making them look dingy.
Inscribing a Regular Triangle Inside a Circle
This is what you do:
Cut a thin strip of card stock, about 1/2-inch wide and 2 inches long. The actual size is irrelevant, but twice the length of your cardstock strip needs to be shorter than the smaller dimension (width) of your paper.
Using one of the pens, poke a small hole in each end of the strip of cardstock. Make sure the holes are small. What we’re doing is creating a mathematical compass and if the holes are too big, there will be too much room for inaccuracy in your drawing.
Have a friend hold your paper down or tape it in place so it doesn’t move while you work.
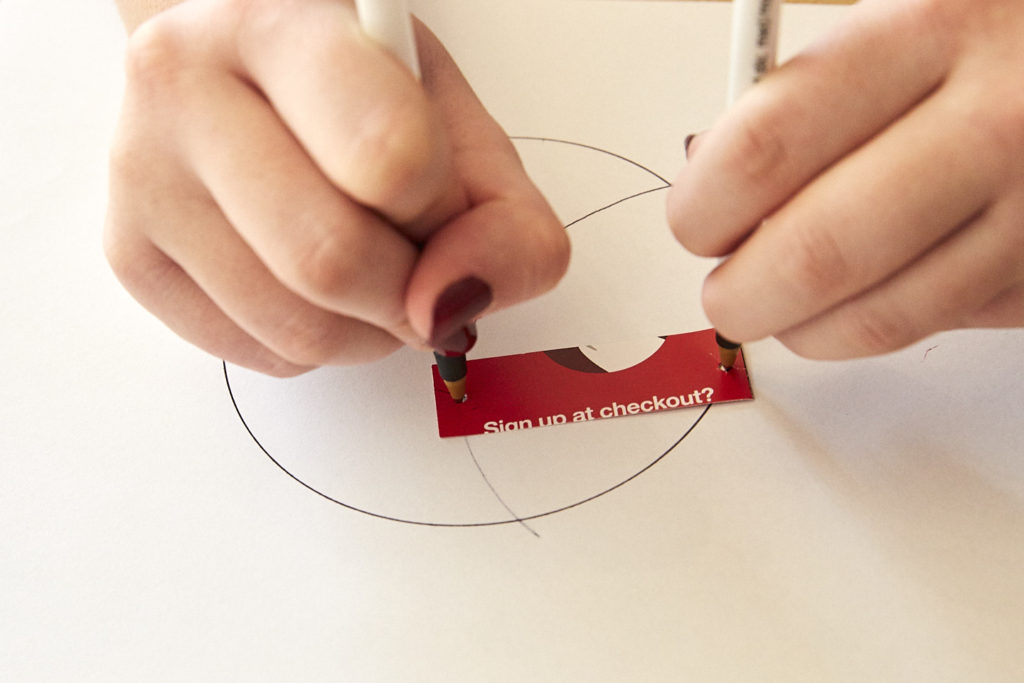
Poke one of your pens through one hole in your cardstock strip and place it in the center(ish) of the paper. Hold this very still so it doesn’t move.
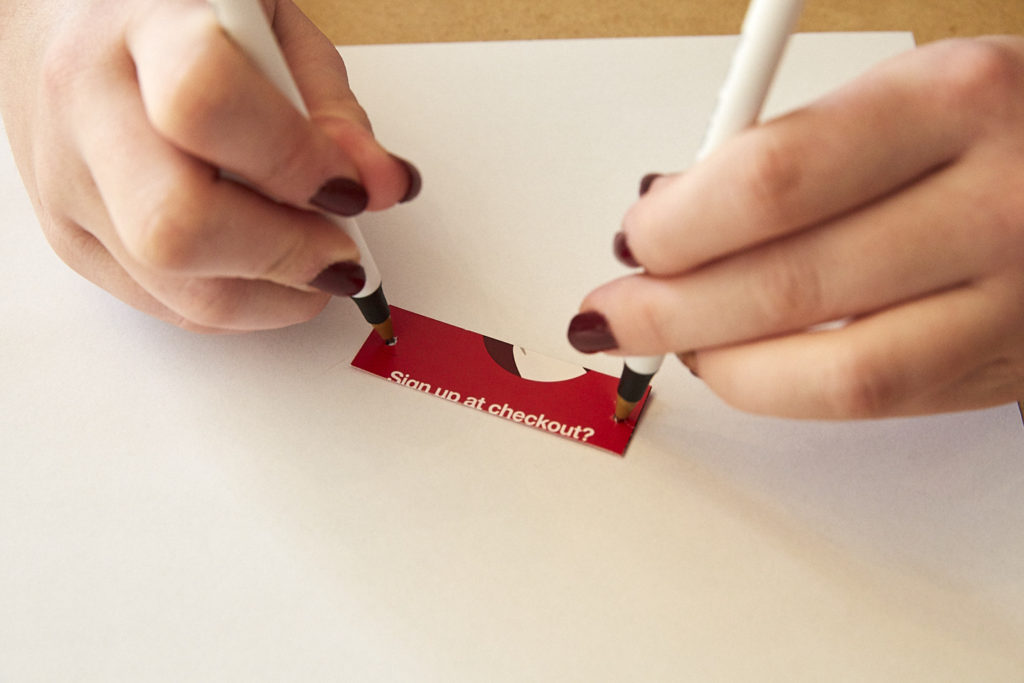
Poke the other pen through the other end and gently pull it taut. Swing the second pen in an arc around the fixed pen. This will draw a circle.

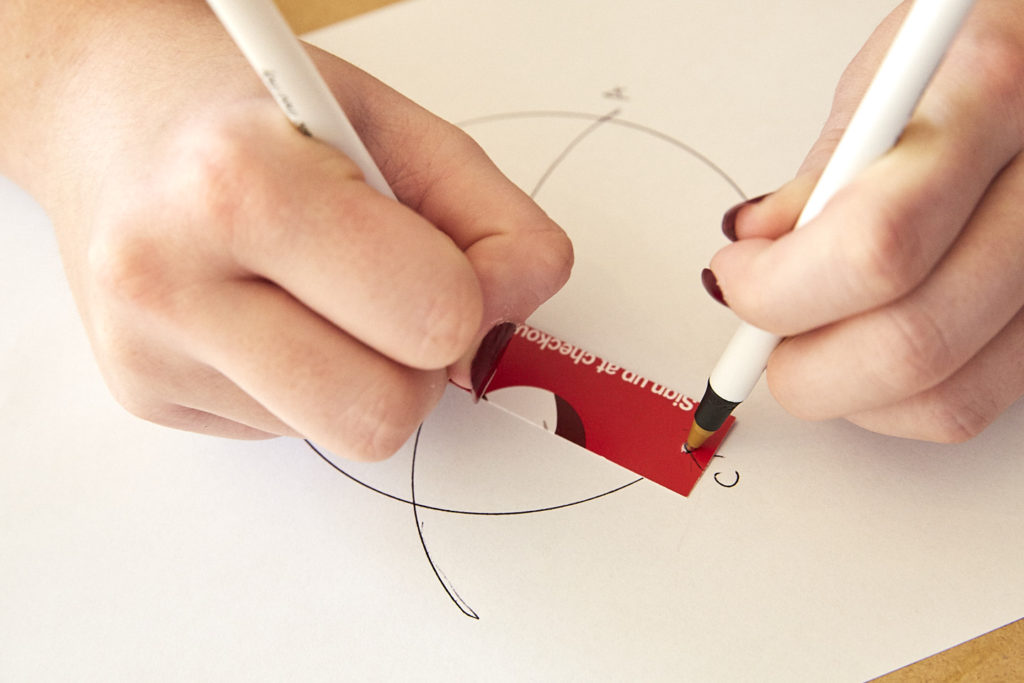
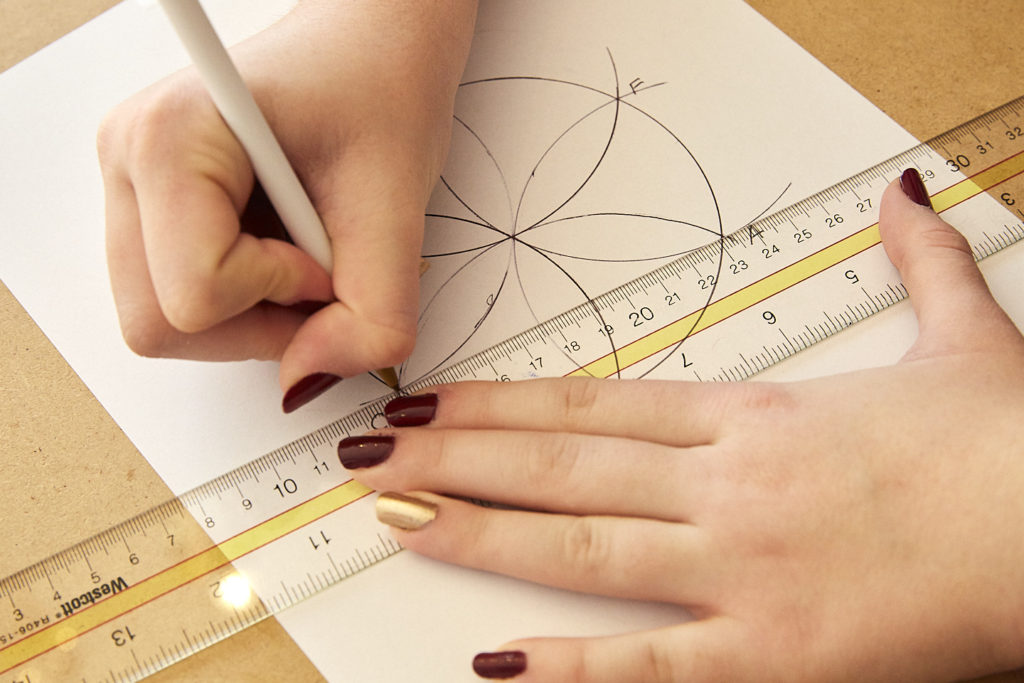
Move your first pen to any point on the circle and again hold it very still. Place the second pen on the circle as well (where it intersects the circle, I’ll label this point A just for ease in talking about the diagram) and swing it through the center of the circle to the opposite side. This will create an arc through your circle. I’ll label the second intersection point C and the point where the first pen was fixed, point B.
Move your first pen to point C and hold it still. Your second pen should now hit the circle at point B. Swing it again through the circle to create a second arc and a fourth point on the circle—D.
Continue creating arcs, moving your fixed pen to the new point created each time.

For completeness’s sake, after using F as a fixed point, move the pen to A and create one last arc.
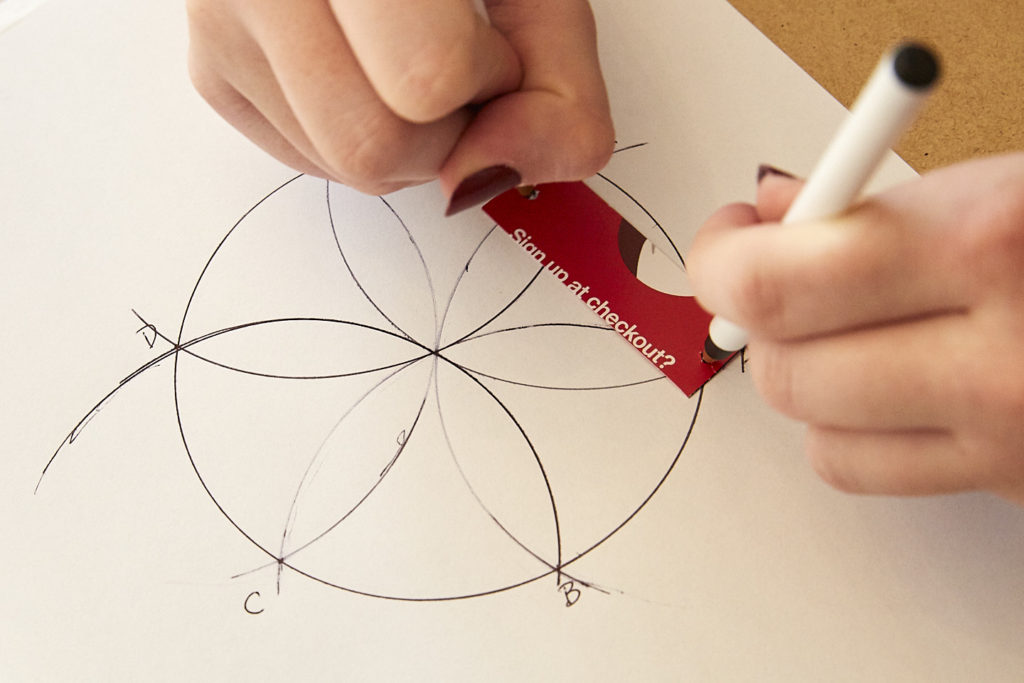
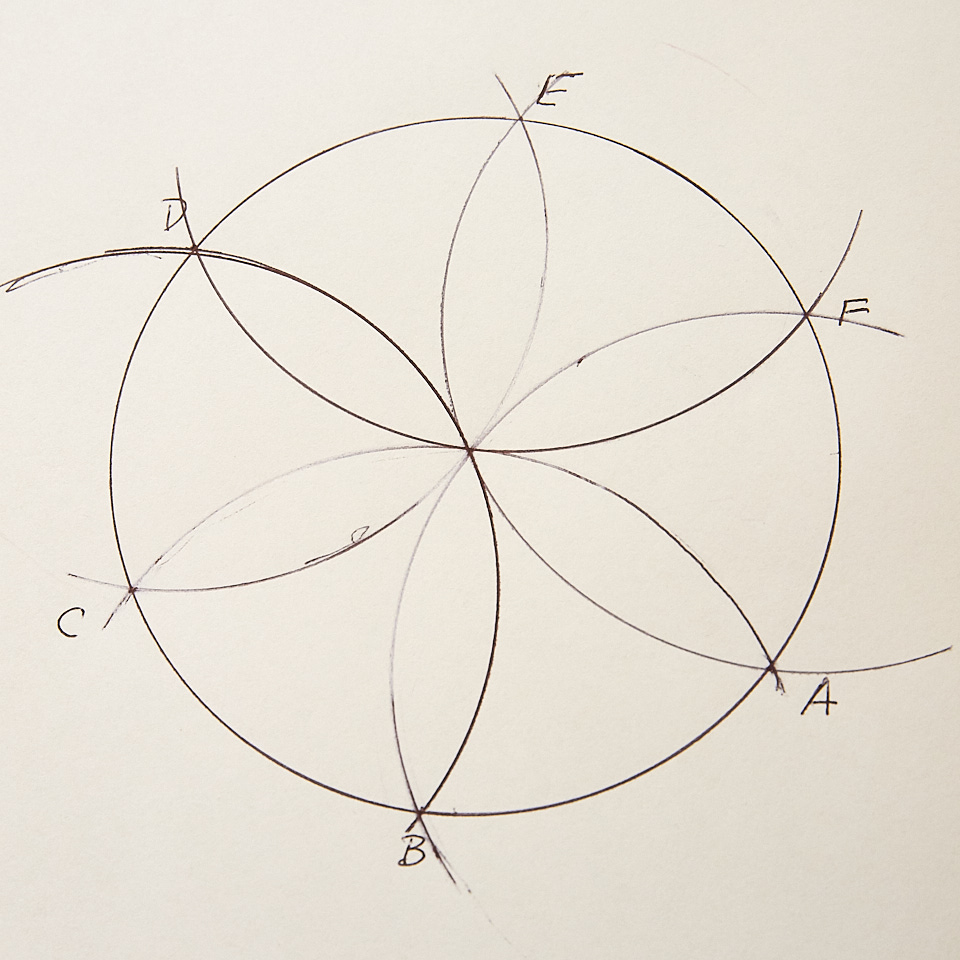
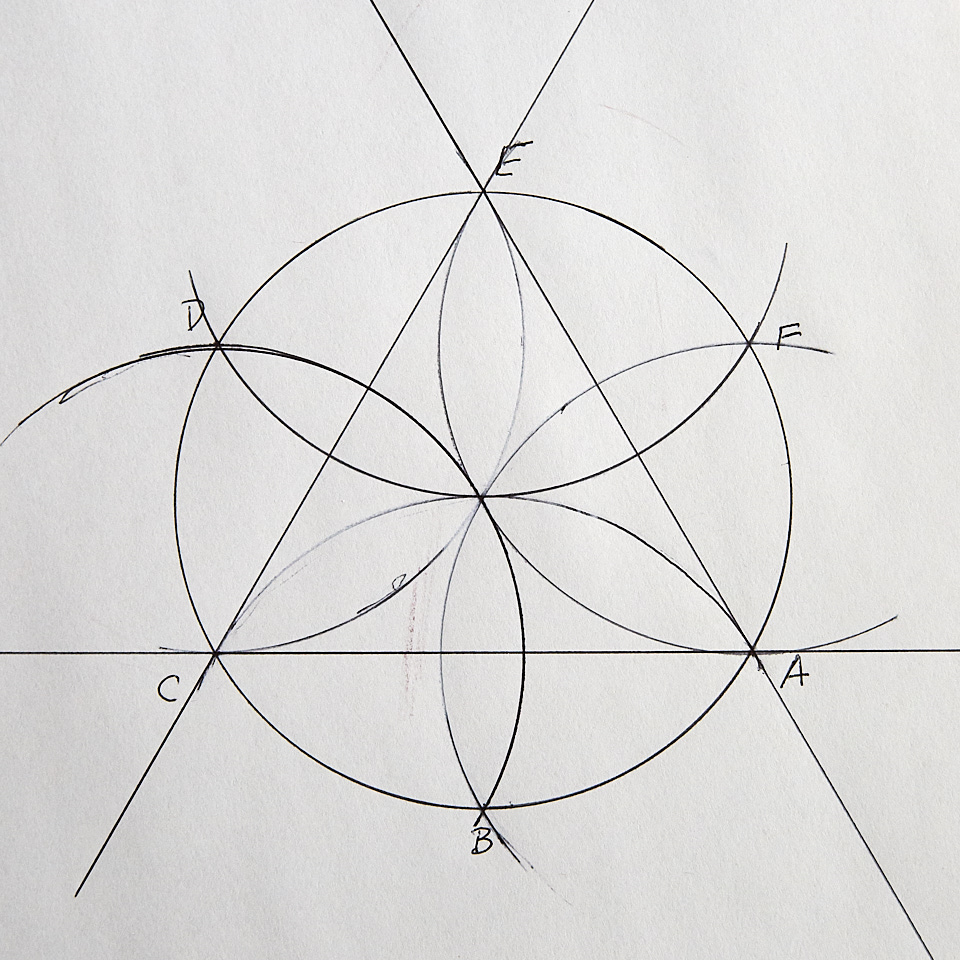
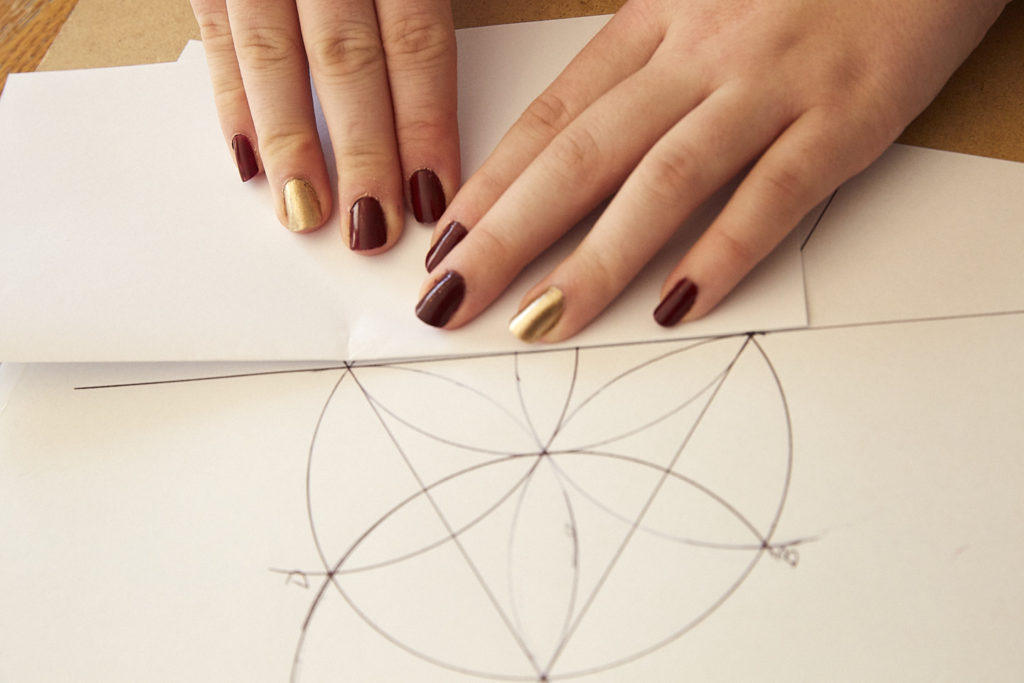
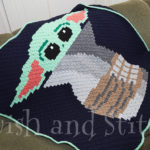
Your diagram should now look like a 6-petaled flower inside your circle.
JMoney did a great job being accurate! See how all of her arcs meet nicely in the middle of the circle?
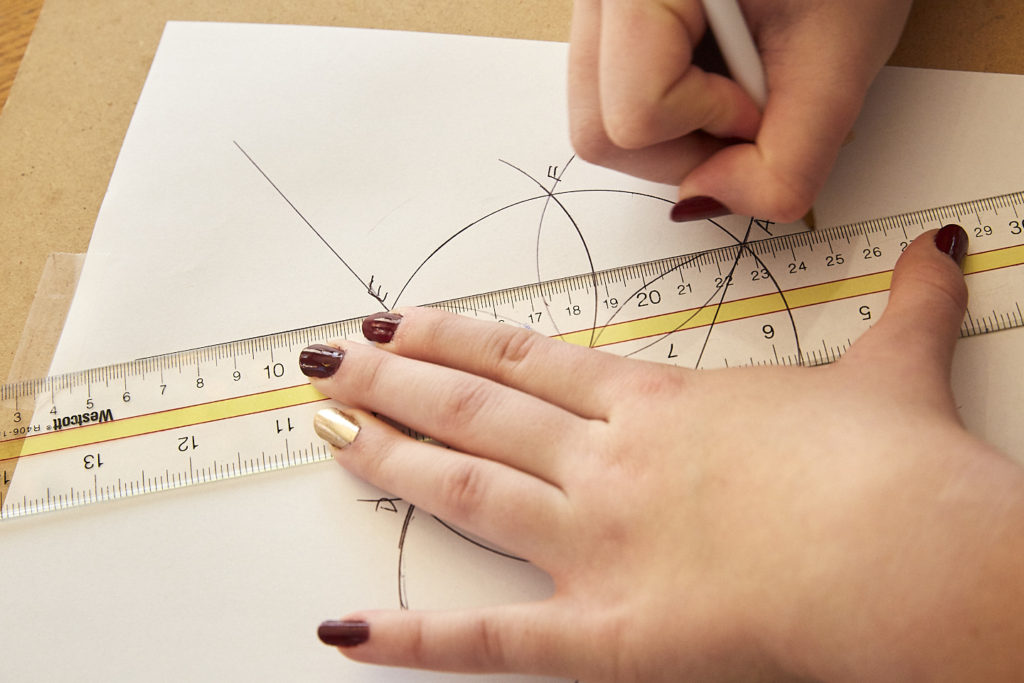
Using a straight-edge (a ruler, another cardstock flier, whatever), draw a line between points A and C, extending the line beyond the circle on both ends.
Draw similar lines between points C and E, and between E and A.
You now have a regular triangle inscribed in your circle. A regular triangle is one that has all sides congruent (equal in length) and all interior angles are also congruent (equal in measure). Regular triangles are also called equilateral triangles and have 60° interior angles.
Wasn’t that easy? And fun! And you thought you’d never use geometry outside of your math class! Your folding guide is now complete. I’ll show you what to do with it as we fold the snowflakes.
Folding Accurately for 6-Pointed Paper Snowflakes
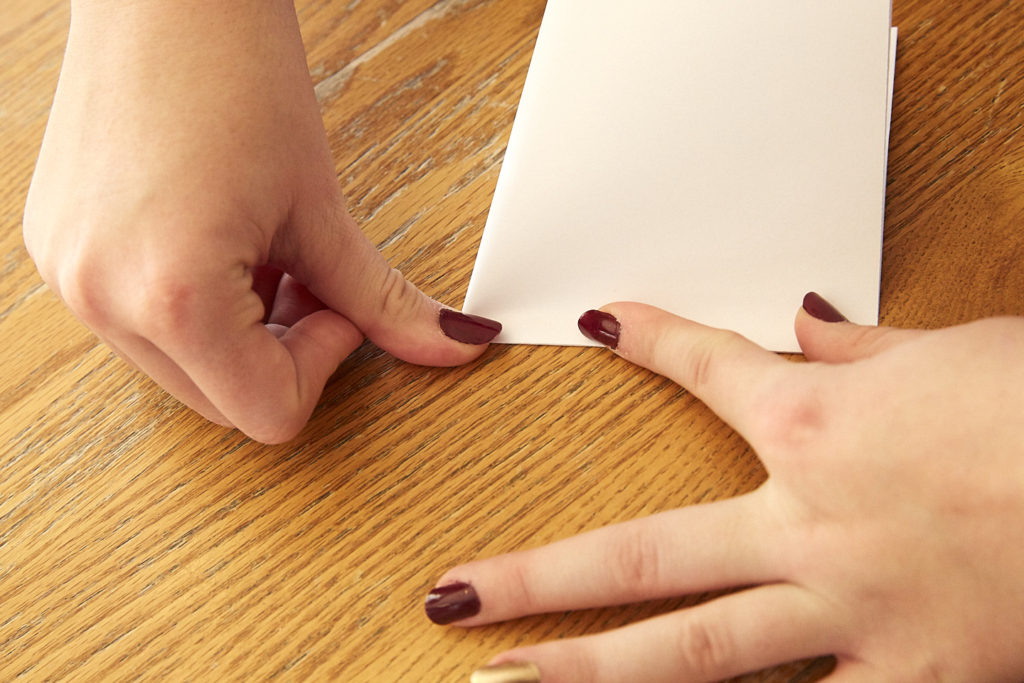
Start with a square piece of paper. I use 8.5 x 11-inch standard printer paper and cut it square with a paper cutter.
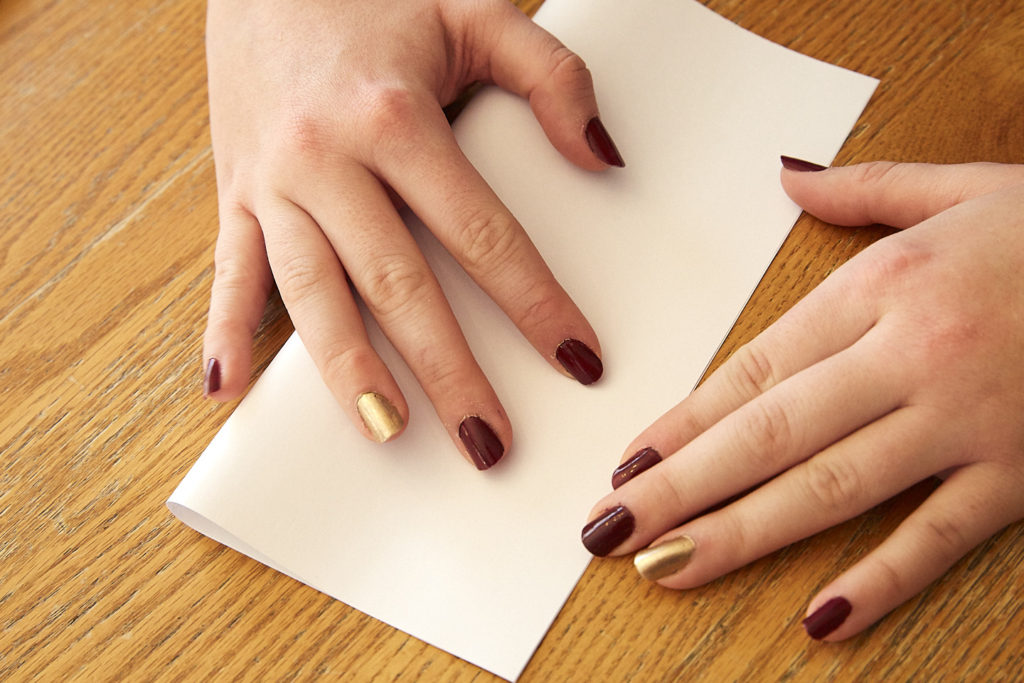
Fold the paper in half, matching edges to form a rectangle half the size of the original square.
Find the midpoint of the folded edge. You can do this one of two ways.
- Make a tiny pen mark at half the measure of the length of the rectangle. For mine that would be at 4.25 inches (half 8.5 inches).
- Start to fold the rectangle in half, bringing short edges together. Do not make the entire crease—just a tiny crease at the midpoint on the folded long edge of the rectangle.
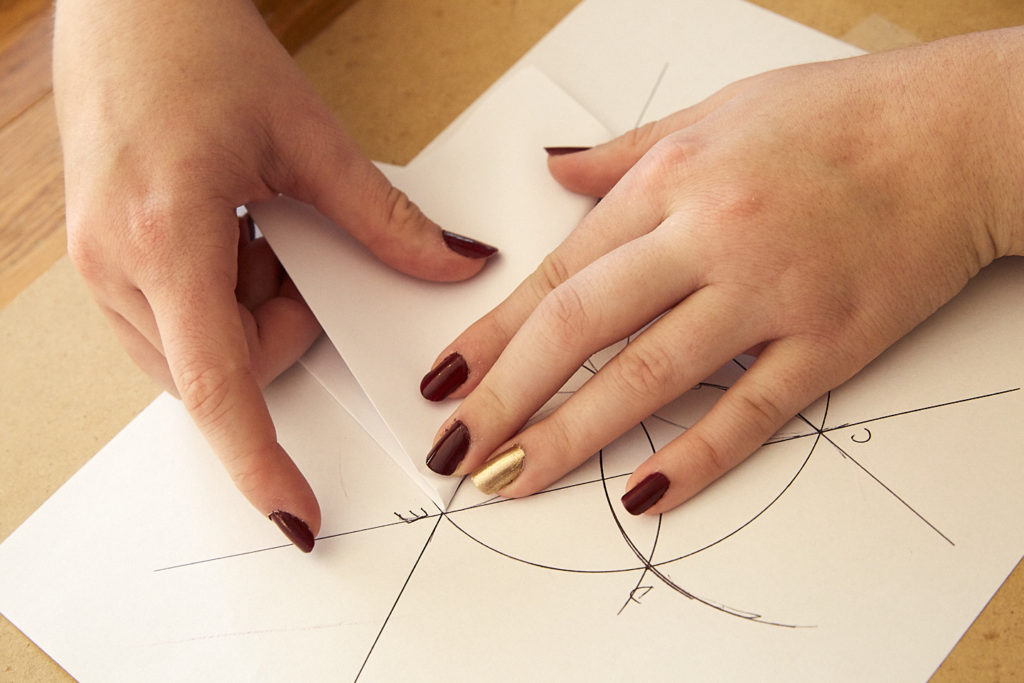
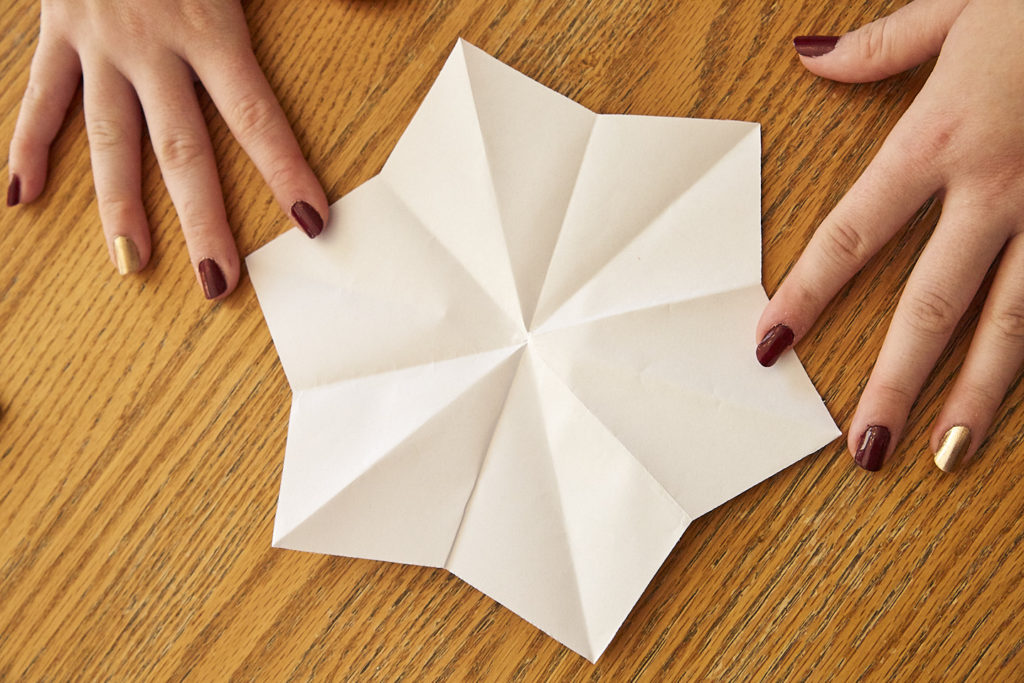
Using your folding guide, lay the folded edge along the line from A to E placing the midpoint of the edge at point E (this, of course, can be any of your lines, I just picked one randomly). Your paper should not cover the middle of the circle, but rather, extend outside of it.
Fold your paper forward from point E along the line from C to E that extends past the circle. Be as accurate as possible and crease well.
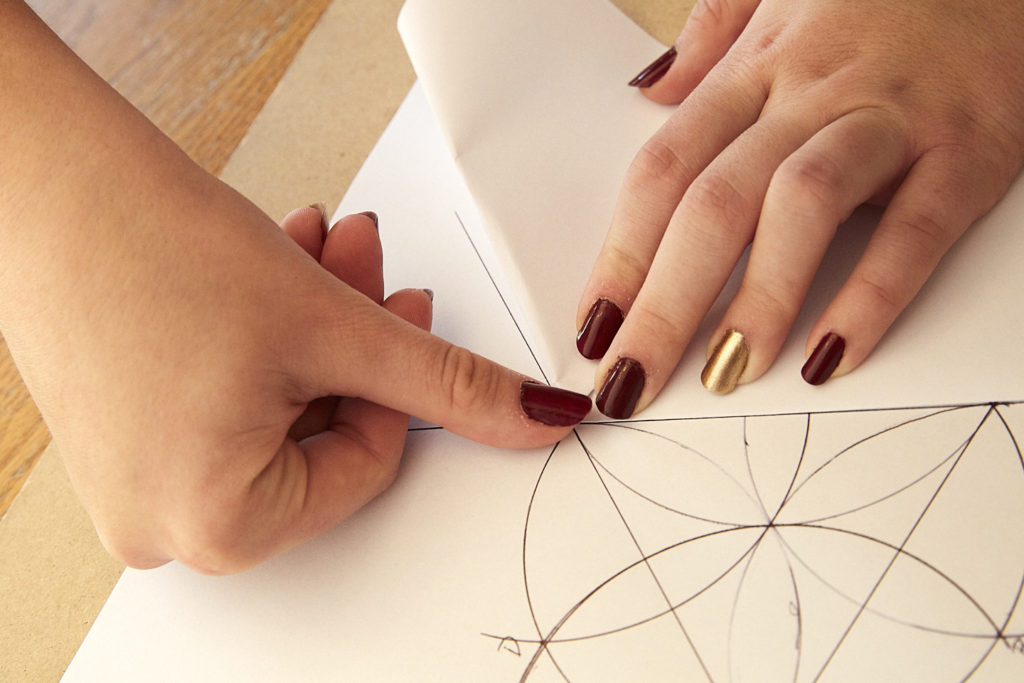
Keeping the midpoint of your first folded edge at point E, swing your paper into the circle until it aligns with line CE.
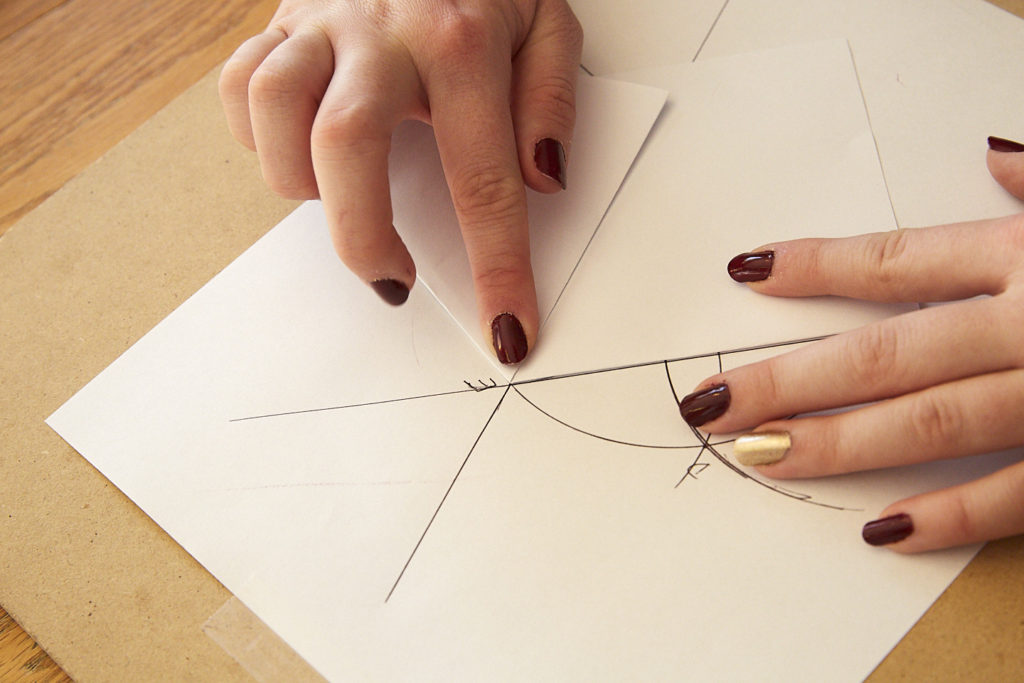
Fold the paper forward again along the line from A to E. Your folded edges should all match. Your paper will now be accurately folded into thirds.
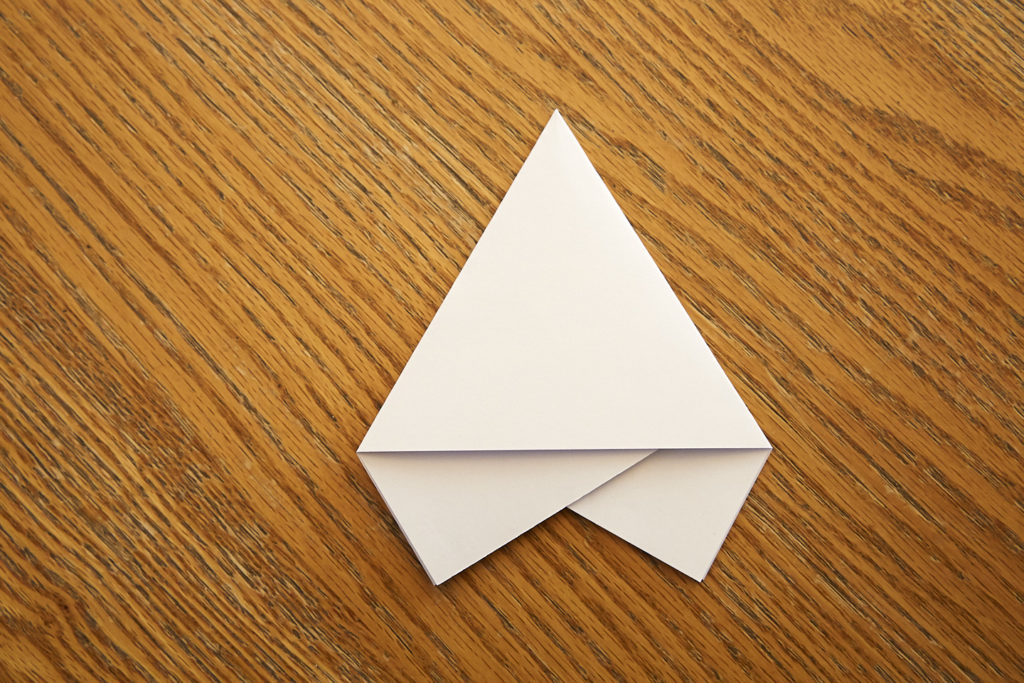
If you turn your paper over, it will look like a regular triangle with smaller triangles extending below—like an upside down heart or a little like the Starfleet insignia.
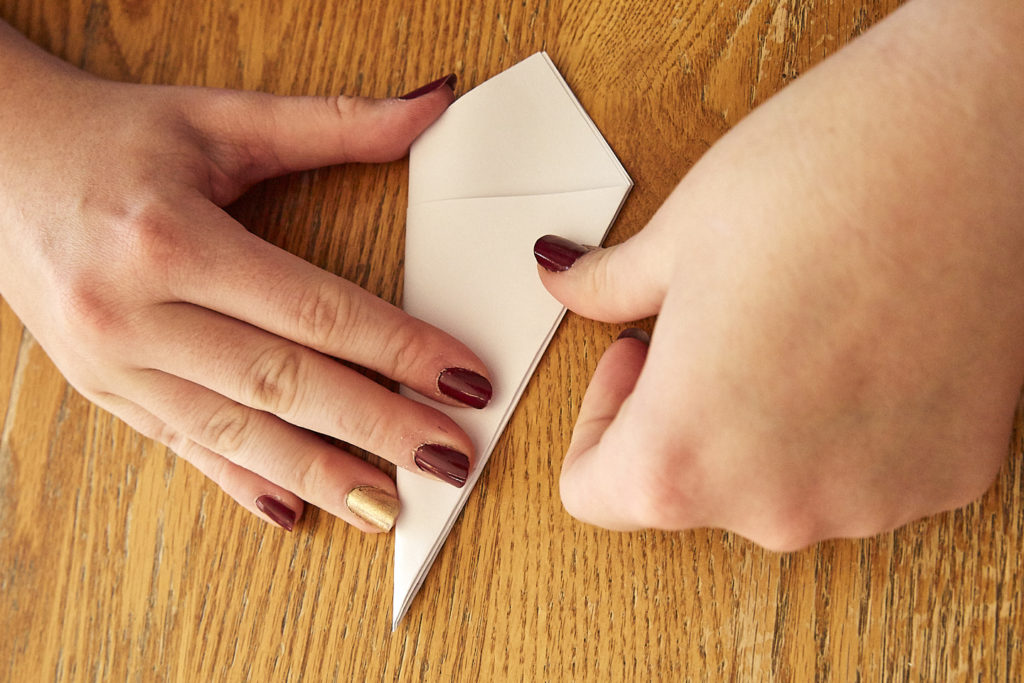
One more fold and you’ll be ready to create your snowflake! With the excess paper at the bottom, fold the paper in half one more time (forward or backward, it doesn’t matter), matching the folded edges of the triangle and creasing well.
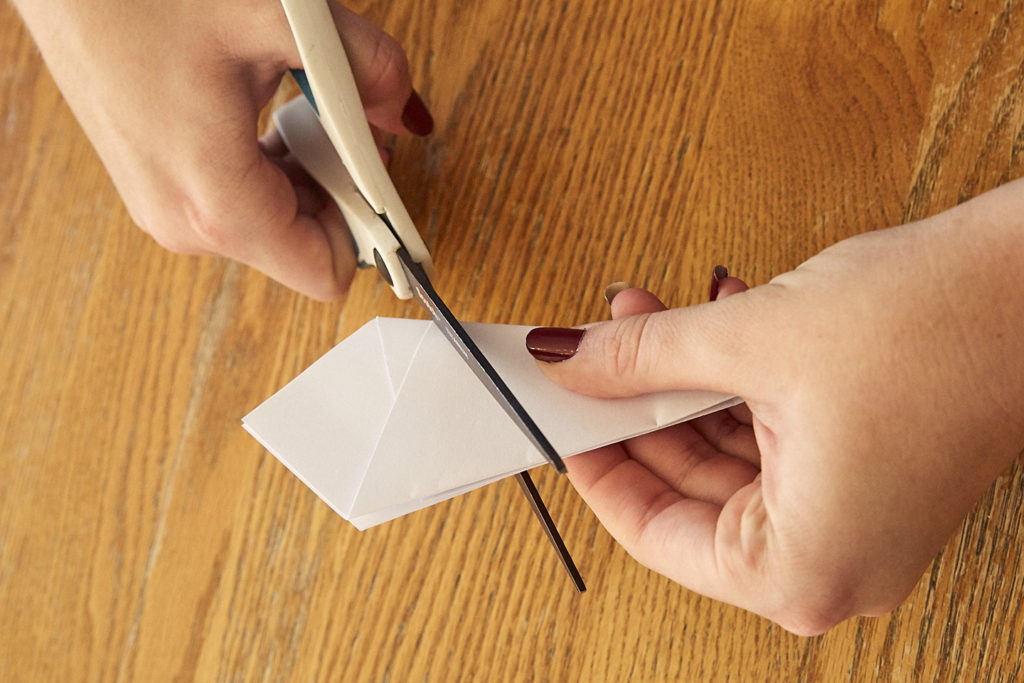
Cut from one side to the other at any angle you like to remove the excess paper and create the basic shape of your snowflake.
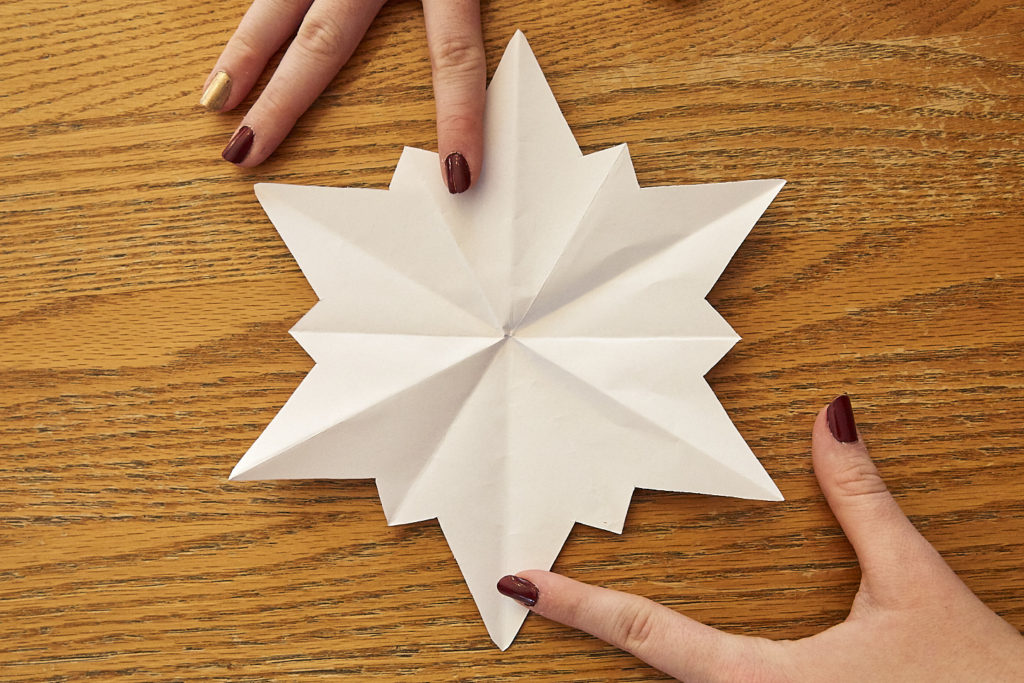
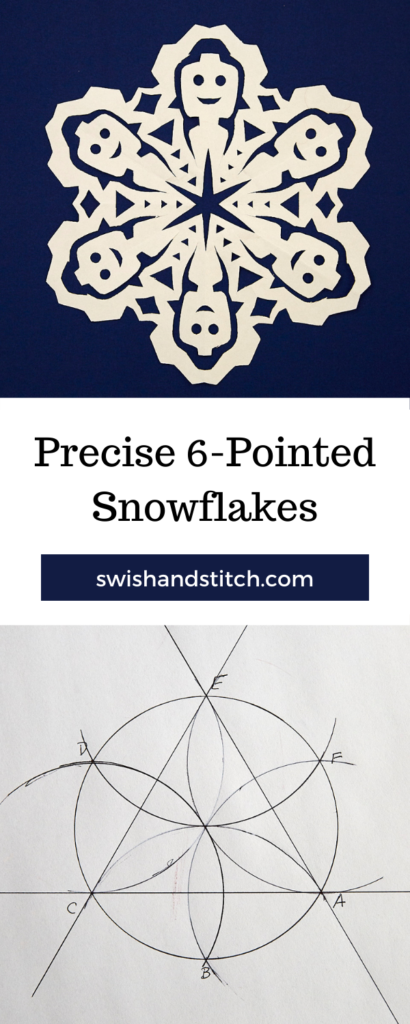
This is what JMoney’s looks like unfolded.
As you can see it’s a 6-pointed snowflake and as accurate as can be.
If you want a 12-pointed snowflake, you can trying folding your paper in half once again, but at this point it gets super thick and hard to fold and cut. Instead, just cut a V-shape instead of the angled cut for the 6-pointed snowflake. You can cut your V evenly or offset, as JMoney has done here.
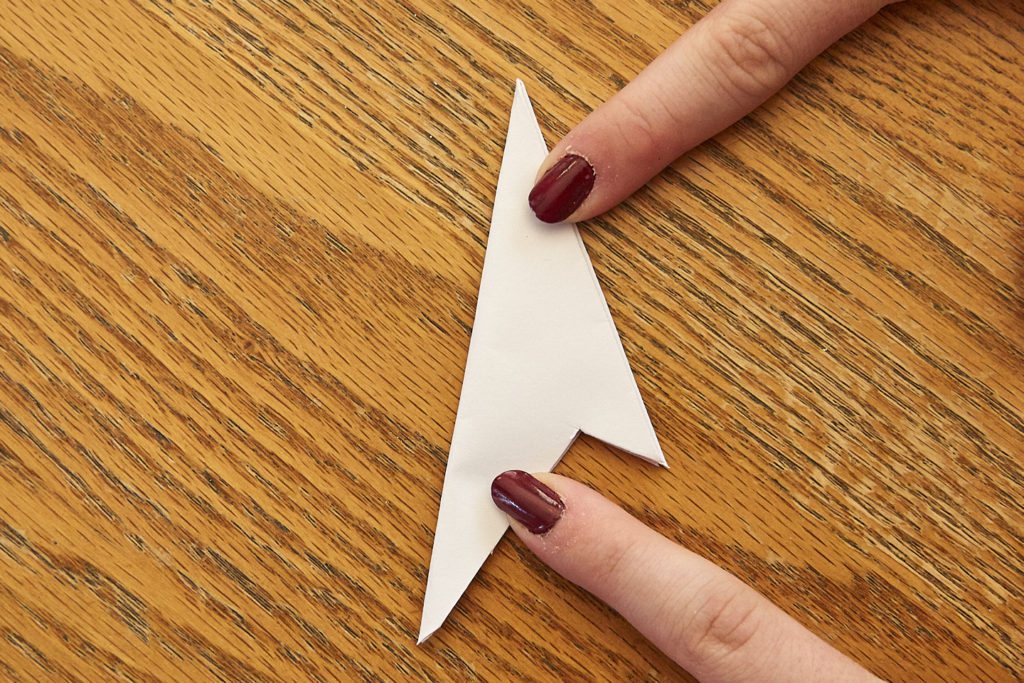
Now it really looks like the Starfleet insignia. Unfolding it, you might get something like this.
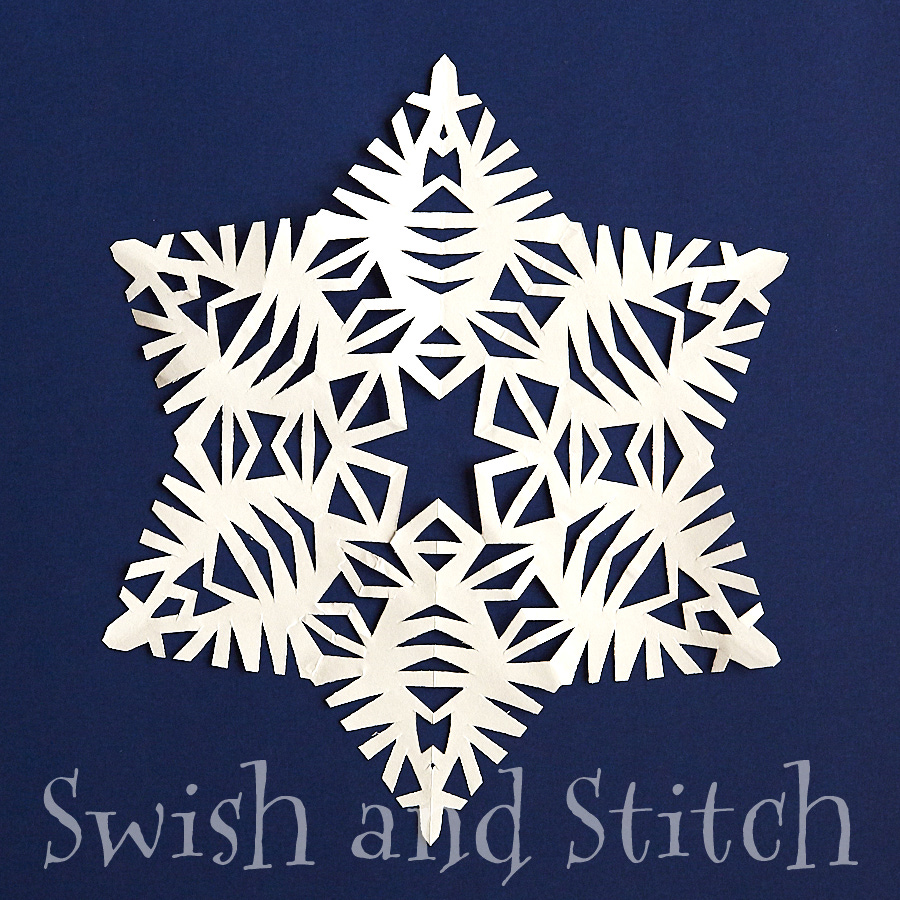
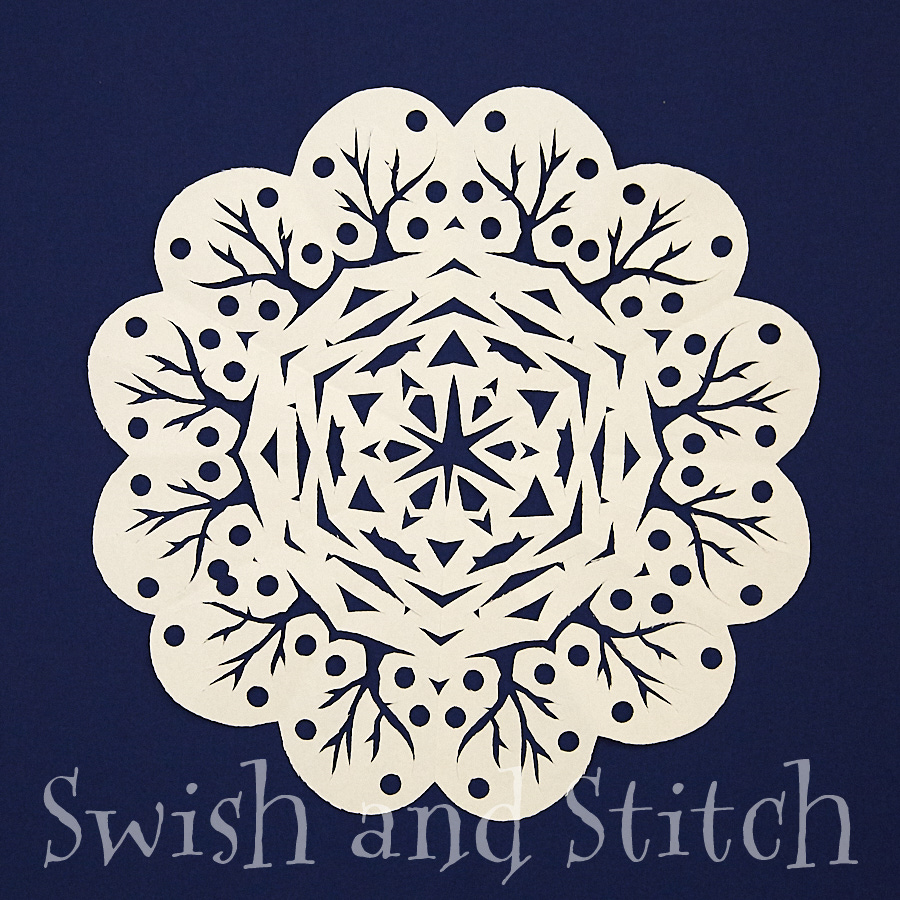
Refold your paper (if you unfolded it to have a peek) and cut designs into your paper as desired. Here is the finished 6-pointed snowflake.
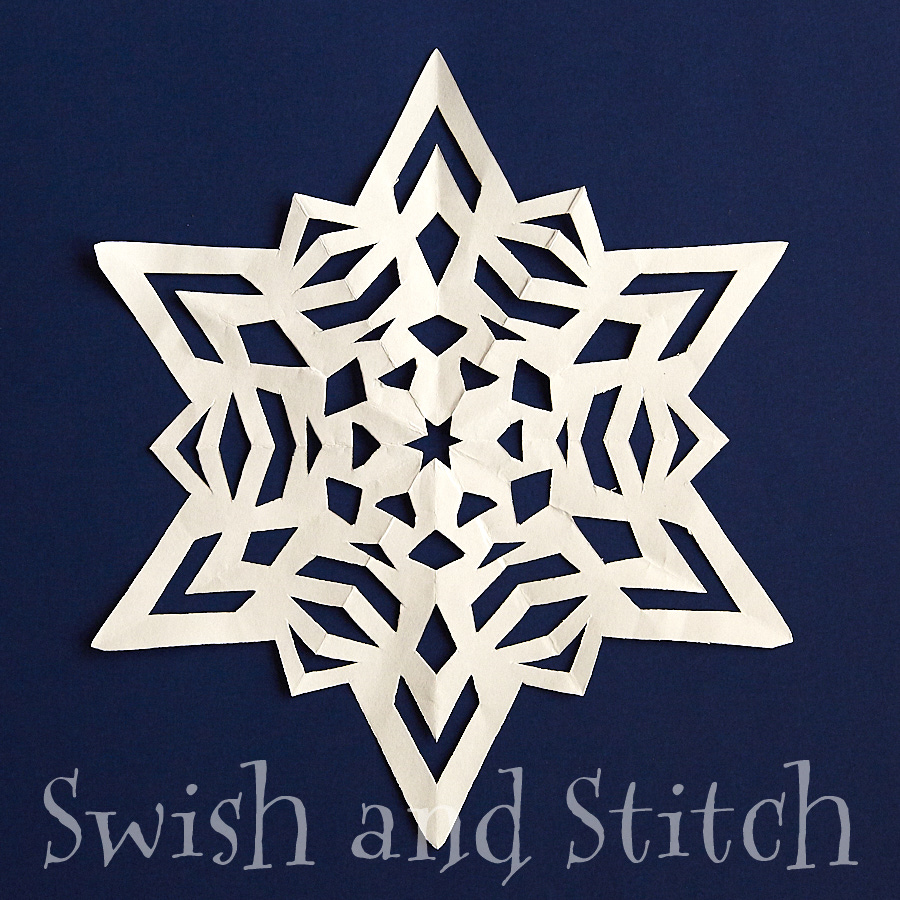
Not bad, huh? The more cuts you make and the more paper you remove, the lacier your snowflake will look. Just be careful not to cut through from one side to the other, or you’ll cut your snowflake in two.
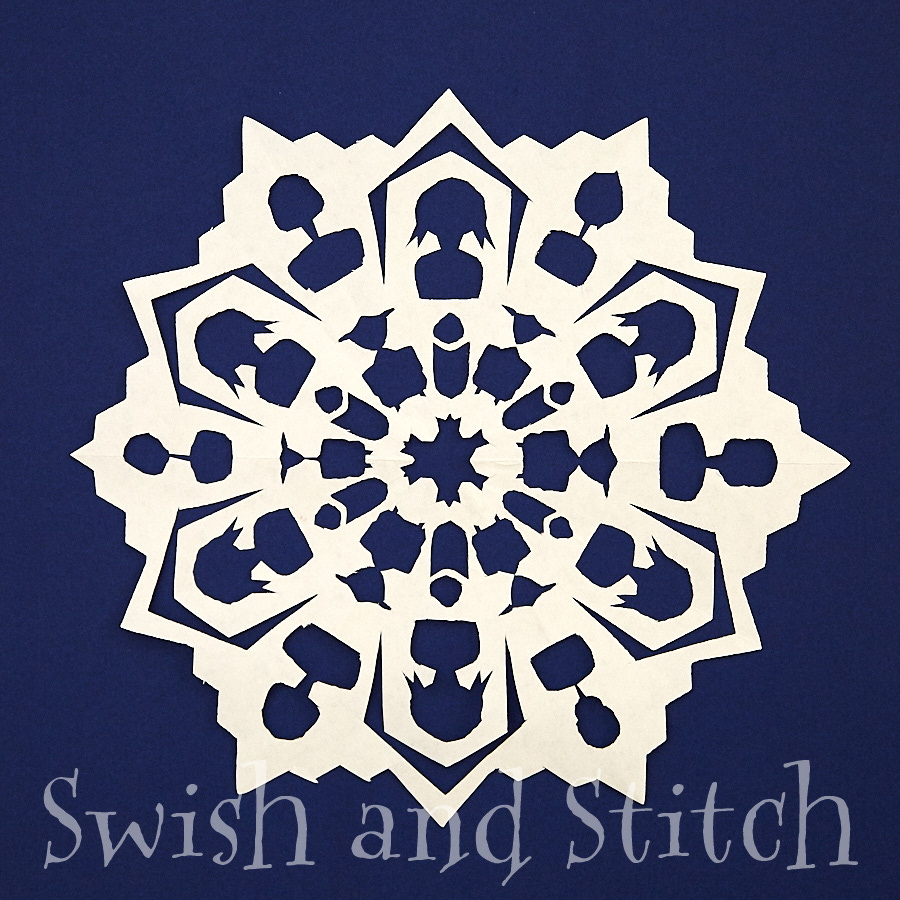
That is about as intricate as my snowflakes get. Or maybe this.
As I said earlier, HDawg is the true master. She’ll even draw designs on and use an exacto knife to create hers. It takes real talent to be able to visualize what you want and then draw just half of it on a fold, but HDawg does it!
The 6-Pointed Snowflake Gallery
Here are a few of HDawg’s snowflakes that I’ve saved over the years.
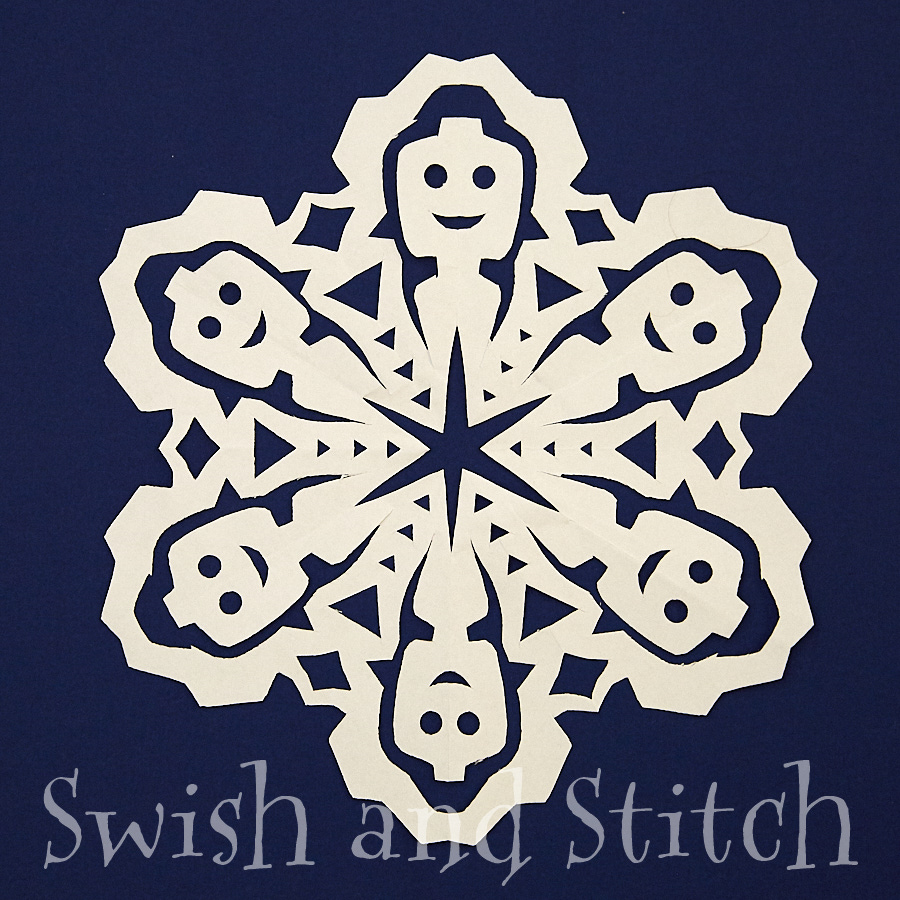
Frosty
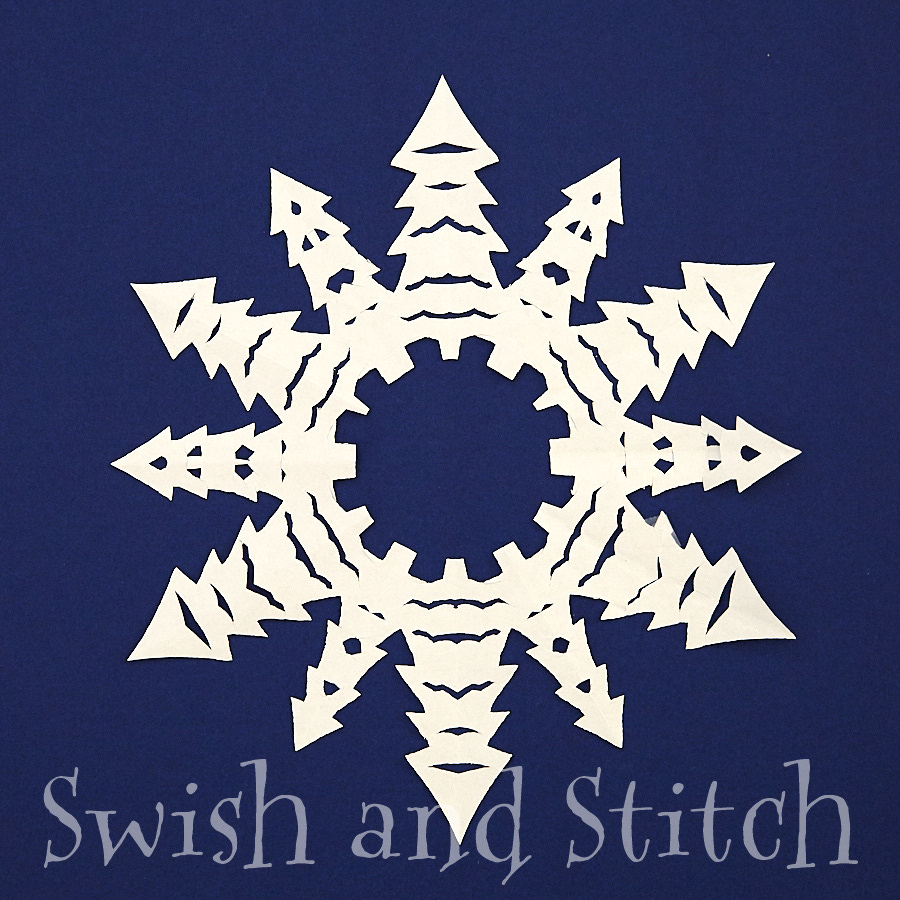
Oh, Christmas Tree!
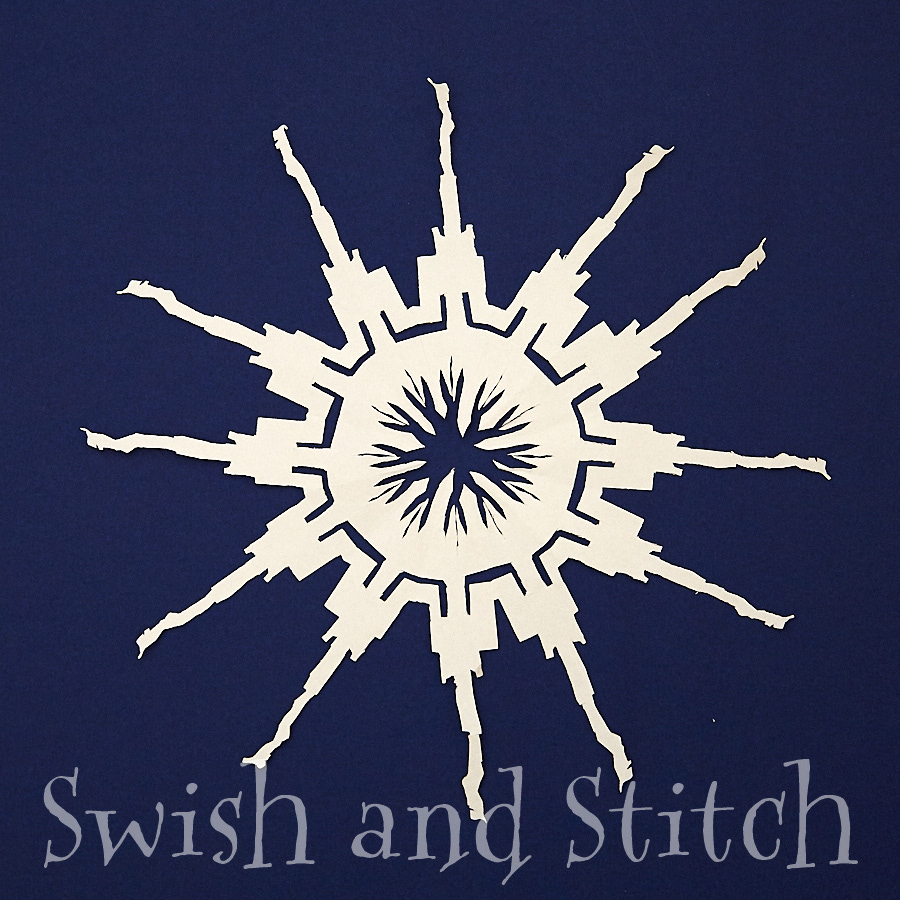
Denver, Colorado LDS Temple
Snowglobe
And . . .
Wait for it . . .
This is the snowflake TMan challenged her to make this year.
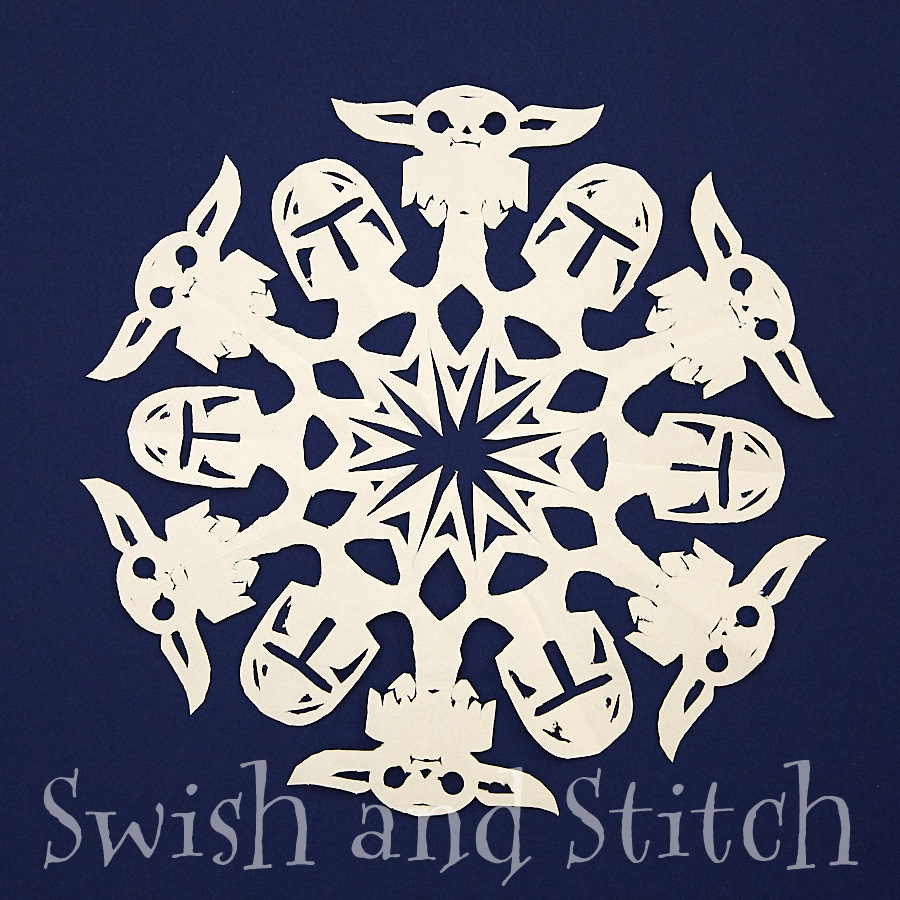
Baby Yoda and the Madalorian
Yep. Baby Yoda, er Grogu, and the Mandalorian. Amazing!
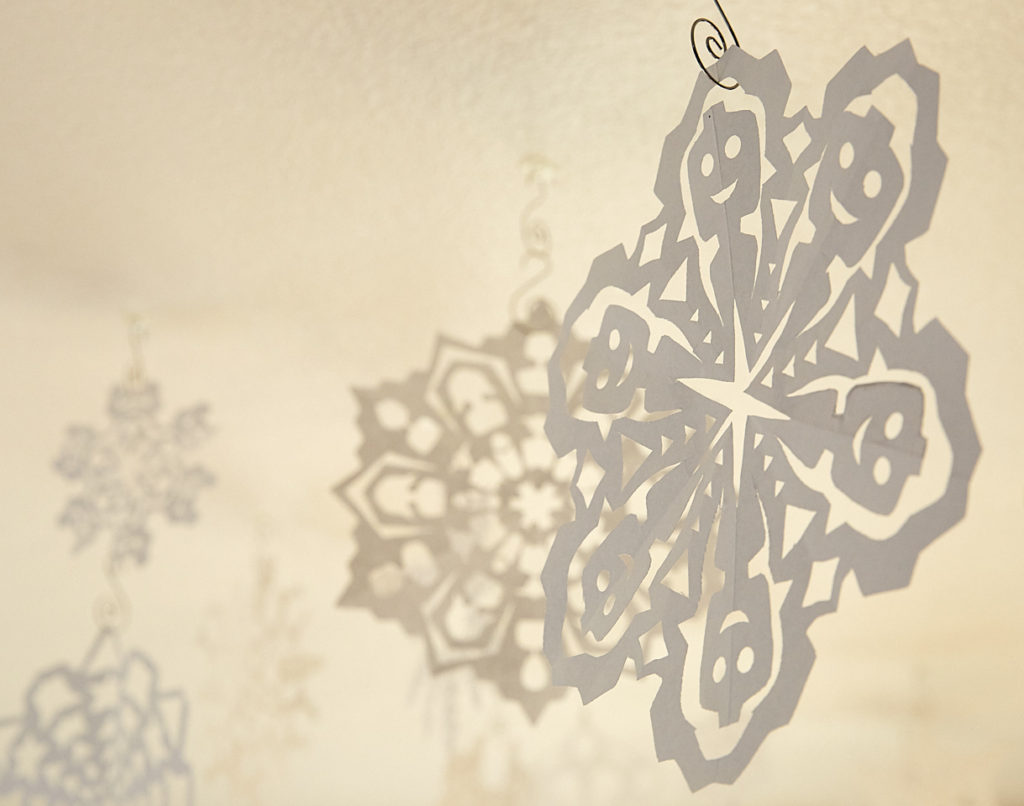
Paper snowflakes are quick and easy to create and a fun way to decorate during the winter. I like to hang mine from the ceiling. I use small clear Command hooks on the ceiling and s-shaped ornament hooks. They’re kind of a hassle to untangle every year, but they’re nicer looking than the standard green wire-covered hooks.
So the snowflakes don’t all end up at the same height, I like to chain together multiple hooks or hang one snowflake from another.
There you have it! A simple way to create precisely-folded, 6-pointed snowflakes.
What snowflakes would you like to see HDawg create next? Post your ideas and I’ll talk her into cutting one or two.
~ Lucinda


")


I LOVE the baby yoda snowflake! These are so cool!!
Thanks! I bow to my daughter’s patience and creativity as a snowflake genius.
Great job! This was so neat to read & look at!
Thank you! Math, snowflakes, and photography – a win all around!
Those snowflakes are really pretty.
Thanks for showing me how to make them!
You’re welcome! It’s always fun to sneak in a little math.
I could try to do this a million times and it still wouldn’t look this good. This is remarkable and takes some scissor skills for sure. WoW!
I’m with you! That’s why I recruit my daughter to create them and then save them from year to year.
Wow, these are beautiful! I’m going to see if my husband can help my boys do some of these.
I’d love to see what they come up with!
Amazing!! I have always wondered how people could get them so perfect! Thank you for sharing!!
Precise folding and lots of patience is the secret. I’m so glad my daughter can do both!
I’m impressed! I can’t wait until my kids get older to make some of these.
I hope they enjoy it! Snowflakes are an easy and cheap way to decorate in winter.
wow, these are super professional looking
Thanks! HDawg does a great job.
Wow, this is a great tutorial! So awesome!
Thank you! It was fun to make it with my daughters.
Wow! These are incredible!. Thanks for the awesome instructions!
Thanks so much! The technical writing class I took in college is proving to be useful.
I can see why you save them! Beautiful pieces of paper art!!
I love pulling them out each year! Especially now that HDawg has left home.
Cool tutorial, thanks!
It was fun to make!
Wow, such talent! Her snowflakes are beautiful.
Aren’t they? I can’t bear to throw any away!
What a great (and fun) tutorial! These are amazing snowflakes!
Thank you! I can’t pick a favorite.
The baby Yoda one is fantastic!!
I love it too! Now I just need to talk her into cutting a Harry Potter one for me.
These are beautiful! And I’m in awe of your daughters patience.
Me too! I’m glad she’s so willing to make new ones each year.
This is great!
Thanks! I’m glad you enjoyed it.
Oh my gosh! Those are AMAZING! Baby Yoda and Mando are insane! Pinning this for the future….as if I have half that talent. Ha!
I know you feel! I’m hoping to get HDawg to make a video tutorial when she comes home for the summer and maybe add a Baby Yoda template. He seems to be popular.
How fun! I haven’t made paper snowflakes in so long and my snowflakes have never been this intricate! thank you for sharing.
You should cut some, though it definitely takes patience to cut the artsy snowflakes that my daughter enjoys!
These are the cutest snowflakes!! I have never thought about those characters or shapes within the snowflake. Your demo is very easy to follow. I better get cutting!
You can cut anything in a snowflake! HDawg made a rose one this year that she taped to her apartment door.
I think I might have to do this with my grandson next time he’s here. It looks fun!
I hope he enjoys it! I always loved geometry and constructing shapes with just a pencil and compass. And cutting snowflakes can jut be relaxing and fun.
This looks like a cool art project for homeschool this week! Thanks!
And January is the perfect time of year for snowflakes!
Those look so fun!!
Thank you! We love making new snowflakes each year!
This is awesome. The perfectionist in me can really appreciate it 🙂
Sometimes perfectionism is a trial and sometimes it’s a definite plus! Maybe constructing a triangle is a little over-the-top, but it makes folding paper in thirds a breeze!