Some of the links on this site are affiliate links. I make a small commission from sales when you click through the link. There is no additional cost to you.
This article was originally published on www.happilyeveraperture.com but has found its new home here. Please repin if needed to bookmark this page.
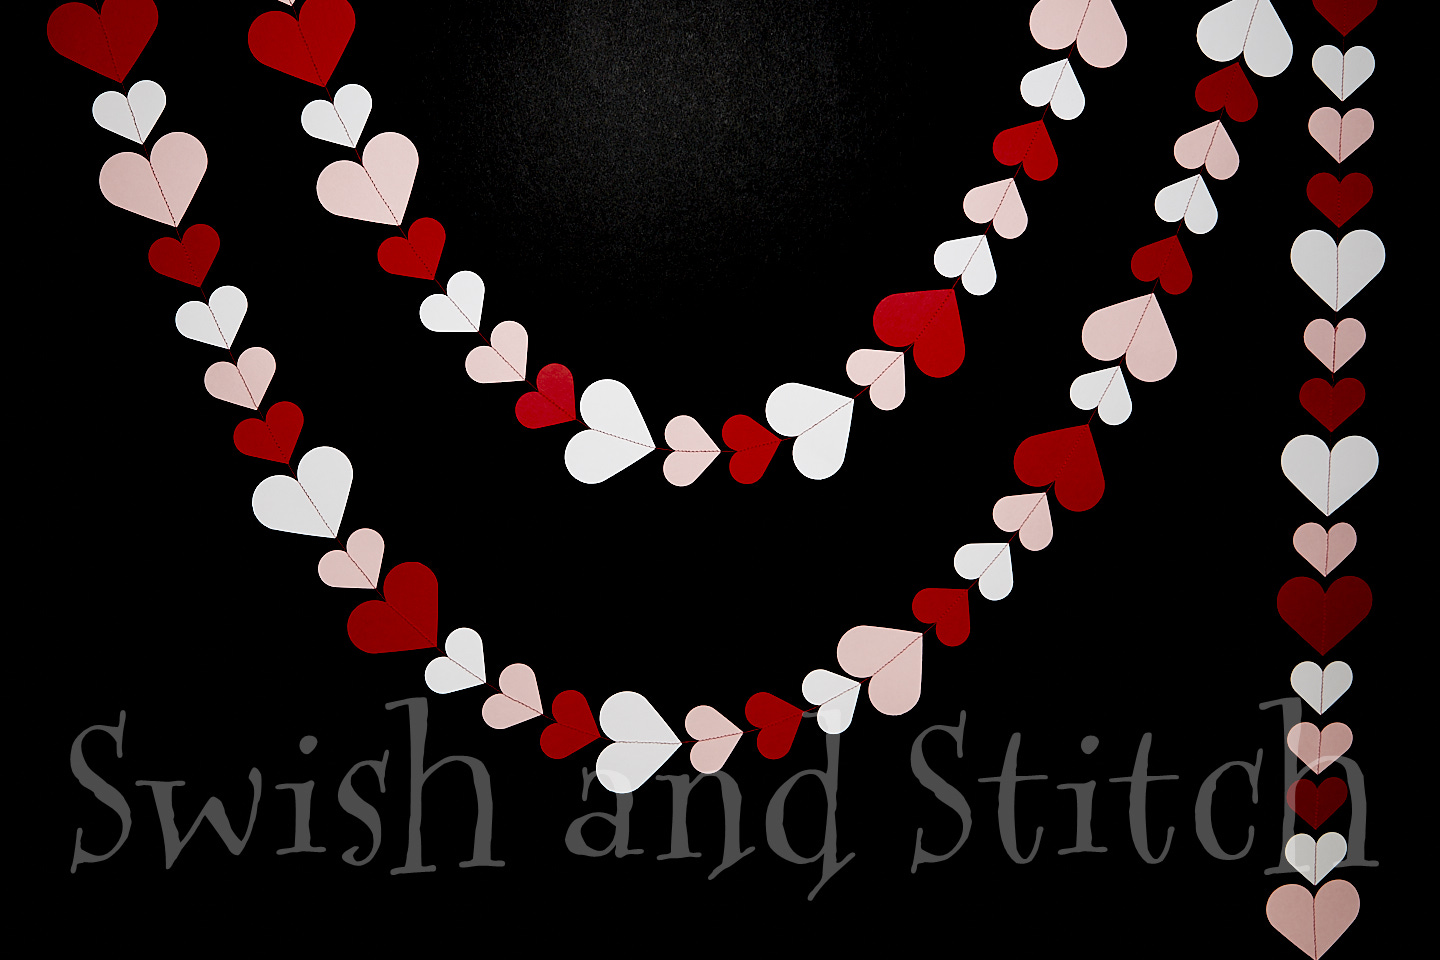
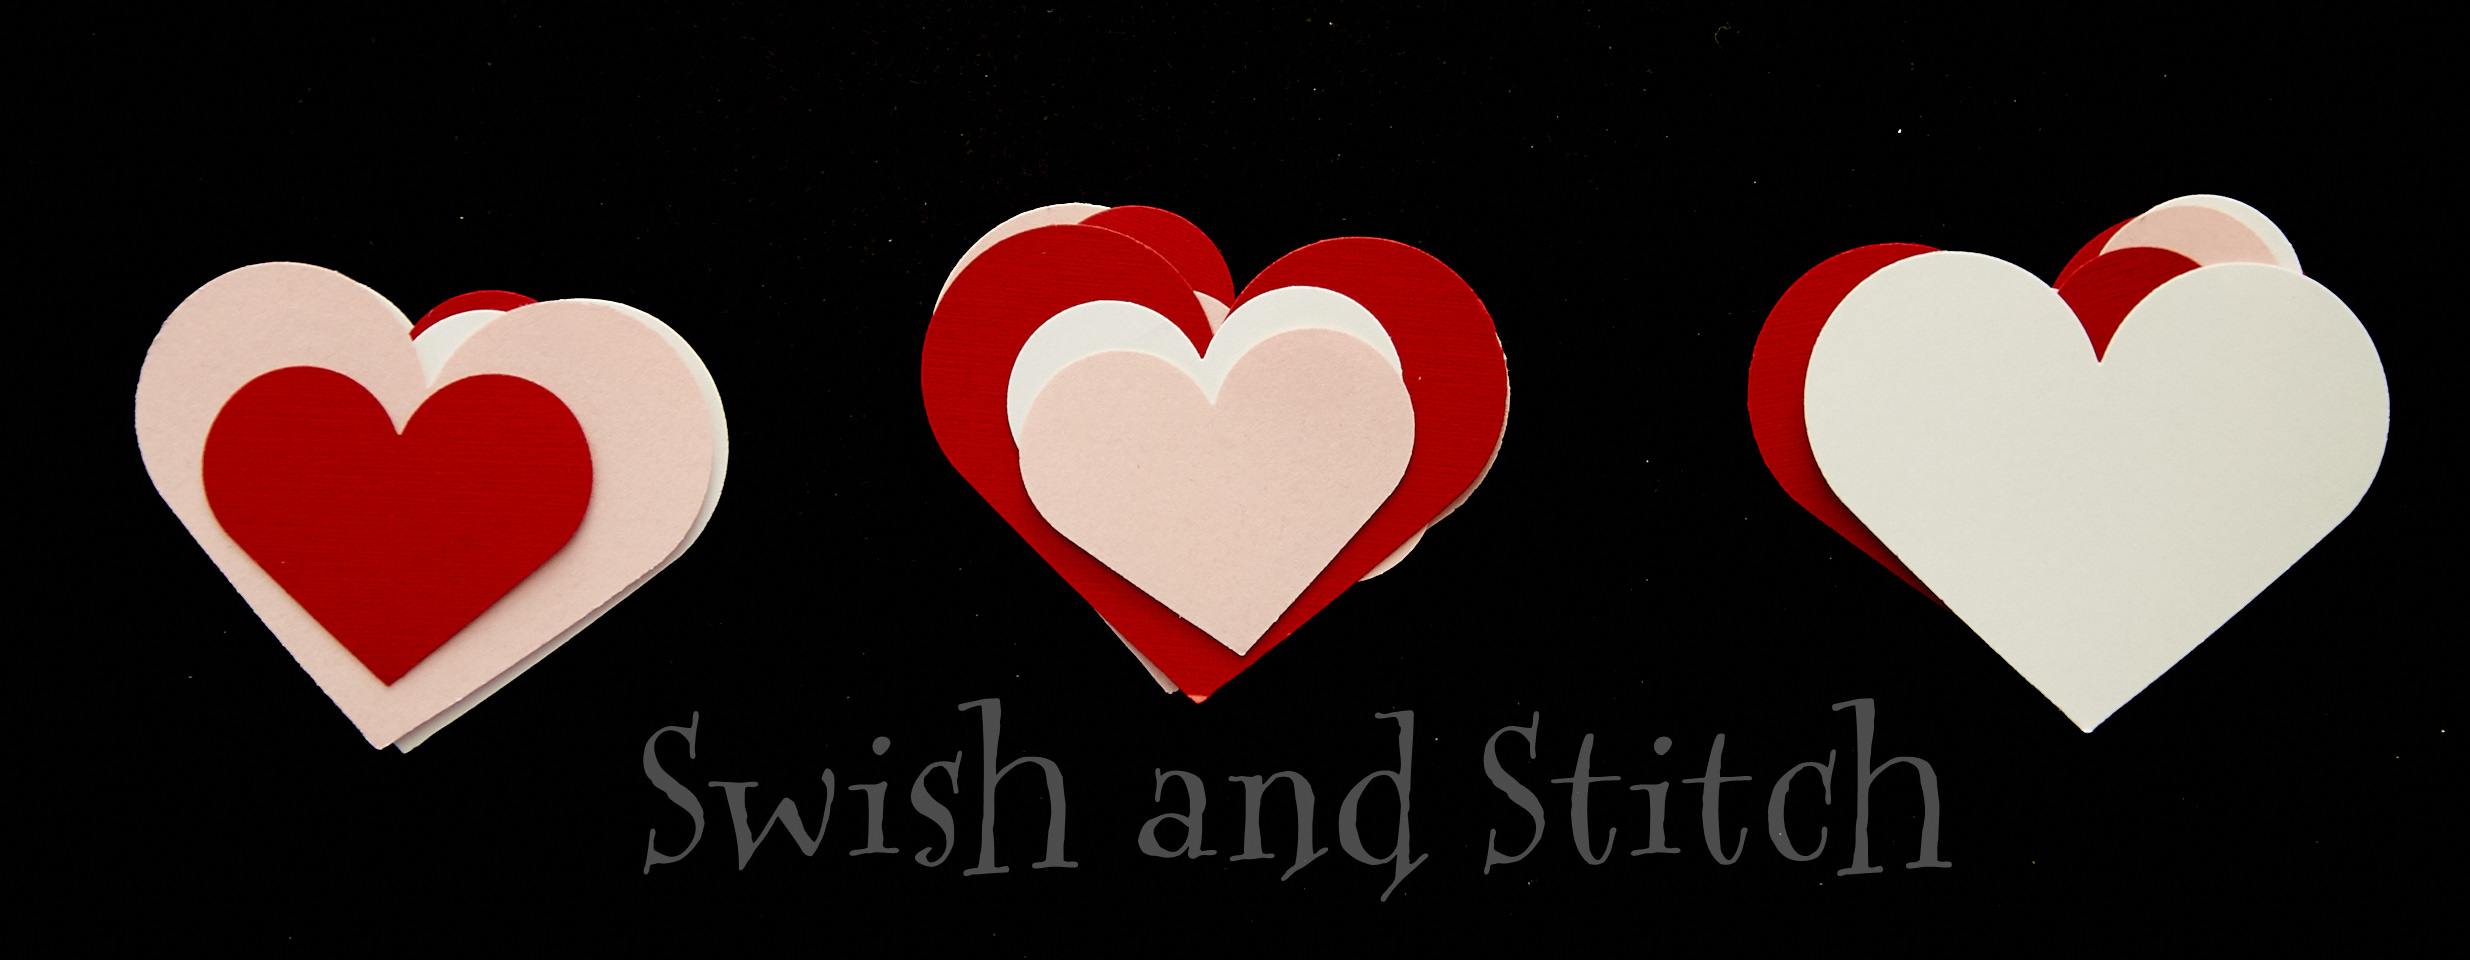
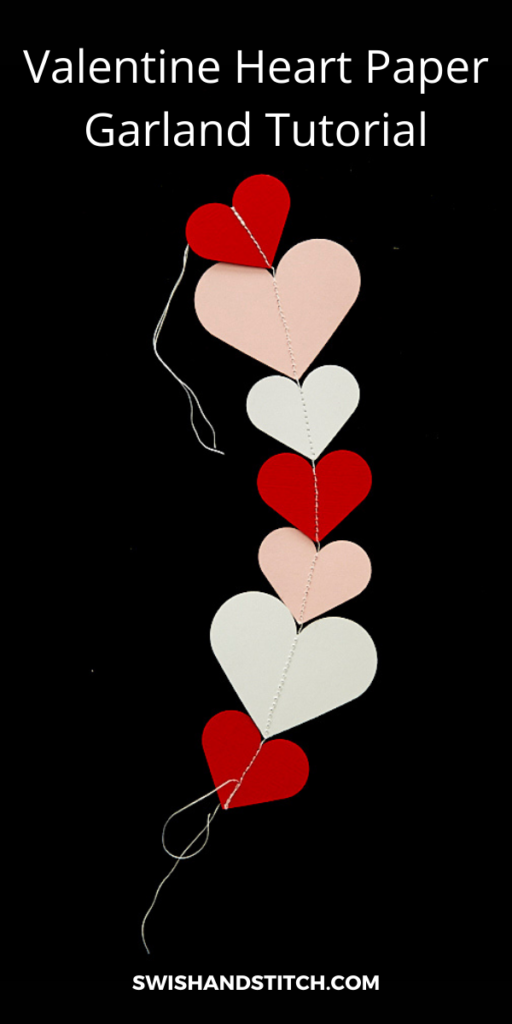
Valentine Heart Paper Garland
If you’re anything like me, you know a holiday is approaching, but it still feels so far away so you don’t plan anything or make anything. Then suddenly, bam, it’s one week away and you’re wondering how to decorate and bake and make it special for your family in the short time you have.
I replay this scenario over and over and over.
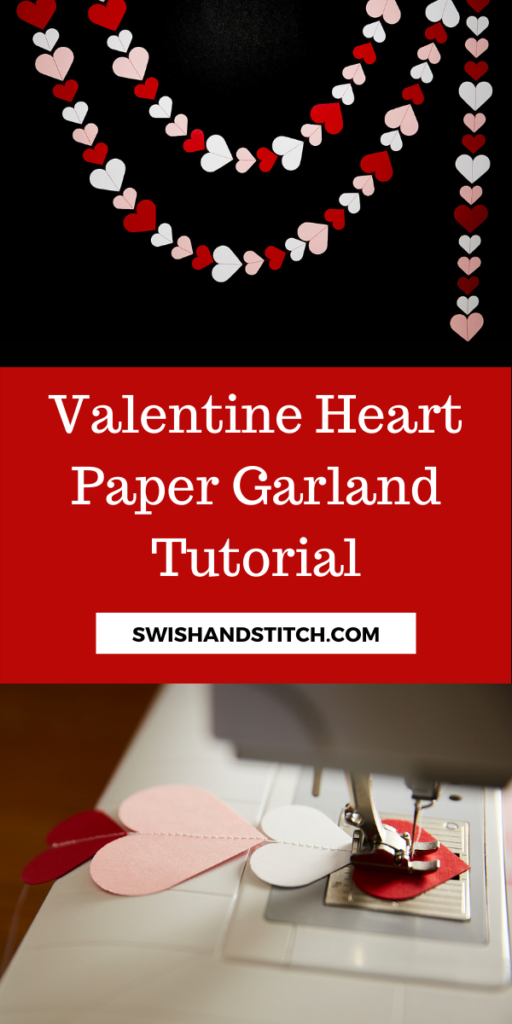
For a super easy decoration that can be adapted to any holiday, I make what some people call “paper garlands,” but I sometimes call “dot banners.” Basically, they’re punched shapes of cardstock, sewn together. The end. They can be swathed across the walls, draped in arcs from the ceiling or across a mantel, or, most often in our house, dangled down like a bead curtain.
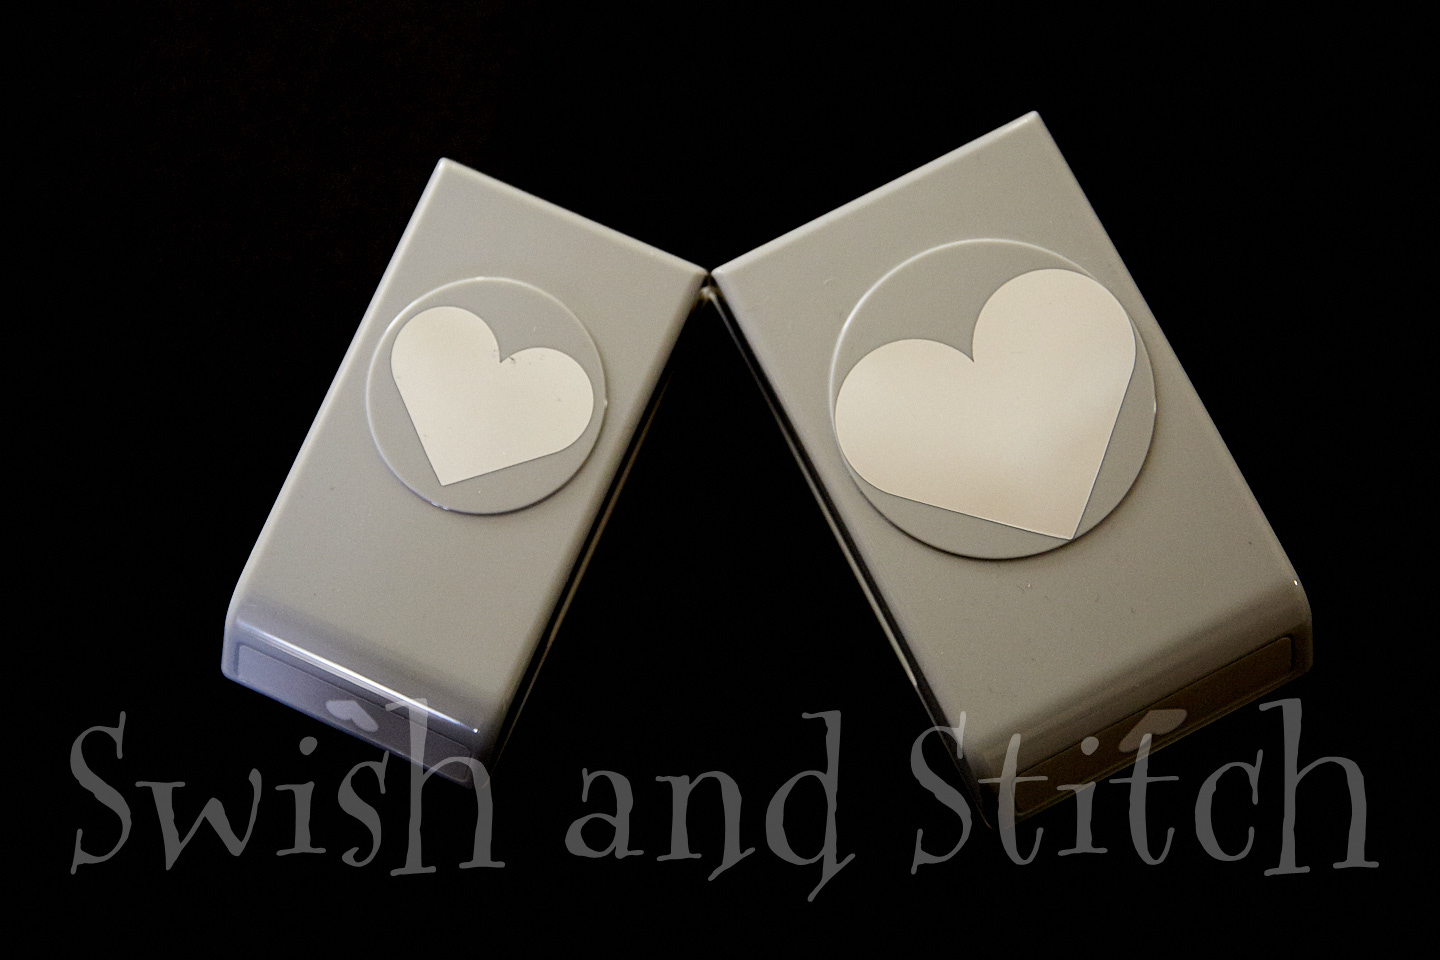
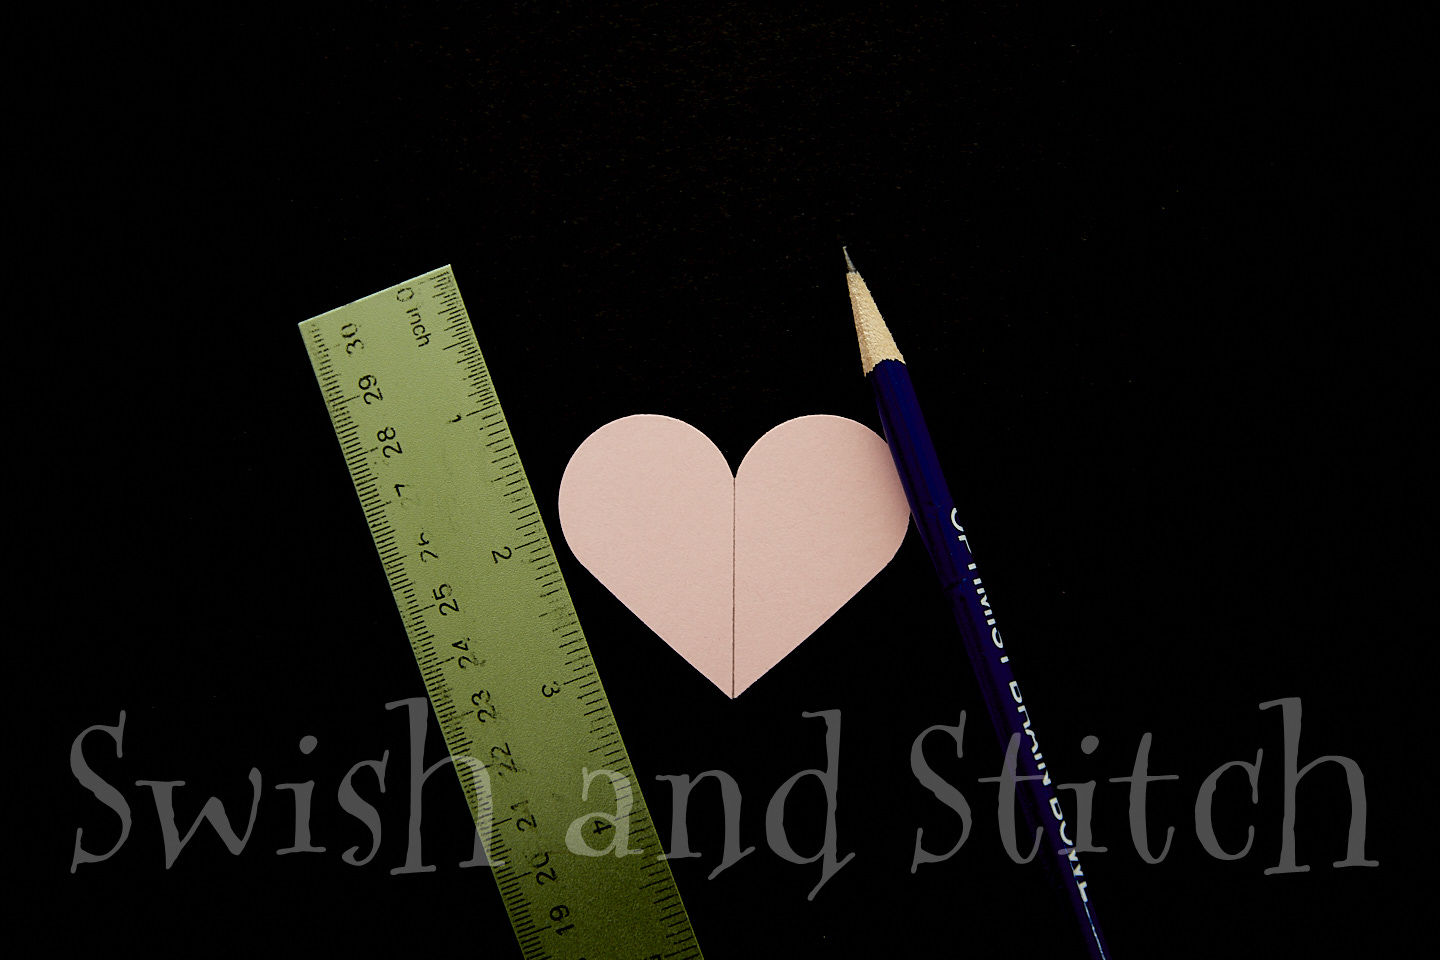
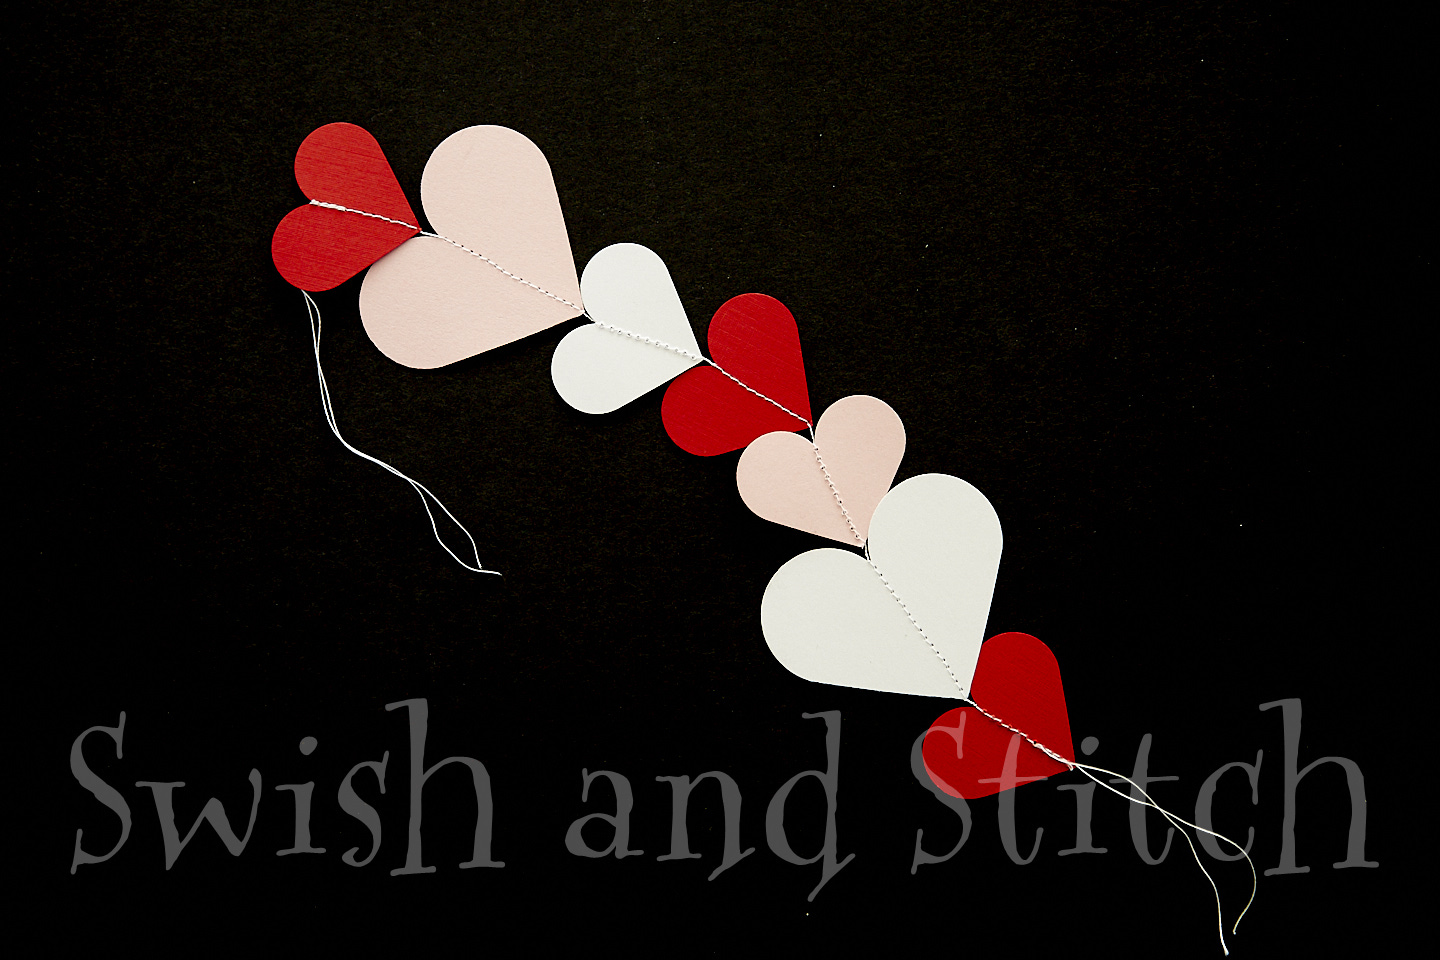
For this Valentine Heart Paper Garland, I used three colors of cardstock: red, pink, and white; and two sizes of heart punches: the EK Tools Classic Heart Punch, and the EK Tools Large Heart Punch. I like the EK Tools punches. They cut cleanly and are flatter that other brands, making them easier to store.
My heart banners are just under six-feet long. I like to tape from an eight-foot ceiling as a curtain. I have chosen to make them all roughly the same length. To mix things up, make them random lengths if you prefer.
Getting Started – Punching Hearts for Banner
To begin, you’ll need to punch a lot of hearts. For each Valentine Heart Paper Garland I punched 42-43 hearts. Set your kids to work on this.
I used a mix of large and small hearts, with 12-13 large ones and the rest small. I chose to use an orderly pattern for the colors of hearts. I interspersed large hearts with small ones in a random pattern. Basically, I just did what seemed aesthetically pleasing.
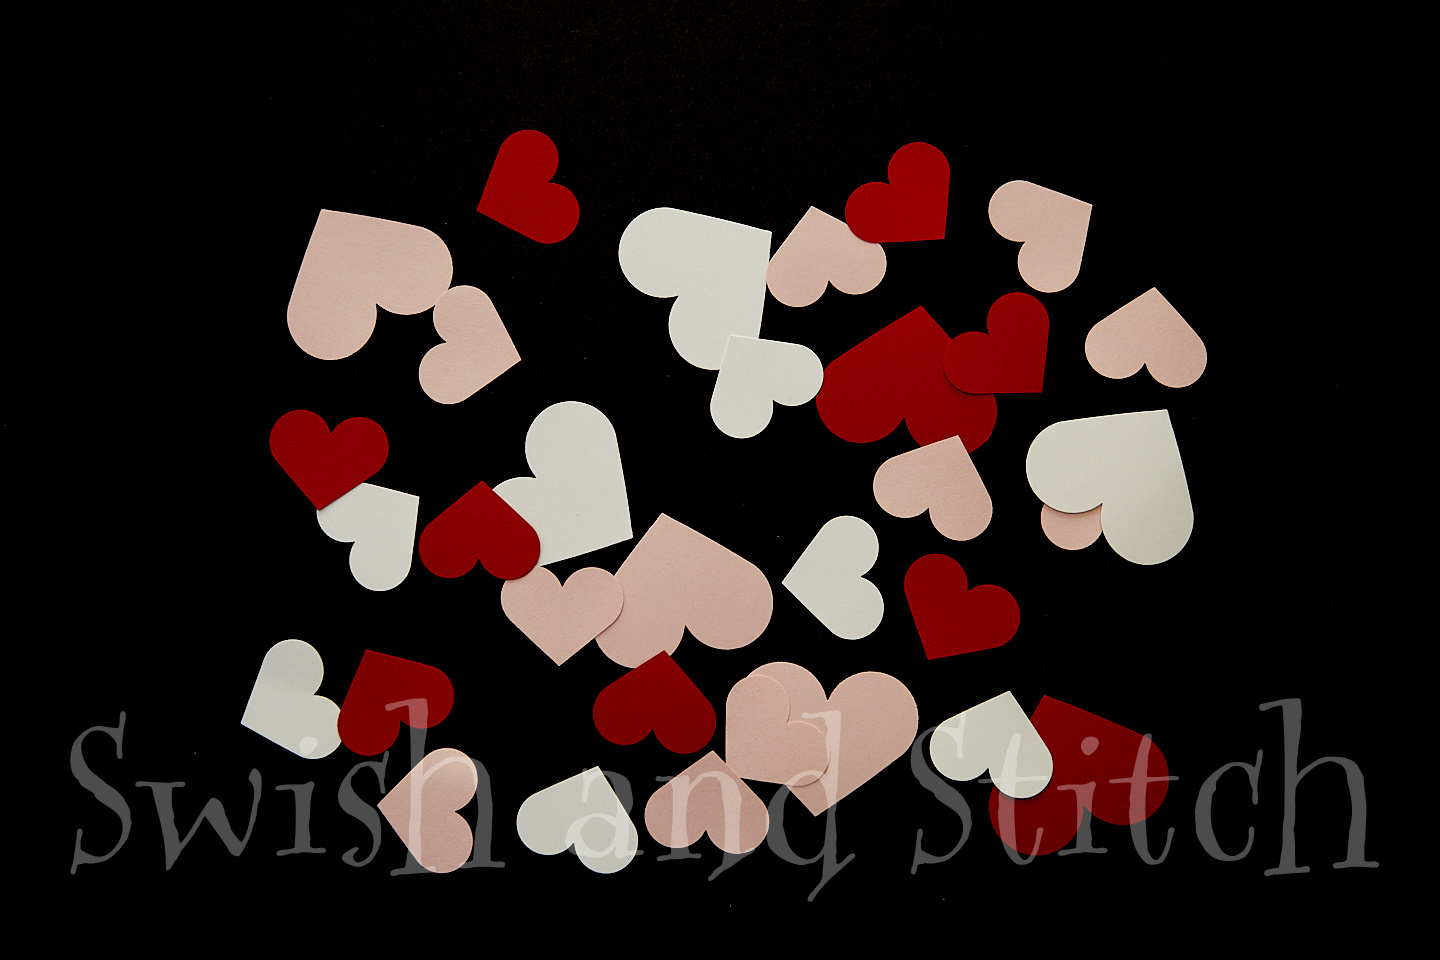
I know this sounds like a lot of hearts to punch, but it is still really quick. I timed it today. In three minutes I punched 56 hearts—more than enough for one six-foot banner. So quick! Anyone has time to make one these.
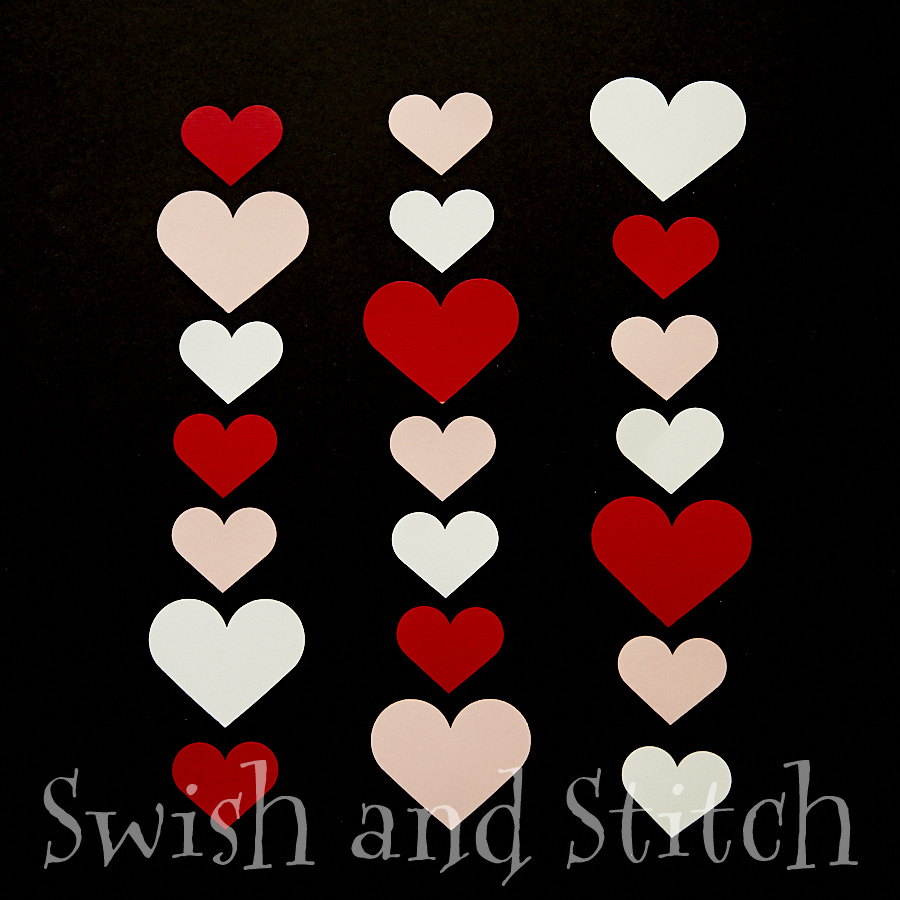
Once you’ve punched a bunch of hearts, lay them out in the order you want to stitch them. I chose a red/pink/white pattern for the first garland, then a pink/white/red pattern for the second, and a white/red/pink for the third. Continue like this for any additional garlands.
Ready, Set, Sew!
To prepare to sew, I stack all the hearts for one garland in a pile with the first heart on top and the last heart—you guessed it—on the bottom.
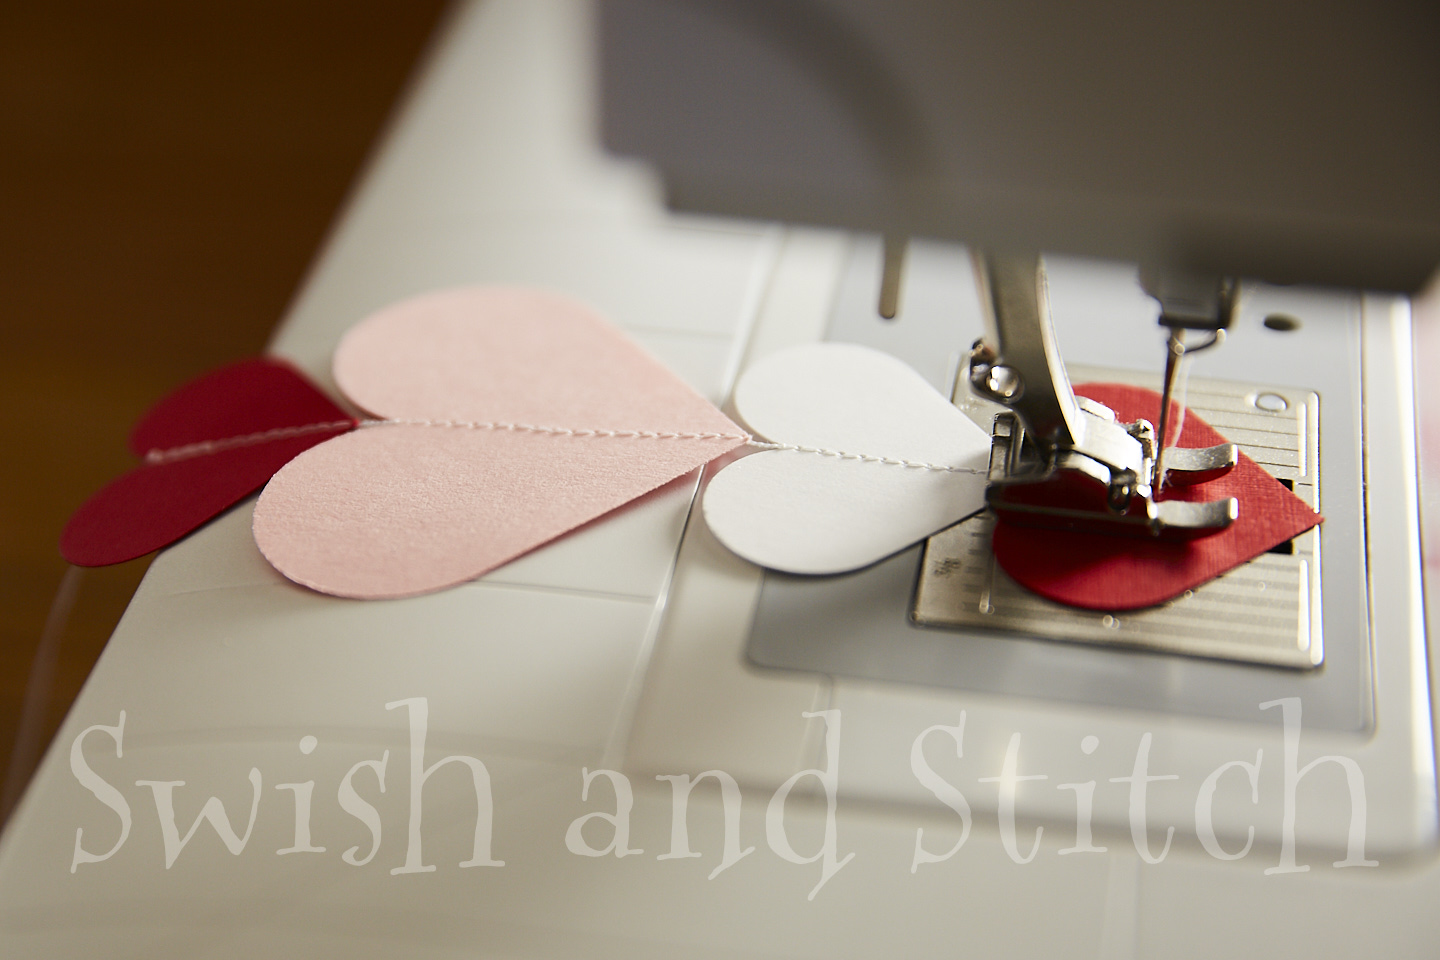
Now the fun part—sewing them together. Anyone who can use a sewing machine can sew this Valentine Heart Paper Garland.
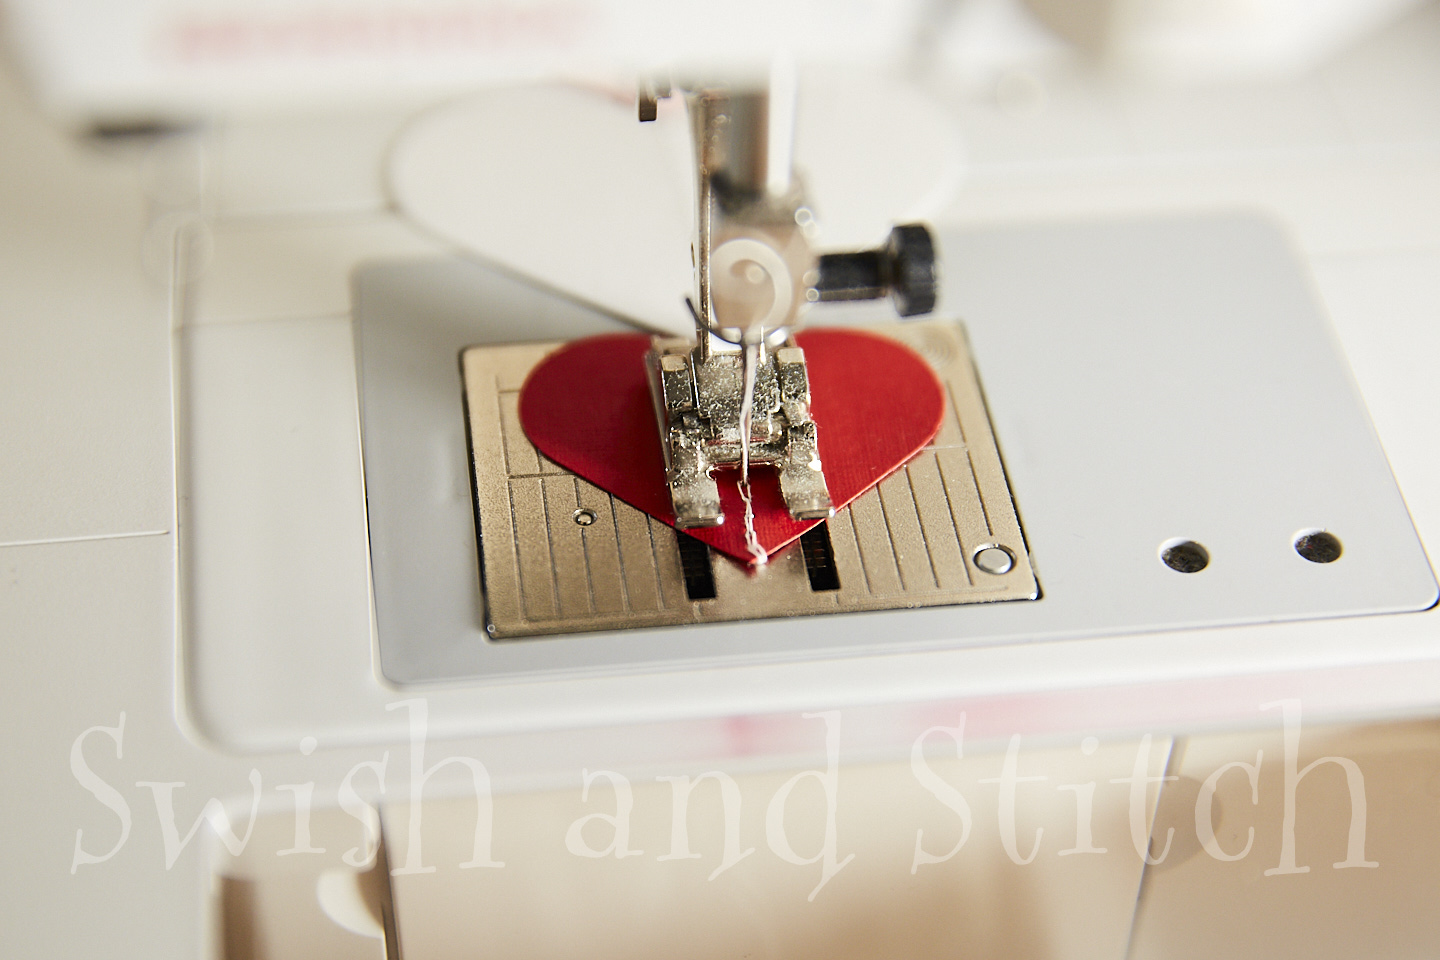
You’ll want to lock in a few stitches at the beginning and end of your banner. To do this, take four or five forward stitches, backstitch over them, and then begin stitching the banner.
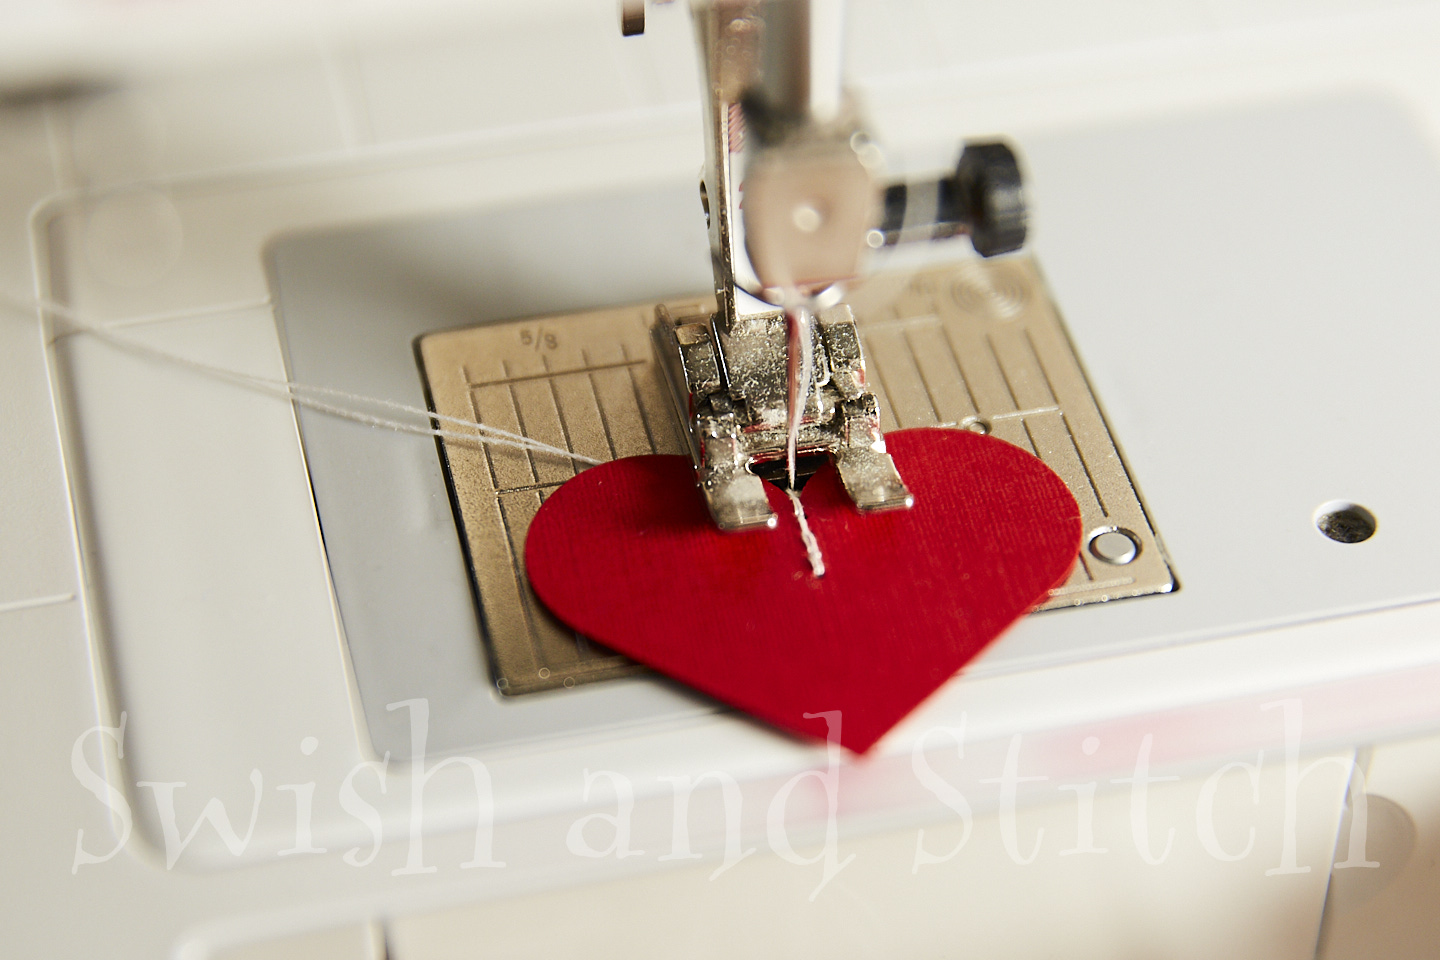
When stitching across a heart, I start at the top and make sure the bottom point of the heart is in line with my needle. You could draw a line across each heart and stitch right on the line if that is easier. I tend to just eyeball it.
When you reach the bottom point, stitch right off the end of the heart and take a few extra stitches (these are called chaining stitches) without any paper under the needle. Chaining stitches allow each heart to hang freely.
Then, with the needle down, lift the presser foot and insert a new heart, abutting it up against the needle.
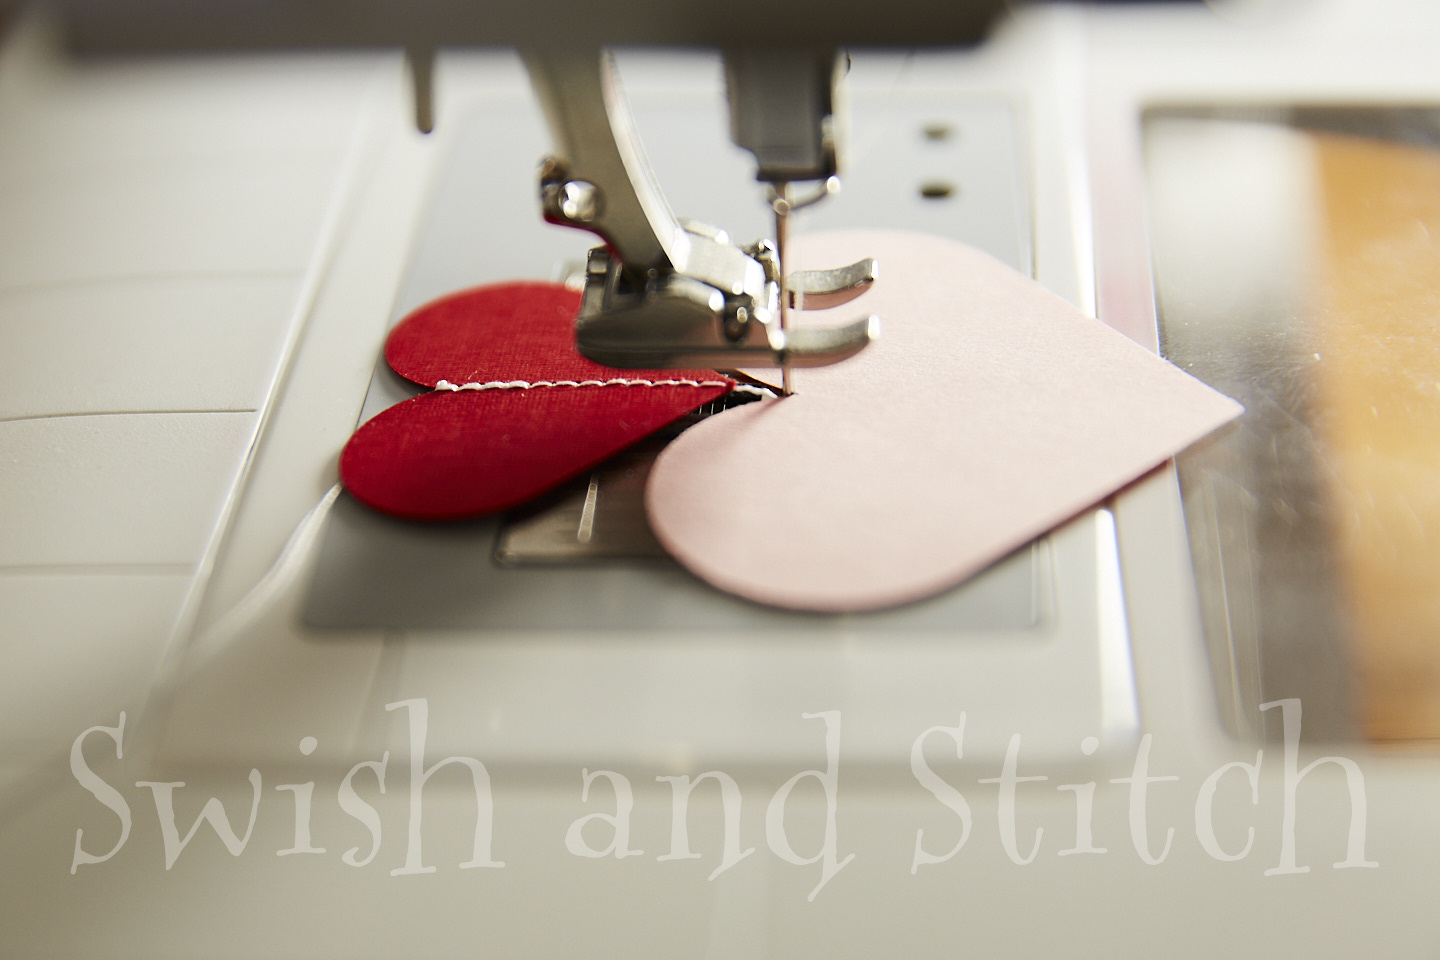
Stitch across the second heart, chain a few stitches, insert the next heart, and repeat.
When adding your last heart, you need to lock in a few stitches at the end of the heart to secure the thread. To do this, stitch across the last heart to the very end, backstitch four or five stitches, then stitch forward once again to the end and off the heart.
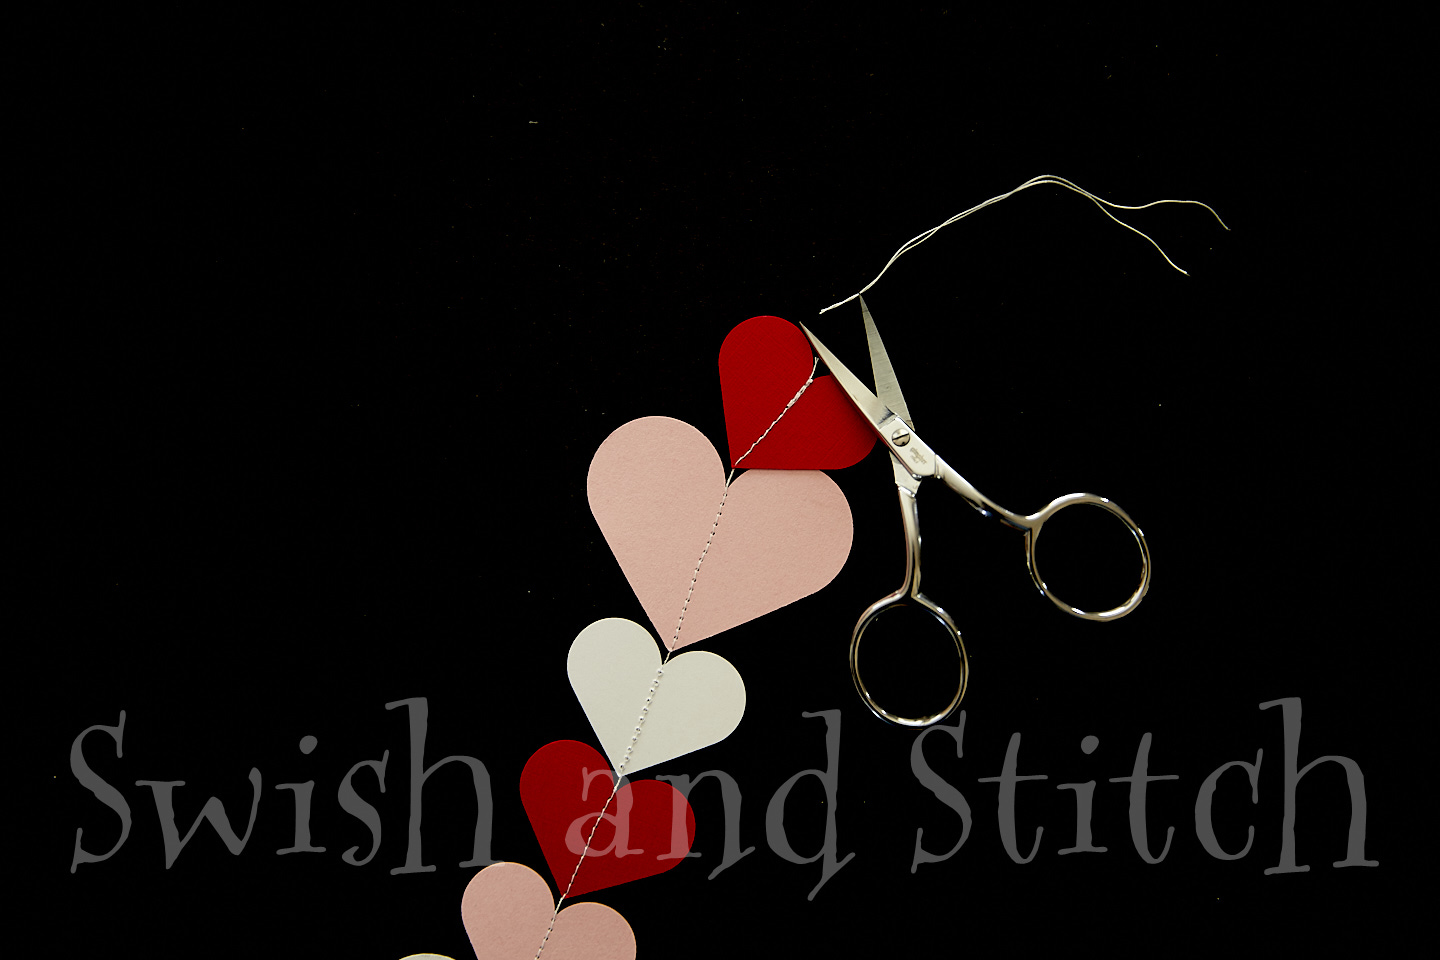
You can now remove your entire garland from your sewing machine. Snip the threads close to the beginning and ending hearts.
Hanging and Storing Your Valentine Heart Paper Garland
When hanging the banners in a curtain fashion, I put a small piece of packing tape on the back of the first heart. This laminates a portion of the heart that I then stick a rolled up piece of tape to for hanging. Laminating makes it easy to remove the tape when you are ready to take the garland down and store it for another year.

If you don’t want to put tape on your walls, you could use small Command hooks, nails, or even just straight pins to secure your banners.
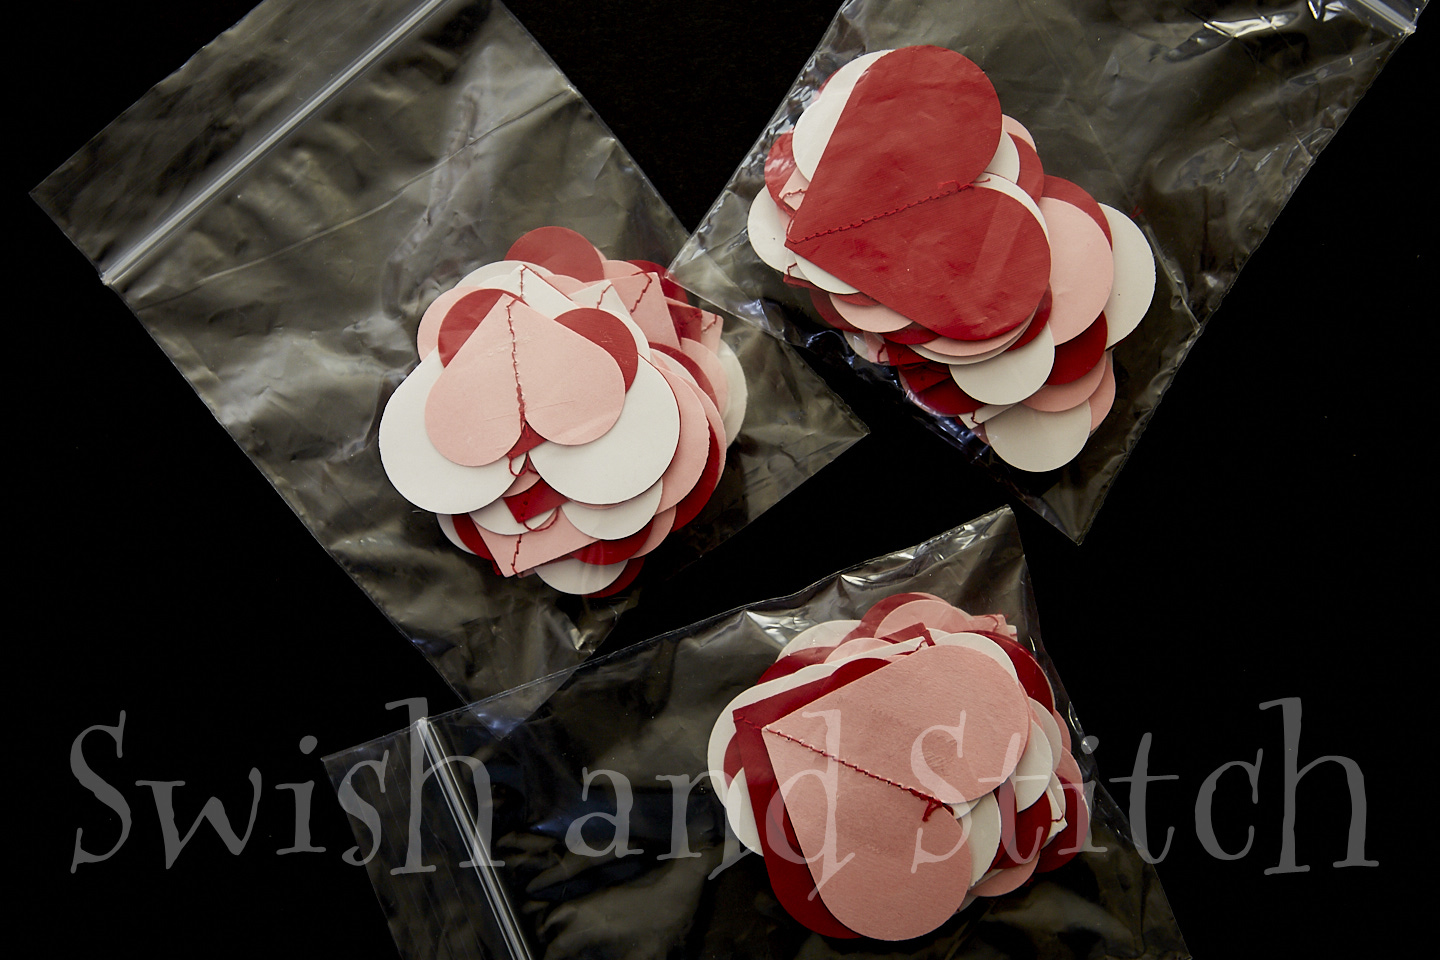
To store each garland, I accordion-fold it and slip it into a small plastic bag. Mine are 4×5-inches, but any size that fits your punched hearts is fine. I store each banner individually so they don’t get tangled together.
That’s it! A quick and simple decoration that can easily be adapted for any holiday. I have made other dot banners for other holidays. I have made red, white, and blue garlands for Independence Day. For HDawg’s birthday one year, I made ones in bright classic Lego colors.
You can also punch different shapes to match the holiday. Most of my garlands are made from circles (thus why I call them “dot banners”). Try other shapes for other holidays. Perhaps shamrocks for St. Patrick’s Day. Or pastel eggs for Easter. How about ghosts and pumpkins for Halloween, turkeys for Thanksgiving, or trees and stockings for Christmas?
Have you ever made paper garlands for your holiday decorating? What other simple decorations do you reuse year after year?
If you try this, let me know how your banners turn out!


These are adorable! I would have to use something other than a sewing machine…those machines just don’t like me LOL
You just need to show that sewing machine who’s boss!
These are adorable! I’m going to send this to my teenage nieces!
Yes, do! They’re super simple and easily adaptable for any holiday.
Great ideas! At first when you said sew together, I was thinking ‘string’ together. Sewing makes them look great!
Thanks! And sewing makes quick work of them too!
How cute! I love this idea.
Thanks! I hope you give it a try.