April Showers Bring Paper Flowers: Clematis
Some of the links on this site are affiliate links. I make a small commission from sales when you click through the link. There is no additional cost to you.
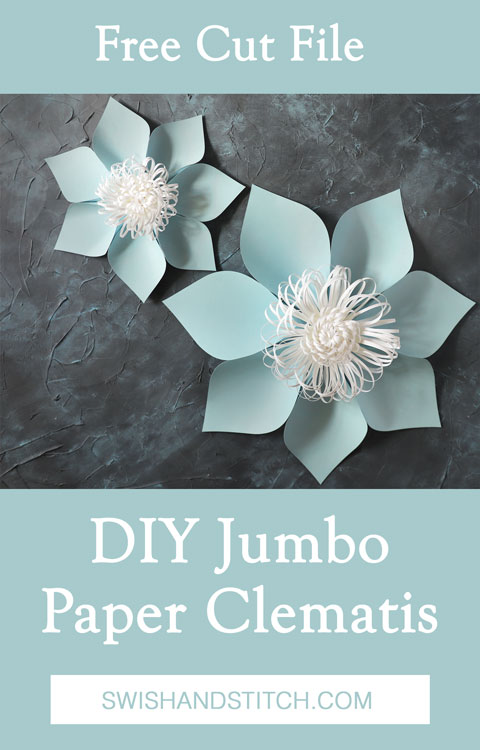
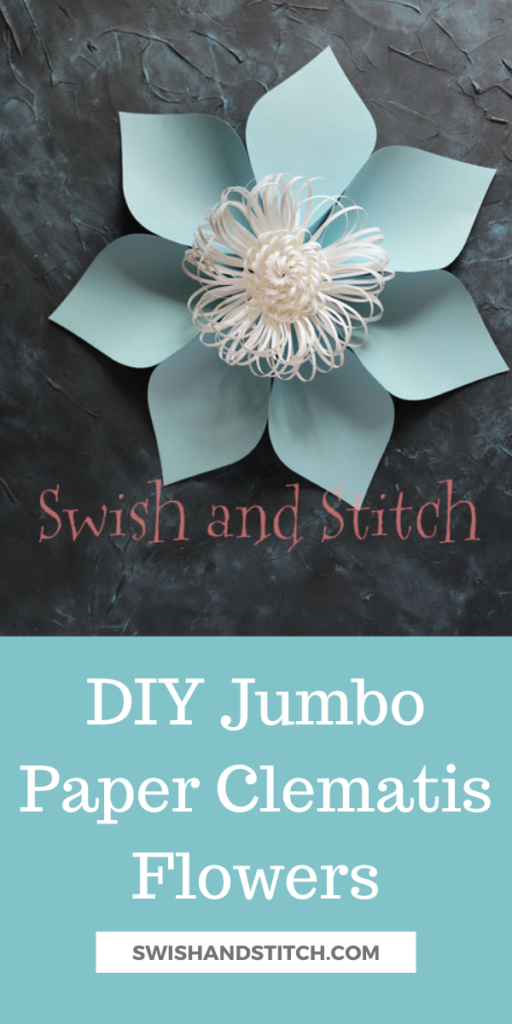
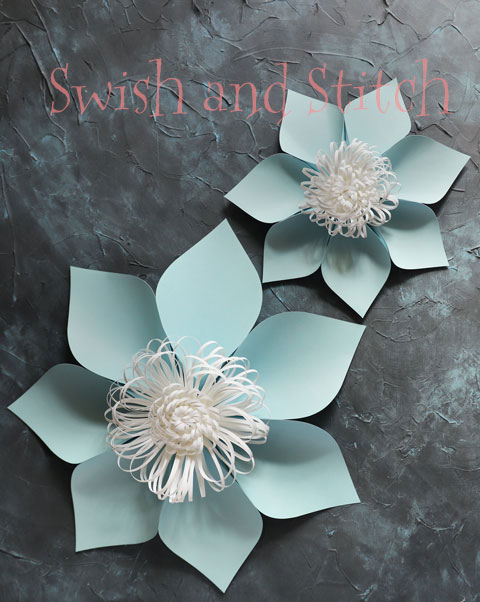
Hey crafters! What better way is there to celebrate spring than with flowers? Try making these Jumbo Cardstock Flowers—Clematis to welcome in spring, or as decoration for the perfect Mother’s Day brunch. Everyone will love them!
About three years ago I was in charge of decorating for a young women event. I had been wanting a desktop cutting machine for a while and after deciding to make these paper flowers for the event’s backdrop, I used them as the perfect excuse to buy a Silhouette Cameo. I love it! The free software that comes with it is very versatile, I have been able to do pretty much anything I want with it so far. Since having created my paper flowers for that young women event, I have been asked by one friend to make some as a birthday present for a woman who loves flowers but is allergic to the pollen and by another friend to make some for her daughter’s wedding backdrop. They really are that lovely!
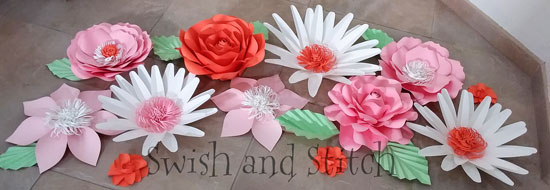
Here is a quick photo of my original flower backdrop laid out on my floor.
I highly recommend that you use a desktop cutting machine of some kind for this project. They will look so much better than if you cut them out by hand. I have never tried to cut the petals by hand, but my friend did and she said that they just didn’t look quite right.
Initially, I created several different flower templates for my backdrop but I thought that I would start you off easy with the simplest one—the paper clematis. This first flower is inspired by the pointed petals of a clematis. Let’s get started!
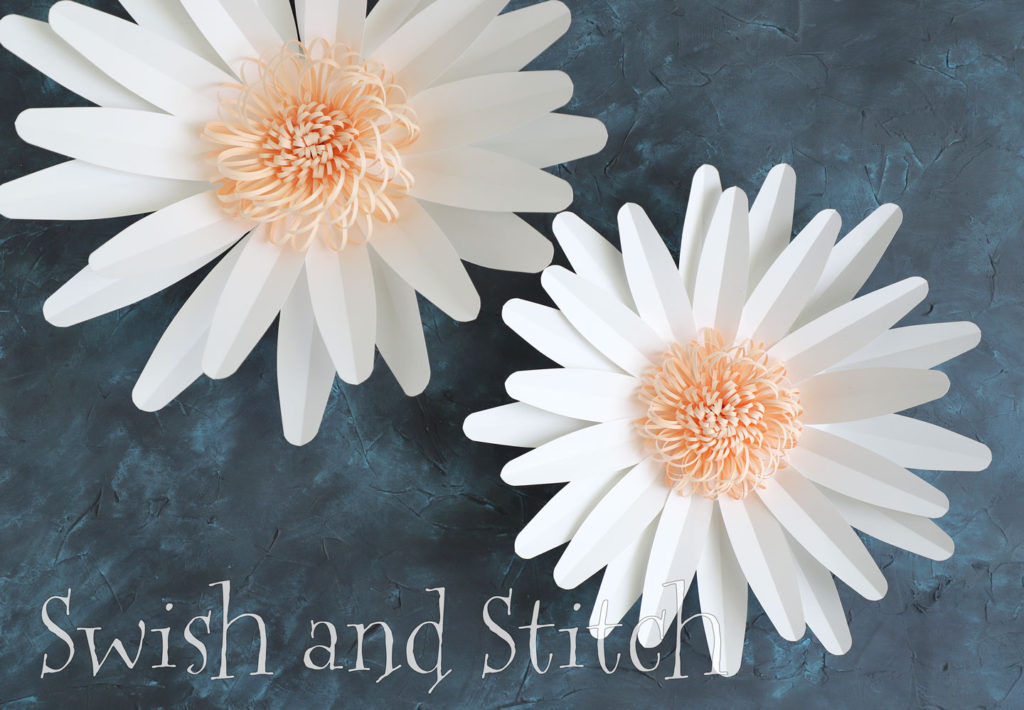
For more paper flower fun, check out DIY Jumbo Paper Flowers: Daisy!
Paper Clematis Materials
For this cardstock clematis you will need:
- Cardstock: you can use two different colors, one for the petals and one for the flower center like I did, or you can use the same color for both.
- Stronger cardboard for the back
- Hot glue gun and hot glue, you will want to use your low-temperature setting when working with paper
- A straight edge, such as a ruler
- ½ piece of pipe cleaner
Go to the end of this post to download free cut files.
Paper Clematis Instructions
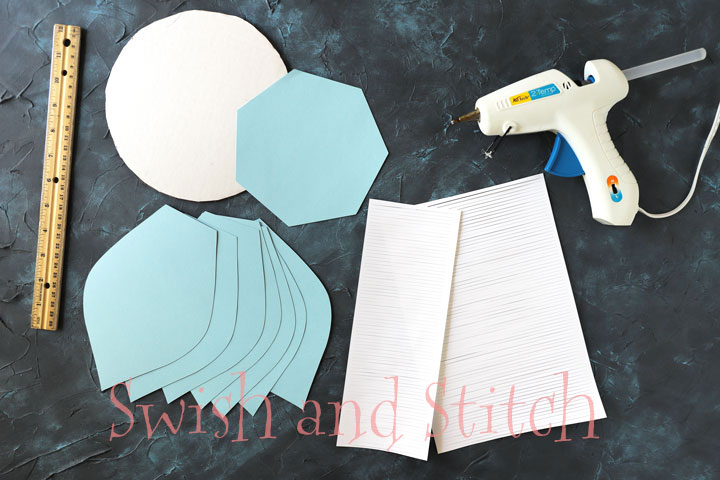
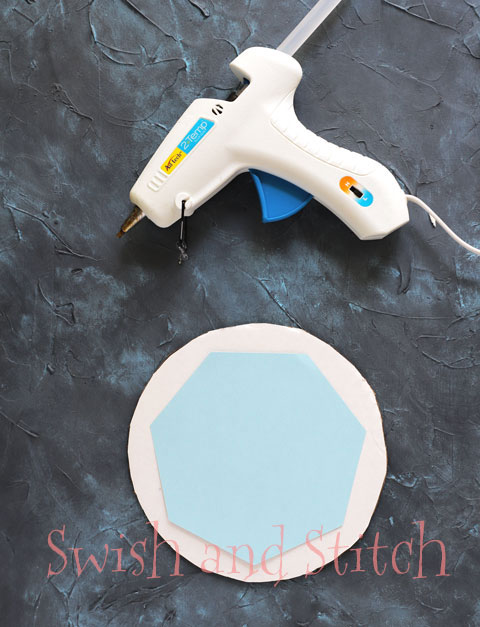
To begin, use the template provided to cut seven cardstock petals with your desktop cutter. Next, cut out a cardstock heptagon—a 7-sided polygon—out of the same color you used for the petals. This will help you arrange the petals evenly around the flower. Cut out two center fringes, one will be wider than the other in order to create the outer filaments (yes, I had to look up the anatomy of a flower to come up with that word!). Cut a cardboard circle slightly larger than the heptagon. This is what it should look like when everything is cut out.
Glue the heptagon onto the center of the cardboard circle. I like to add a pencil dot in the center to help when gluing that petals on. I just eyeball it, it doesn’t have to be perfect.
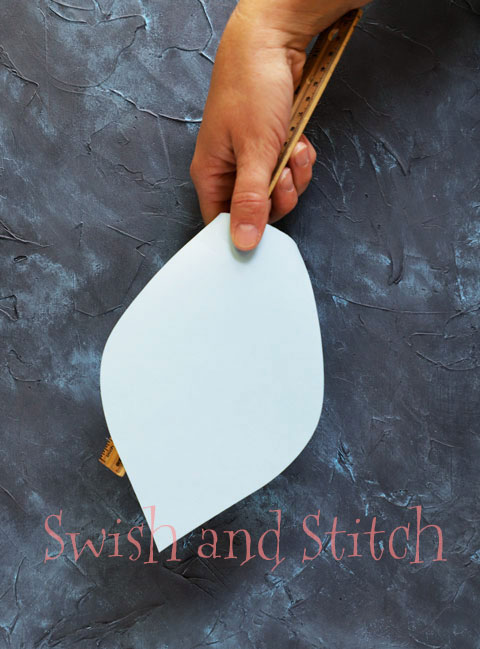
Using a straight edge, such as the back side of a ruler, curl the bottom of each petal. You will start in the center of the petal bottom and run the petal between the ruler and your thumb, like you would curl ribbon when wrapping a present. Curl outward from the center and then repeat the process on the other side. This makes the next step easier.
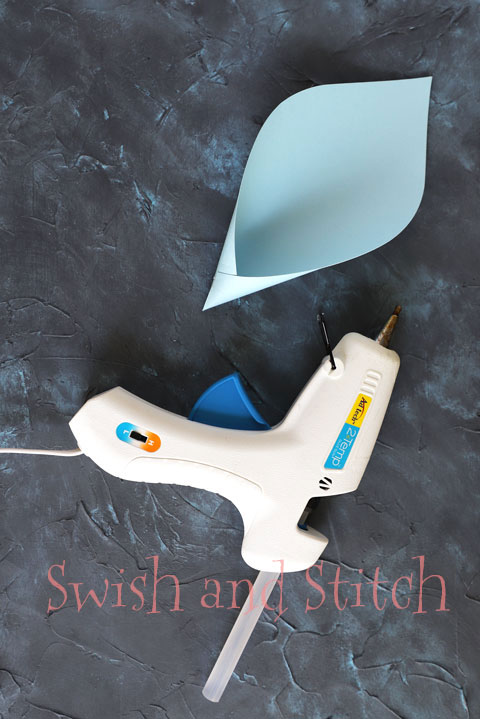
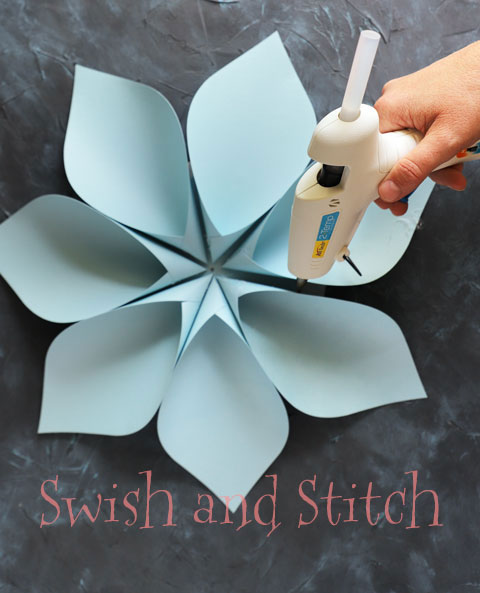
Overlap the bottom two sides of each petal as shown in the photo, and glue it together in a cone-like shape. Repeat the process until all seven petals are completed.
Using the sides of the heptagon as a guide, glue each petal onto the cardboard back. There will probably be small spaces between each petal in the center.
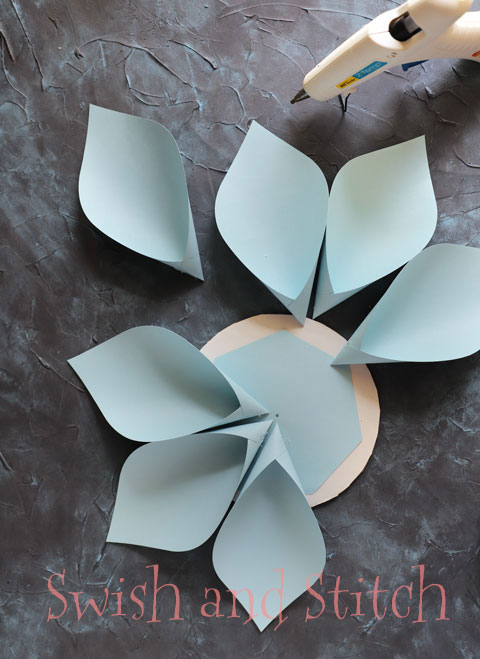
Once all the petals are on the back, add a small dot of glue between two petals, about ½ inch below the top edges, and glue the two petals together. Repeat this process until all the petals have been glued to their neighboring petals.
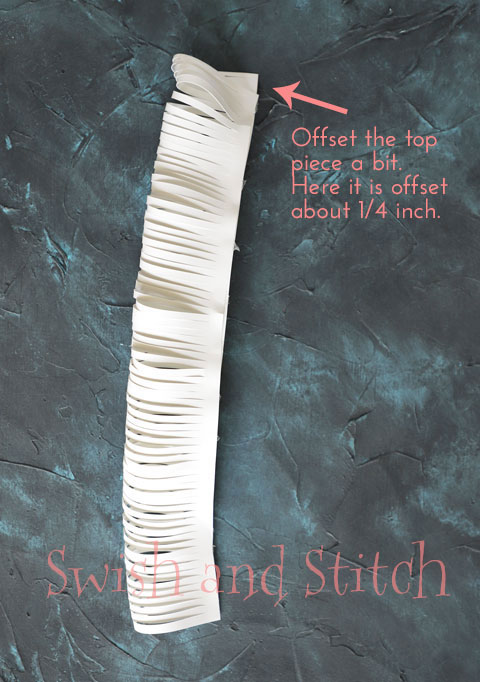
Bend your small center fringe in half, see below. Slightly off set the top side and begin gluing the top side to the bottom side. Just use a small dot of glue every inch or so. You will need to be able to curl this piece in on itself so you don’t want to have glue all along the edge that won’t bend.
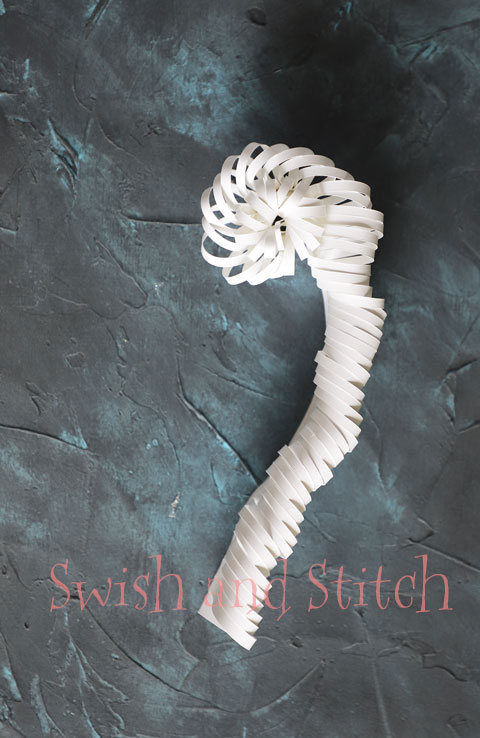
Begin curling the small fringe in on itself and gluing it at the bottom.
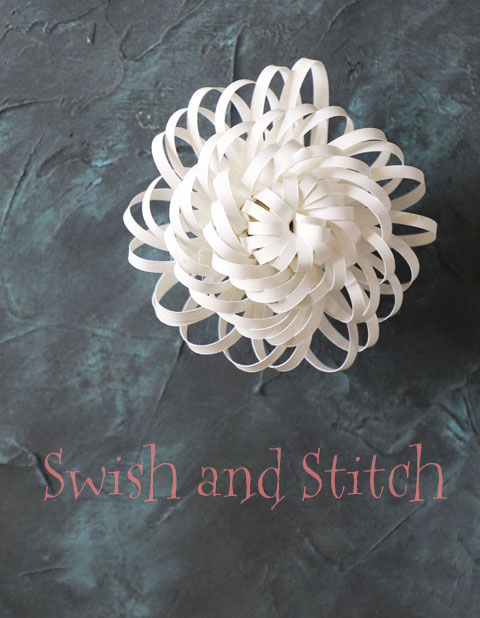
Here is the completed center.
Bend the large fringe in half, slightly offset the top side, and begin gluing the top and bottom sides together as you did with the smaller fringe. Again, use just a dot of glue every inch or so. Once this is complete, fold up the base of the fringe piece to a 90° angle.
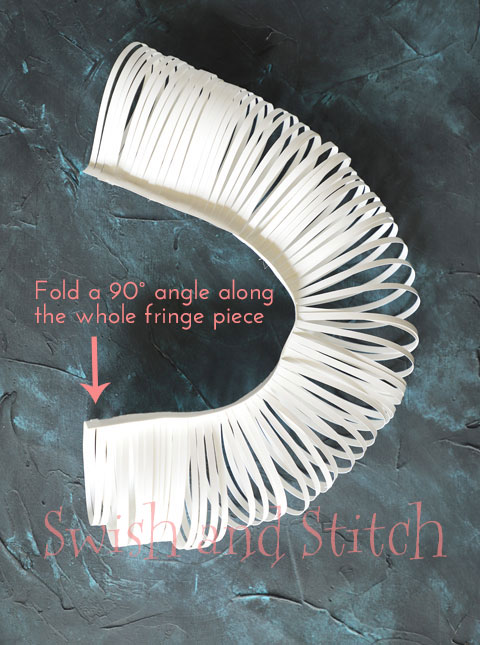
Begin wrapping the larger fringe around the center, gluing as you go. The 90°-fold should allow the second, larger fringe to circle sideways around the center the fringe. This is what the center piece of your paper clematis will look like once completed.

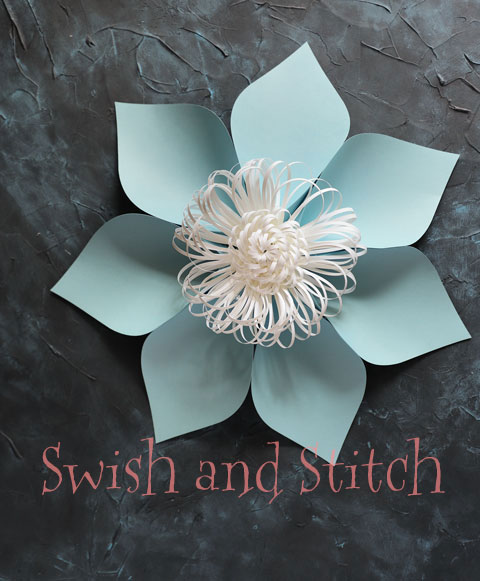
Glue this center piece onto the center of the flower petals.
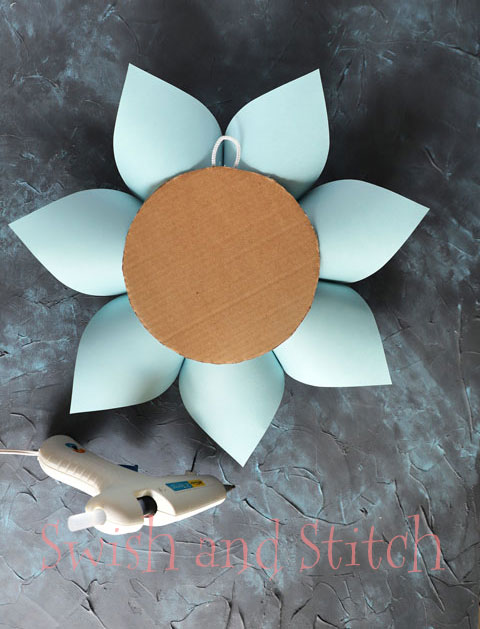
Flip your completed paper clematis flower over. Twist the half-piece of pipe cleaner into a loop and glue it onto the back of your flower. You will use this to hang your flower.
Done! In order to make different sizes like I did, you will need to scale down the template. Look for more jumbo paper flower tutorials coming soon!
~ Erika
Download
Download Cut Files
Studio3 Files
PDF Files
Other File Types
Download DXF Files | Download SVG Files