Some of the links on this site are affiliate links. I make a small commission from sales when you click through the link. There is no additional cost to you.
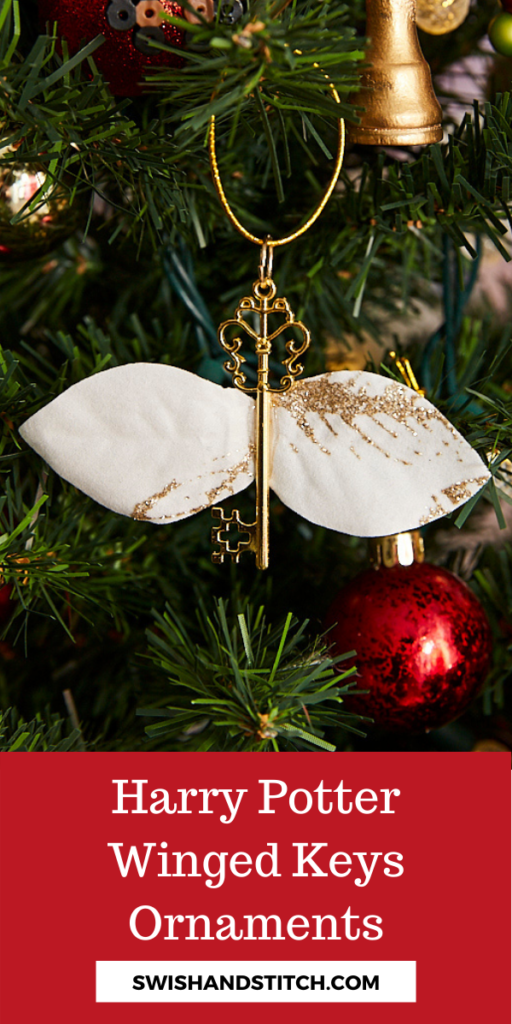
“They reached the end of the passageway and saw before them a brilliantly lit chamber, its ceiling arching high above them. It was full of small, jewel-bright birds, fluttering and tumbling all around the room. On the opposite side of the chamber was a heavy wooden door . . .
“They watched the birds soaring overhead, glittering—glittering?
“‘They’re not birds!’ Harry said suddenly. ‘They’re keys! Winged keys . . .'”
Harry Potter and the Sorcerer’s Stone
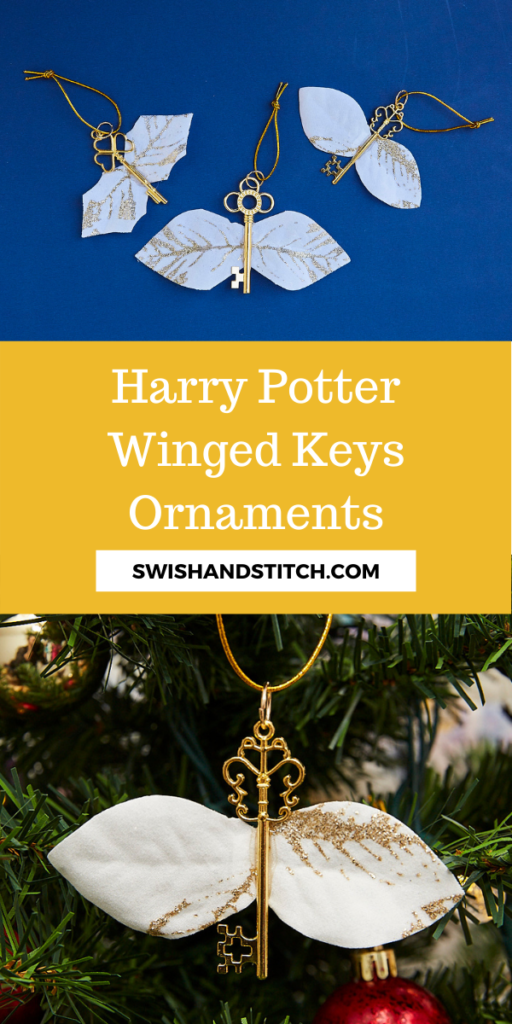
At the end of Harry Potter and the Sorcerer’s Stone, Harry, Ron, and Hermione have to get through several enchantments in their attempt to reach the Sorcerer’s Stone and stop Professor Quirrell from taking it for Lord Voldemort. One of these, is a flock of winged keys. As soon as Harry and his friends mount broomsticks, the keys dive at them to stop them from getting through the locked door. “Not for nothing, though, was Harry the youngest Seeker in a century” and he easily spots as is able to grab the key they need.
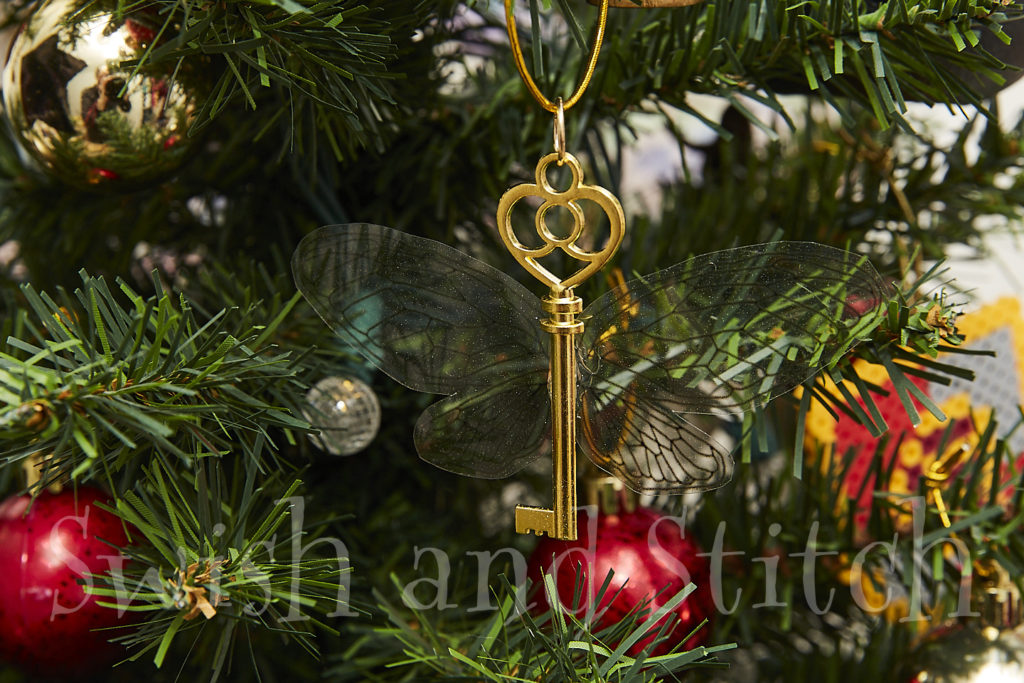
Of course I had to have winged keys for my Harry Potter Mini Christmas Tree.
Check out all the ornaments in the Harry Potter Mini Christmas Tree Ornaments Marathon!


Harry Potter Winged Keys Ornaments Supplies
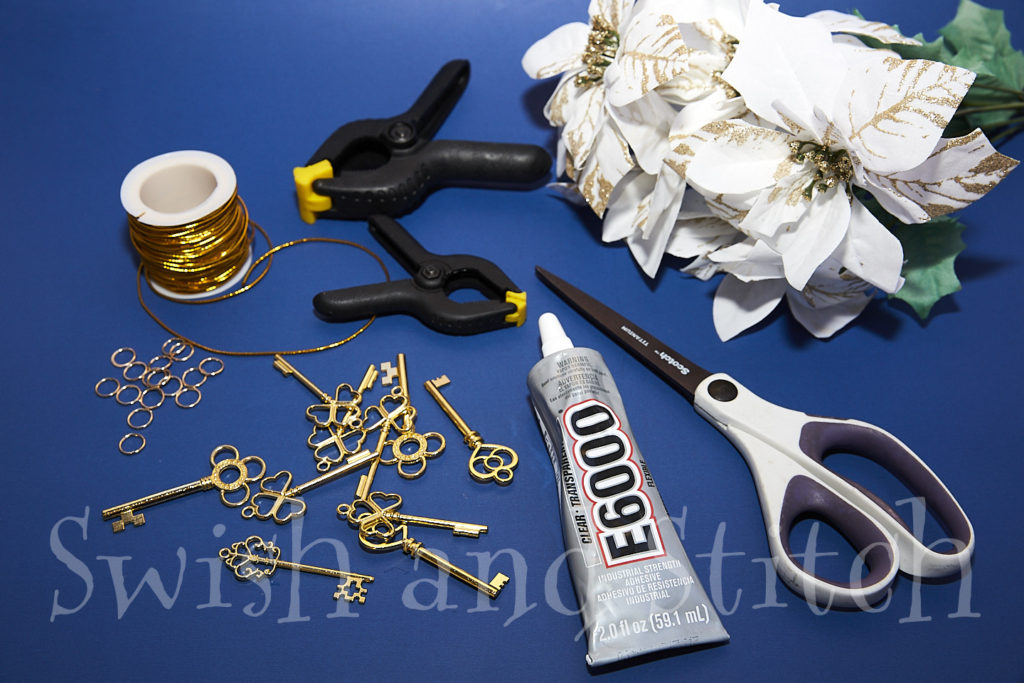
You’ll need:
- Gold keys
- Petals, feathers, or other wing choice
- Clear E6000 Permanent Craft Adhesive
- Clamps
- 10 mm Gold Jump Rings
- 1 mm Gold Elastic Cord
- Scissors
Wing Types
There are a lot of winged keys tutorials available. Most of them use either feathers for the wings or the printable ones from Potter Crafts on YouTube.
I didn’t like either option. The feathers are very delicate and I was concerned they would be hard to store from year to year. The printable wings are frequently printed on transparency paper, which I tried. The keys looked great with those wings, but they kind of disappeared on my tree. The wings were just too invisible.
I wanted wings that are sturdy, beautiful and Christmassy. I went to Michaels with an open mind.
I found just what I wanted among the Christmas florals—this lovely poinsettia bush. The flowers’ petals are the perfect size to be the wings for the keys I bought for this project.. My favorite part is the gold glittery veins on the petals that perfectly complement the gold keys.
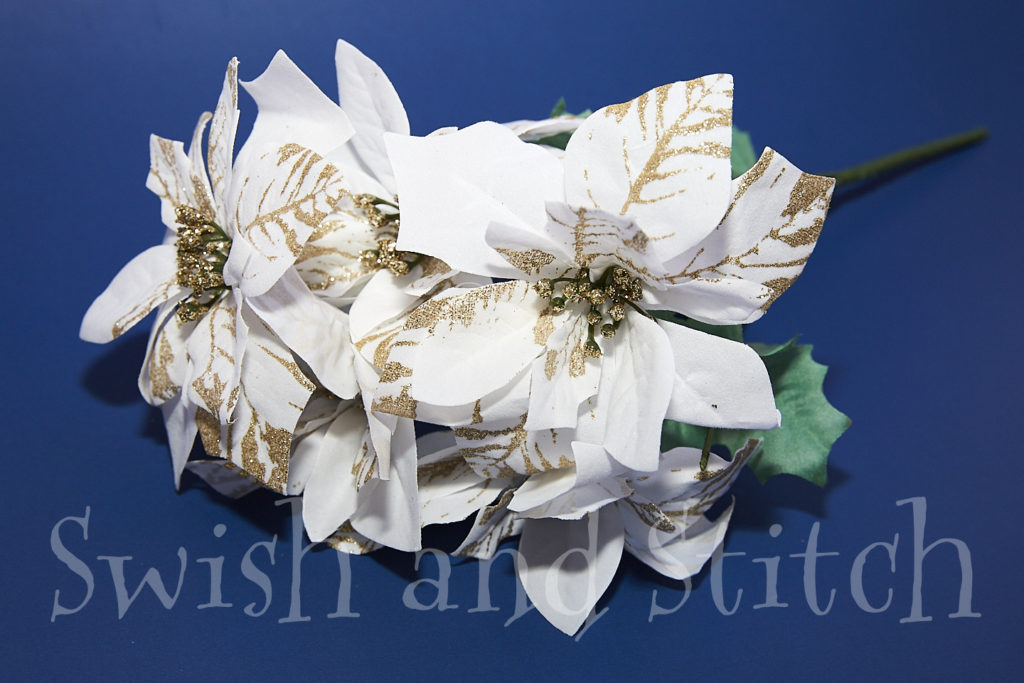
If you can’t find the same flowers, look around and see what you like. Make sure the petals are not so large that they overwhelm your keys.
Directions
Let’s get started!
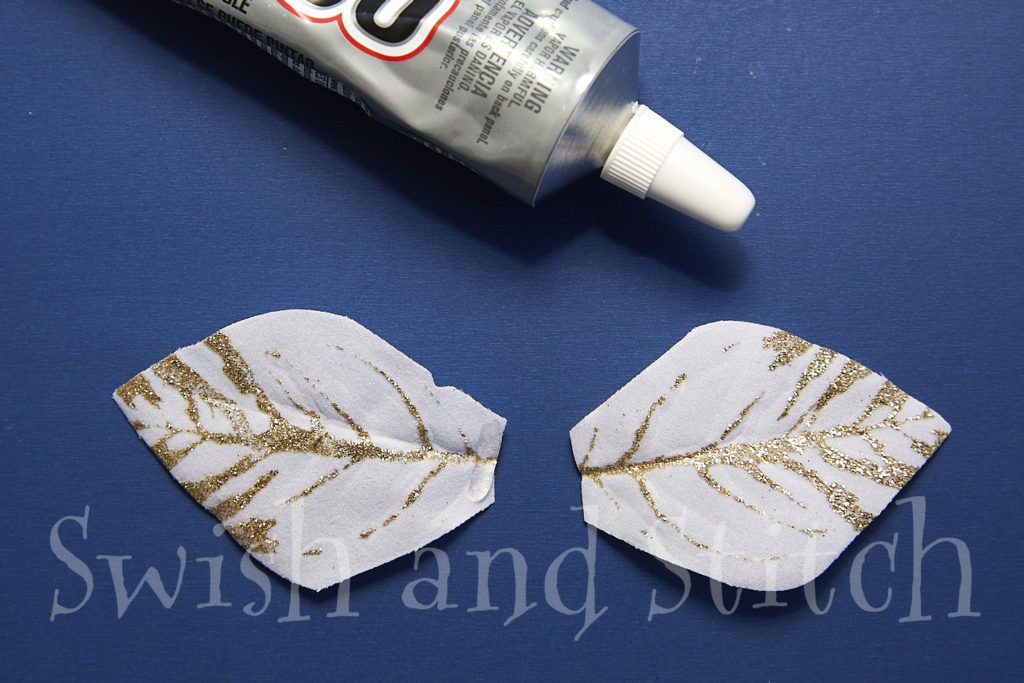
1. Cut and Match the Flower Petals
To begin, pop the flowers off their stems. these flowers are formed from rings of petals.
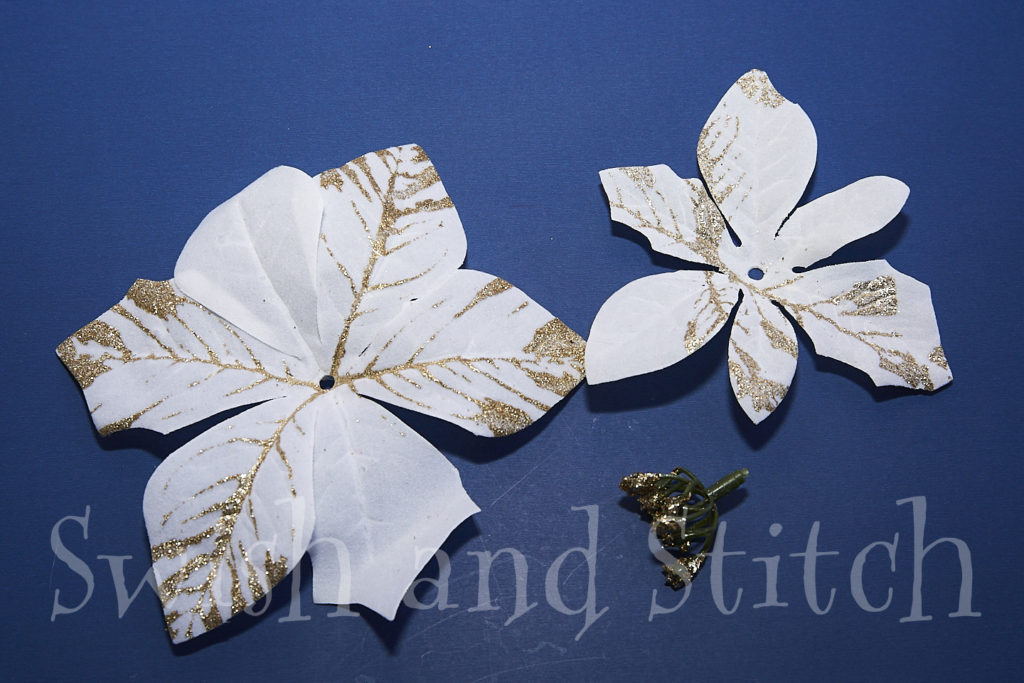
Cut them off close to the center of the ring.
If the petals are not all the same size, match them up in pairs. The petals on my flower bush came in two varieties (smooth and pointed), three different sizes, and some were glittery while others were plain white. I used all three sizes and both the smooth and pointed petals, but discarded the plain white petals.
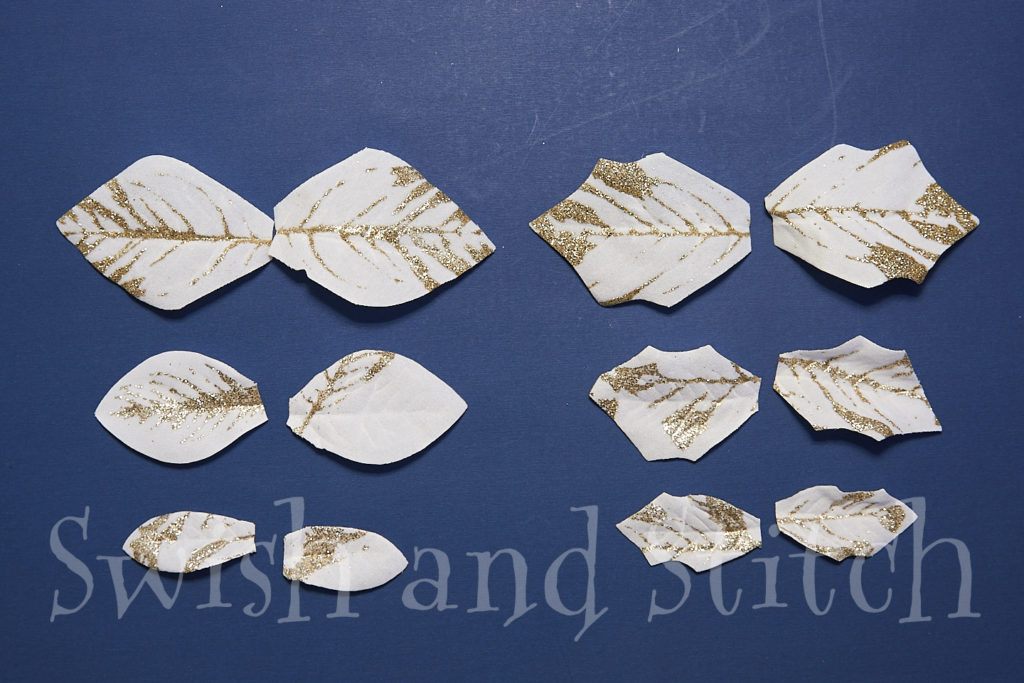
2. Glue the Petals Together to Form the Wings
E6000 is a strong, permanent glue. It bonds lots of different materials, so it’s a great all-purpose craft glue. It is also quite odoriferous. You’ll need to work in a well-ventilated area with a protected surface.
Squeeze a line of glue onto the cut edge of one of your flower petals. Place the second petal on top and press together.
Since my flower petals are not flat, I found that they would not adhere together well without a little help. Use the clamps to firmly hold the petals together while they dry.
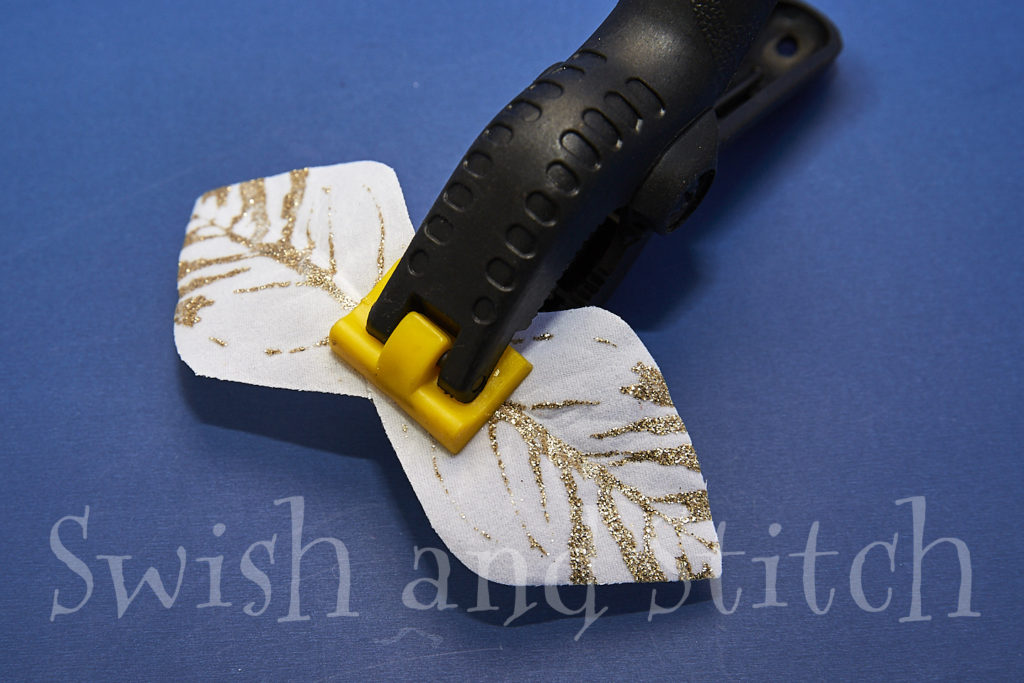
Tip: If any glue squeezes out from the petals, you may end up with glue on your clamps. Since you really don’t want to have clamps permanently bonded to your ornaments, be sure to check the wings periodically. Loosen them from the clamps, if necessary, and wipe any glue from the clamps. Re-clamp the wings and allow to continue drying.
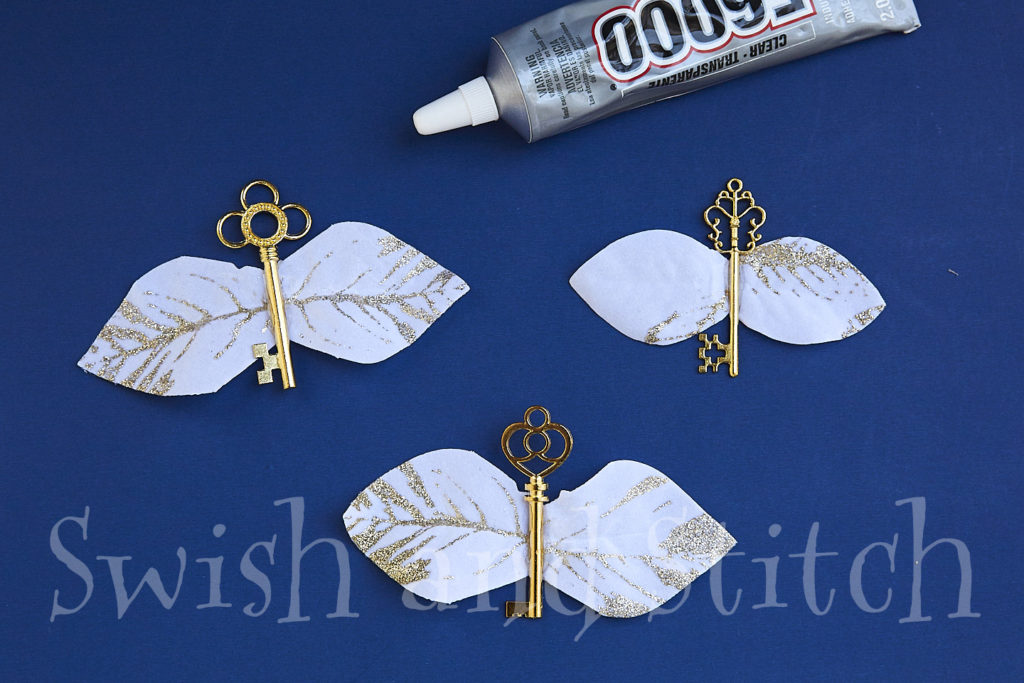
3. Glue the Keys to the Wings
Once your wings are dry, it’s time to add the keys!
Draw a line of glue vertically down the center of your wings. Lay a key on top off the glue. Walk away! Really, just walk away and don’t touch. These will need to dry for a few hours and you don’t want to bump them.
I found that gravity was good enough to keep the keys in place. I did not need to clamp them this time. If just laying the keys on the wings isn’t working for you, by all means, go ahead and clamp. And then walk away.
4. Finishing Your Harry Potter Winged Keys Ornaments
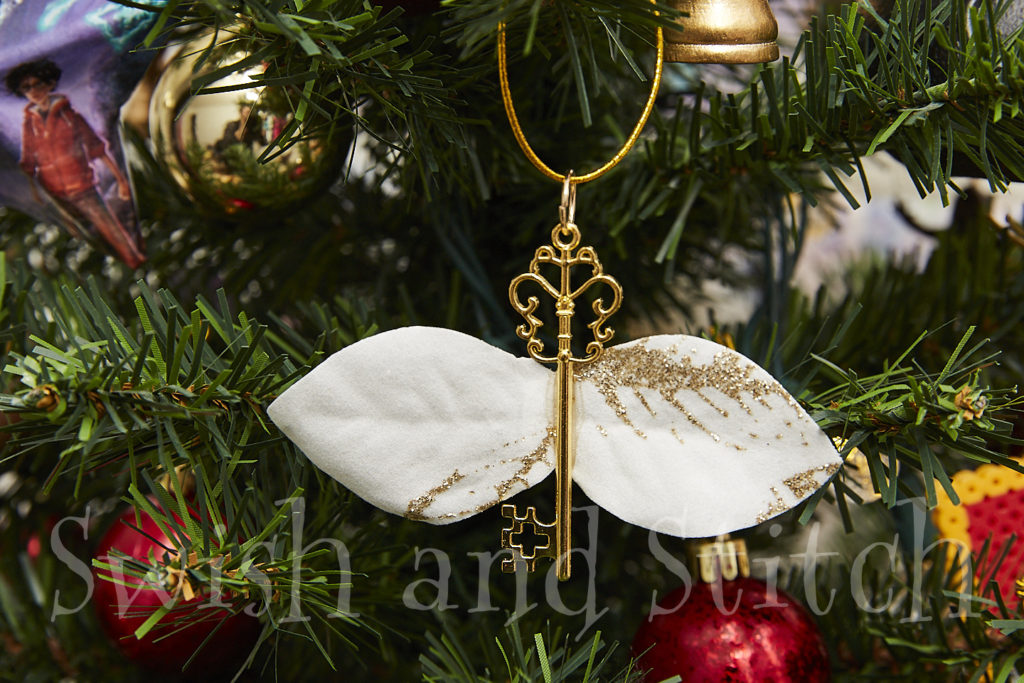
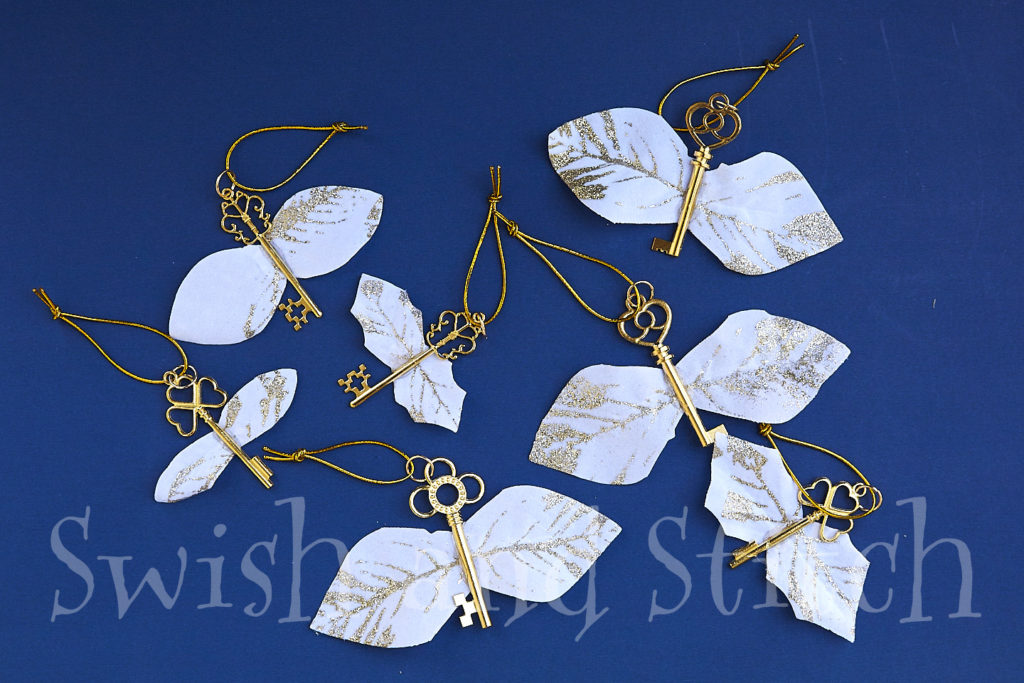
Once your keys are well-adhered to the wings, all that’s left to do is to add the hanging loop.
Insert a jump ring through the handle of each of the keys. Once your rings are inserted, cut a piece of gold cord 5-6 inches. Thread the cord through the jump ring and tie a simple knot. Trim the ends, if desired.
And that’s all there is to it!
Here are my finished winged keys ornaments.
And they look great on my Harry Potter Mini Christmas Tree.

What do you think? I’d love to see yours! Send me a picture at lucinda@swishandstitch.com.
Enjoy!
~ Lucinda
For more Harry Potter fun, try these other great crafts!